The Ultimate Guide to Perfect Teriyaki Chicken at Home
Have you ever wondered why restaurant-style Teriyaki Chicken tastes so much better than takeout versions? The secret lies in the balance of sweet and savory flavors, proper cooking techniques, and fresh ingredients. Preparing this beloved dish at home not only saves money but also allows you to control the quality of ingredients and customize the flavor to your preference. Whether you’re a busy parent looking for quick weeknight dinners or a home cook eager to explore Japanese recipes, mastering teriyaki chicken is a valuable skill that will elevate your home cooking repertoire.
Ingredients & Kitchen Tools
For the Chicken:
– 4 boneless, skinless chicken thighs (or breasts for leaner option) – thighs stay juicier
– 1 tablespoon vegetable oil – for searing with high smoke point
– Salt and white pepper to taste
For the Homemade Teriyaki Sauce:
– ½ cup soy sauce (low-sodium recommended)
– ¼ cup mirin (sweet rice wine – essential for authentic flavor)
– ¼ cup sake or dry sherry (optional but adds depth)
– 2 tablespoons brown sugar (or honey for natural sweetness)
– 1 tablespoon fresh ginger, grated
– 3 cloves garlic, minced
– 1 tablespoon cornstarch mixed with 2 tablespoons water (slurry)
Kitchen Tools:
– Large skillet or wok (non-stick works best)
– Sharp chef’s knife
– Cutting board
– Measuring cups and spoons
– Small bowl for sauce mixing
– Tongs for flipping chicken
– Instant-read thermometer (optional but recommended)
Optional Substitutions: Swap chicken with tofu for vegetarian version, or use tamari for gluten-free adaptation.
Prep Time & Cooking Schedule
Total Time: 30 minutes active, plus 15 minutes optional marinating
– Prep Time: 10 minutes (mince garlic, grate ginger, mix sauce)
– Cook Time: 15-18 minutes (sear chicken, simmer sauce, glaze)
– Resting Time: 3-5 minutes (allows juices to redistribute)
This efficient schedule makes teriyaki chicken perfect for busy weeknights. While the chicken rests, you can steam rice or stir-fry vegetables to complete the meal. For best results, marinate chicken in half the sauce for 15-30 minutes while preparing other ingredients.
Step-by-Step Instructions
Step 1: Prepare the Sauce
In a small bowl, whisk together soy sauce, mirin, sake (if using), brown sugar, grated ginger, and minced garlic. Set aside. This balanced combination of umami, sweetness, and acidity is what makes authentic Teriyaki Chicken so irresistible. The sauce should taste slightly sweeter than you’d expect—it will concentrate as it cooks.
Step 2: Sear the Chicken
Heat vegetable oil in a large skillet over medium-high heat until shimmering. Pat chicken dry with paper towels (crucial for good browning), season lightly with salt and pepper. Place chicken skin-side down (if using skin-on) or presentation side down. Cook undisturbed for 4-5 minutes until golden brown and crispy. Flip and cook another 4-5 minutes. Internal temperature should reach 165°F for safety.
Step 3: Glaze and Simmer
Reduce heat to medium-low. Pour the prepared sauce around the chicken (not directly on top to preserve crust). Let simmer for 3-4 minutes, spooning sauce over chicken occasionally. The sauce will reduce and thicken slightly. If you’re exploring Japanese recipes, you’ll notice this technique builds layers of flavor that slow-cooking methods can’t replicate.
Step 4: Finish and Serve
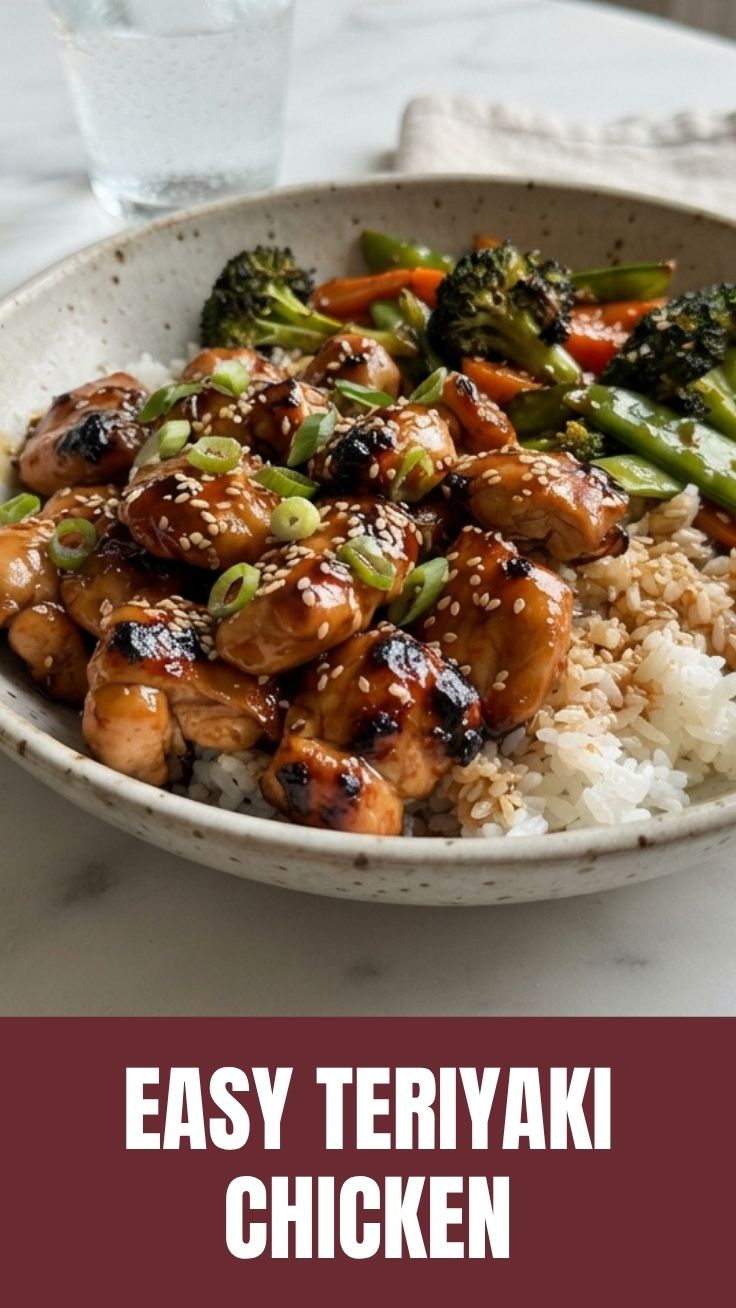
Remove chicken to a cutting board and let rest 3 minutes. If sauce is too thin, remove chicken and whisk in cornstarch slurry, simmering until thickened. Slice chicken against the grain into ½-inch strips. Drizzle with remaining sauce, garnish with sesame seeds and sliced green onions. Serve over steamed jasmine rice with a side of steamed broccoli or sautéed bok choy.
Pro Tip: For extra glossy finish, add 1 tablespoon butter at the end and swirl until melted—this creates restaurant-quality sheen and richness.
Nutritional Benefits & Advantages
Teriyaki chicken offers impressive nutritional value when prepared with quality ingredients. Chicken thighs provide excellent protein (approximately 22g per serving), essential B vitamins, and selenium. The ginger in teriyaki sauce contains anti-inflammatory compounds, while garlic supports immune function. When paired with brown rice and vegetables, this dish delivers a balanced meal with fiber, vitamins, and antioxidants. By making sauce at home, you control sodium levels—reducing it by up to 40% compared to bottled versions. The moderate sugar content (about 8g per serving) makes this suitable for balanced diets, especially when paired with plenty of vegetables.
Tips, Variations & Cooking Advice
Flavor Variations:
– Spicy Teriyaki: Add 1 teaspoon sriracha or red pepper flakes to sauce
– Citrus Teriyaki: Replace sake with orange juice and add orange zest
– Honey Garlic: Substitute brown sugar with honey and double the garlic
Cooking Method Alternatives:
– Grilling: Sear chicken on grill, then brush with sauce in last 3 minutes
– Baking: Bake at 400°F for 20 minutes, then broil 2 minutes with sauce
– Air Fryer: Cook at 375°F for 12 minutes, brushing with sauce halfway
Dietary Adaptations: For gluten-free version, use tamari or coconut aminos instead of soy sauce. For dairy-free, ensure no butter is added. For low-carb, serve over cauliflower rice or zucchini noodles.
Common Mistakes to Avoid
Mistake 1: Overcrowding the Pan
Cooking too many pieces at once lowers pan temperature, causing steaming instead of searing. Solution: Cook in batches or use a larger pan.
Mistake 2: Adding Sauce Too Early
Pouring sauce over raw chicken prevents proper browning. Solution: Sear chicken until golden first, then add sauce.
Mistake 3: Overcooking Chicken
Chicken thighs become dry and tough when overcooked. Solution: Use instant-read thermometer and remove at 165°F.
Mistake 4: Skipping the Resting Step
Cutting immediately causes juices to run out. Solution: Rest 3-5 minutes before slicing.
Mistake 5: Using Bottled Sauce
Store-bought versions contain preservatives and high fructose corn syrup. Solution: Make fresh sauce in 5 minutes—the flavor difference is dramatic.
Storage & Meal Prep Tips
Refrigeration: Store cooled teriyaki chicken in airtight container for 3-4 days. Keep sauce separate to prevent sogginess.
Freezing: Place chicken and sauce in freezer-safe bags, removing excess air. Freeze for up to 3 months. Thaw overnight in refrigerator.
Reheating: For best texture, reheat in skillet over medium heat with 1 tablespoon water or chicken broth. Microwave works but may dry out chicken—cover with damp paper towel and heat in 30-second intervals. Avoid boiling, which toughens meat.
Meal Prep: Cook double batch on Sunday. Portion with rice and vegetables for grab-and-go lunches. Prepare extra sauce separately to refresh leftovers.
Conclusion
Mastering teriyaki chicken at home transforms your weeknight dinners from ordinary to extraordinary. This versatile dish demonstrates that authentic Teriyaki Chicken is achievable with simple ingredients and proper technique. The balance of sweet and savory flavors, combined with the satisfaction of creating restaurant-quality meals, makes this recipe a valuable addition to your cooking repertoire. Whether you’re expanding your culinary horizons with Japanese recipes or simply looking for a reliable family dinner, this recipe delivers consistent results. Try this recipe tonight, share your results with friends, and explore more Asian-inspired dishes to continue your culinary journey. Your kitchen is now the best teriyaki spot in town!
FAQs
Q: Can I use chicken breasts instead of thighs?
A: Absolutely! Reduce cooking time by 2-3 minutes per side and check internal temperature at 160°F (carryover cooking will bring it to 165°F). Breasts are leaner but can dry out faster, so watch carefully.
Q: How do I make the sauce thicker without cornstarch?
A: Simmer sauce longer to reduce naturally, or use arrowroot powder (1 tablespoon per ½ cup liquid). For keto-friendly option, use xanthan gum (¼ teaspoon per cup of liquid).
Q: Why is my teriyaki chicken too salty?
A: Likely from regular soy sauce and added salt. Use low-sodium soy sauce, reduce salt on chicken, or balance with extra mirin or honey. For already-cooked salty dish, serve with plain rice to offset.
Q: Can I make teriyaki sauce ahead of time?
A: Yes! Store homemade sauce in airtight container in refrigerator for up to 2 weeks. Shake or whisk before using. For longer storage, freeze in ice cube trays for portioned convenience.
Q: What’s the best rice to serve with teriyaki chicken?
A: Short-grain Japanese rice (sushi rice) is traditional and absorbs sauce perfectly. Jasmine rice is excellent alternative. For healthier option, try brown rice or quinoa, adjusting cooking time accordingly.
Quick way to grow Teriyaki Chicken wings
Ingredients
Equipment
Method
- Preheat oven to 400°F (200°C). Line a baking sheet with parchment paper.
- In a medium bowl, whisk together soy sauce, honey, rice vinegar, grated ginger, and minced garlic to create the teriyaki sauce.
- Add chicken wings to the bowl, tossing to coat them evenly with the sauce.
- Arrange the coated chicken wings in a single layer on the prepared baking sheet.
- Bake for 20-25 minutes, or until the chicken is cooked through and the sauce has caramelized. Flip them halfway for even cooking.
- Garnish with sesame seeds before serving, if desired.