Why This Orange Chicken Recipe Will Change Your Home Cooking Forever
Have you ever craved that sticky, sweet, and tangy takeout favorite but hesitated because you knew it was loaded with sugar, MSG, and deep-fried calories? You’re not alone. The good news is that you can recreate the magic of Orange Chicken right in your own kitchen—without the guilt or the delivery fee. This homemade version of the iconic dish delivers the same glossy glaze, tender chicken bites, and punchy citrus flavor that made it a global phenomenon. By preparing it at home, you gain control over ingredients, adjust spice levels to your liking, and save money while impressing everyone at the dinner table. Whether you’re a seasoned cook or a beginner looking for a weekend project, this recipe will become your new go-to. Let’s dive into why homemade Orange Chicken isn’t just possible—it’s better.
—
Ingredients & Kitchen Tools
For the Orange Chicken
– 1½ lbs boneless, skinless chicken thighs (or breasts for leaner option) – cut into 1-inch cubes for even cooking
– ½ cup cornstarch – creates the signature crispy coating
– 2 large eggs, beaten – helps the cornstarch adhere
– ½ cup all-purpose flour – adds structure to the coating
– 1 teaspoon salt – enhances all flavors
– ½ teaspoon white pepper – subtler heat than black pepper
– Vegetable oil for frying – peanut or canola work best due to high smoke point
For the Orange Glaze
– ¾ cup fresh orange juice (about 2-3 oranges) – bottled won’t give the same brightness
– ¼ cup soy sauce (low-sodium recommended)
– ¼ cup rice vinegar – milder acidity than white vinegar
– ⅓ cup brown sugar, packed – deep sweetness with molasses notes
– 2 tablespoons honey – adds shine and complexity
– 3 cloves garlic, minced
– 1 tablespoon fresh ginger, grated
– 1 tablespoon orange zest – don’t skip this! It’s the flavor bomb
– 1½ tablespoons cornstarch mixed with 2 tablespoons water (slurry) for thickening
Kitchen Tools
– Large wok or deep skillet (12-inch)
– Mixing bowls (3: one for dry coating, one for egg, one for sauce)
– Whisk
– Spider strainer or slotted spoon
– Paper towels for draining
– Microplane or zester
– Measuring cups and spoons
Optional Substitutions
– Gluten-free: Use rice flour instead of all-purpose flour; tamari instead of soy sauce
– Keto/Low-Carb: Skip cornstarch coating; use almond flour mixed with Parmesan; use monk fruit sweetener
– Extra spicy: Add 1 teaspoon chili flakes or sriracha to the sauce
– Fruit twist: Substitute 2 tablespoons orange juice with pineapple juice for tropical notes
—
Prep Time & Cooking Schedule
Total Time: 45 minutes | Active Prep: 20 minutes | Cook Time: 25 minutes | Rest Time: 5 minutes
Here’s how to plan your cooking session effectively:
– First 10 minutes: Juice and zest your oranges, mince garlic, grate ginger. This is your “mise en place” – having everything ready prevents burning later.
– Next 10 minutes: Cut chicken into uniform 1-inch pieces. Mix dry coating in one bowl, beat eggs in another. The chicken should be patted very dry with paper towels – moisture is the enemy of crispy coating.
– Cooking Phase (25 min): Fry chicken in batches (don’t overcrowd!). While the last batch fries, start the glaze in a separate pan – it comes together in 5 minutes flat.
– Final 5 minutes: Toss fried chicken with glaze, let rest for 5 minutes so the sauce absorbs slightly, then serve immediately.
Pro Tip: Set a timer for marinating? No need here – this recipe’s magic happens through the fresh glaze, not a long marinade. But if you want deeper orange flavor, toss raw chicken pieces with 2 tablespoons of the fresh orange juice and a pinch of salt for 15 minutes before coating.
—
Step-by-Step Instructions
Step 1: Prepare the Chicken Coating
In a shallow bowl, whisk together cornstarch, flour, salt, and white pepper. In a separate bowl, beat the eggs. Working with a few pieces at a time, dip chicken into egg, letting excess drip off, then dredge in the flour mixture. Press gently to adhere. Place coated pieces on a plate – don’t stack them.
Step 2: Fry to Golden Perfection
Heat 2 inches of oil in a wok or deep skillet to 350°F (175°C) – use a thermometer! If oil is too cold, chicken absorbs grease; too hot, coating burns before chicken cooks. Fry in batches of 6-8 pieces for 4-5 minutes, turning occasionally. The chicken should be golden brown and internal temperature should reach 165°F (74°C) . Drain on paper towels. Keep warm in a 200°F oven while you finish all batches.
Step 3: Create the Orange Glaze
In a small saucepan, combine orange juice, soy sauce, rice vinegar, brown sugar, honey, garlic, ginger, and orange zest. Bring to a boil over medium-high heat, stirring occasionally. Reduce heat to medium-low and simmer for 2-3 minutes until slightly reduced. Whisk in the cornstarch slurry and continue stirring for 1-2 minutes until the glaze thickens enough to coat the back of a spoon. Remove from heat.
Step 4: Toss and Serve
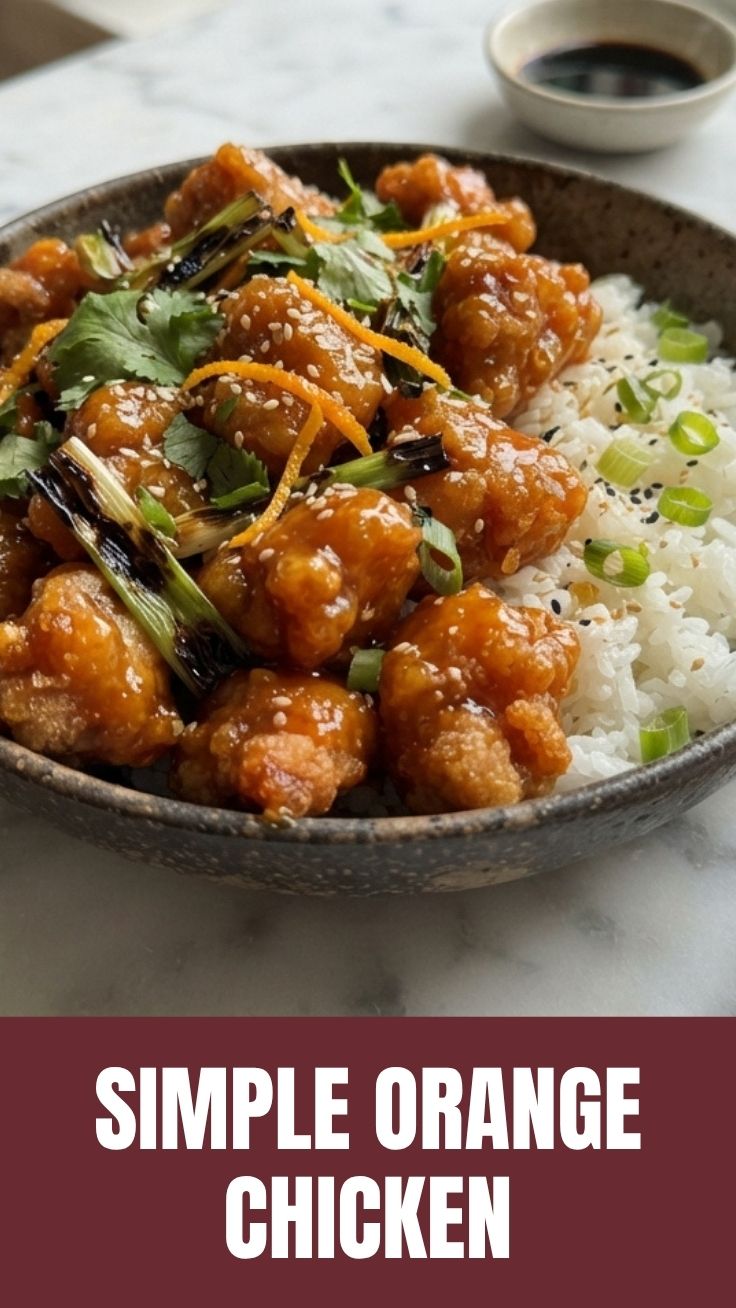
Place all fried chicken in a large bowl. Pour about ¾ of the glaze over the top and toss gently using tongs – you want every piece coated, but not drowning. Taste and add more glaze if desired. Serve immediately over steamed jasmine rice, garnished with sliced green onions and sesame seeds. For a perfect takeout-style comparison, try this Orange Chicken version that mimics the restaurant texture.
Expert Tip: For extra-crispy chicken that stays crunchy even after saucing, use the double-fry method: fry once at 325°F for 3 minutes (cooks through), let rest 5 minutes, then fry again at 375°F for 2 minutes (crisps exterior). This is the secret behind the best takeout-style General Tso Chicken and works perfectly here too.
—
Nutritional Benefits & Advantages
This homemade Orange Chicken isn’t just delicious – it’s actually more nutritious than its takeout counterpart. Here’s why:
– Higher protein, lower sodium: Chicken thighs provide 23g of protein per serving, while homemade sauce uses low-sodium soy sauce. Restaurant versions can have up to 1,200mg sodium per serving; ours has about 600mg.
– Real citrus, real nutrients: Fresh orange juice and zest deliver vitamin C (45% DV), antioxidants like hesperidin (supports heart health), and natural pectin (good for gut health). Bottled juice lacks these benefits.
– Controlled oils: You choose a high-quality oil like avocado or peanut oil that’s free from trans fats. Restaurant frying oil is often reused, creating harmful compounds.
– No MSG or preservatives: The flavor comes from fresh ingredients, not chemical enhancers. The ginger and garlic also provide anti-inflammatory compounds like gingerol and allicin.
– Customizable macros: By using chicken breasts and reducing sugar to 2 tablespoons, you can drop calories to ~350 per serving while keeping it satisfying.
The real advantage? You’re not sacrificing flavor for health. The fresh orange zest adds a floral, aromatic quality that bottled sauces can’t replicate. And when you serve this alongside steamed broccoli or a simple cucumber salad, you’ve got a balanced meal that rivals any restaurant.
—
Tips Variations & Cooking Advice
Flavor Variations
– Spicy Orange Chicken: Add 1 tablespoon sambal oelek or gochujang to the glaze for a Korean-inspired kick
– Herb-Infused Version: Throw 2 sprigs of fresh thyme into the simmering glaze; remove before serving
– Honey-Orange Glaze: Replace brown sugar with ⅓ cup honey and add ½ teaspoon cinnamon – great for fall
Alternative Cooking Methods
– Air Fryer Method: Toss coated chicken with 1 tablespoon oil, air fry at 380°F for 12 minutes, shaking halfway. Toss with glaze in the last 3 minutes.
– Baked Version: Place coated chicken on a greased wire rack over a baking sheet. Bake at 400°F for 20 minutes, brushing glaze on in the last 5 minutes.
– Stir-Fry Shortcut: Skip the coating entirely, stir-fry chicken in 1 tablespoon oil with garlic and ginger, then add glaze and simmer until cooked through.
Dietary Adaptations
– Gluten-Free: Use tamari instead of soy sauce, and rice flour or arrowroot in the coating. The texture is surprisingly similar.
– Dairy-Free: Already dairy-free by nature, but double-check your soy sauce (some brands add whey).
– Paleo-Friendly: Replace brown sugar with coconut sugar or date paste; use cassava flour instead of cornstarch.
Portion Changes
– For a crowd: Double the recipe and use a turkey fryer for faster batch frying. Keep chicken warm on a baking sheet in a 200°F oven.
– Lower calorie: Use chicken breast, oven-baked method, and reduce sugar to 2 tablespoons. Serve over cauliflower rice.
—
Common Mistakes to Avoid
1. Soggy Coating – The #1 complaint! Solutions:
– Pat chicken THOROUGHLY dry with paper towels before coating
– Don’t let coated chicken sit for more than 5 minutes before frying (moisture seeps through)
– Maintain oil temperature at 350°F – not a degree less
2. Bitter Orange Taste – This happens when you use bottled juice or over-reduce the sauce. Fix:
– Always use fresh-squeezed orange juice (bottled has preservatives that turn bitter)
– Don’t simmer the glaze for more than 5 minutes total
– Add zest only at the end (cooking zest too long makes it bitter)
3. Sauce Too Thin or Too Thick – The cornstarch slurry is key:
– Add slurry slowly while whisking – you might not need all of it
– If it gets too thick, thin with a tablespoon of orange juice at a time
– If it’s thin, mix another teaspoon cornstarch with water and add
4. Chicken Rubbery or Tough – Usually from overcooking:
– Use chicken thighs (more forgiving than breasts) and check internal temp
– Fry in small batches so oil temperature doesn’t drop
– Let fried chicken rest only briefly before tossing with sauce
5. Sauce Doesn’t Stick – The glaze needs to be slightly tacky:
– Make sure the fried chicken is still hot when you toss it with glaze
– If glaze is too thin, simmer another minute to reduce
– Toss in a bowl, not the hot pan (which can break the sauce)
—
Storage & Meal Prep Tips
Refrigeration
Store leftover Orange Chicken in an airtight container for up to 4 days. The key to maintaining texture is to store the chicken and sauce separately if possible – toss them together only when reheating. If already combined, the coating will soften but the flavor remains excellent.
Freezing
This recipe freezes beautifully! Here’s how:
– Freeze before coating: Place raw, uncoated chicken pieces in a freezer bag with 2 tablespoons orange juice – freeze for up to 3 months. Thaw overnight in fridge before coating and frying.
– Freeze the glaze: Pour cooled glaze into a freezer-safe jar, leaving 1-inch headspace. Freeze for up to 6 months. Thaw in fridge overnight or in a bowl of warm water.
– Freeze fully cooked: Cool completely, then place in a single layer on a baking sheet in the freezer. Once frozen solid, transfer to a freezer bag. Reheat directly from frozen (see below).
Reheating Instructions
– Oven method (best for crispiness) : Preheat to 375°F. Place chicken on a wire rack over a baking sheet. Bake 8-10 minutes, then brush with a little extra glaze (if you have it) and bake 2 more minutes.
– Air fryer (2nd best) : 350°F for 5-6 minutes, shaking halfway. The coating will crisp up beautifully.
– Stovetop: Add a splash of water or orange juice to a nonstick pan, add chicken, cover, and heat on medium-low for 5 minutes. This keeps it from drying out.
– Avoid microwave – it turns the crispy coating into a soggy mess.
Meal Prep Tips
– Prep the sauce up to 5 days ahead and store in the fridge
– Cut and marinate chicken in orange juice and ginger overnight for deeper flavor
– Pre-mix dry coating in a sealed bag – just toss chicken in egg then shake in the bag for fast cooking
—
Conclusion
There you have it – a foolproof recipe for homemade Orange Chicken that’s healthier, more flavorful, and surprisingly easy to pull off. By using fresh orange juice and zest, controlling the sugar, and mastering the double-fry technique (or not – the single fry works great too), you’ve just upgraded your weeknight dinner game forever. The beauty of this dish is its flexibility: you can dial up the heat, swap in chicken for tofu, or turn it into a salad topping. And if you love takeout-style Chinese food, this recipe is your ticket to making it better than delivery – every single time.
Now that you’re equipped with the secrets to crispy, saucy perfection, why not try this General Tso Chicken for another takeout classic made healthy? The same techniques apply – just swap the orange juice for the spicy-sweet sauce of General Tso Chicken. Your family will think you ordered from their favorite spot, but you’ll know better.
Have you tried this recipe? Drop a comment below with your variation – I’d love to hear how you personalized it. And don’t forget to share this post with someone who loves takeout as much as you do. Happy cooking!
—
FAQs
1. Can I use chicken breast instead of thighs?
Absolutely! Chicken breast works well – just be careful not to overcook it. Cut into slightly larger pieces (1½ inches) and fry for the same time. The breast will be leaner and slightly drier, so double-check with an instant-read thermometer (165°F). For the juiciest results, brine the breast pieces in salt water for 15 minutes before coating.
2. My glaze turned out too salty. How do I fix it?
This usually happens if you used regular soy sauce instead of low-sodium. To fix: add 1 tablespoon honey or brown sugar to balance the salt, then stir in 2 tablespoons fresh orange juice to dilute. If that’s not enough, make a quarter batch of glaze without soy sauce and mix it in. Next time, use low-sodium soy sauce and taste before adding the cornstarch slurry – you can always add more salt later.
3. Can I make this recipe without
Quick way to grow your Orange Chicken
Ingredients
Equipment
Method
- Cut chicken thighs into 1-inch pieces, then pat them dry with paper towels.
- In a medium bowl, whisk the egg and then add the chicken, tossing to coat.
- In a separate shallow dish, place the cornstarch; dredge each chicken piece in the cornstarch, ensuring it is fully coated.
- Heat vegetable oil in a large skillet or wok over medium-high heat until it reaches 350°F (175°C).
- Carefully add chicken pieces in batches, without overcrowding the pan, and fry for 3-4 minutes per batch until golden brown and cooked through.
- Remove the fried chicken with a slotted spoon and place it on a wire rack set over paper towels to drain excess oil.
- In a medium saucepan, combine orange juice, soy sauce, rice vinegar, brown sugar, grated ginger, minced garlic, orange zest, and red pepper flakes if using.
- Bring the mixture to a simmer over medium heat, then whisk in the cornstarch slurry.
- Continue to cook and stir until the sauce thickens to your desired consistency, about 2-3 minutes.
- Add the fried chicken to the saucepan with the orange sauce, tossing gently to ensure all pieces are evenly coated.
- Serve immediately with steamed rice and a sprinkle of sesame seeds or chopped green onions, if desired.