The Ultimate Guide to Perfect No-Bake Peanut Butter Bars: A Quick, Healthy, and Irresistible Treat
Have you ever craved a decadent dessert that comes together in minutes without turning on your oven? Imagine sinking your teeth into a rich, creamy, and satisfying treat that not only curbs your sweet tooth but also fits seamlessly into your busy schedule. That’s exactly what you get with these No-Bake Peanut Butter Bars. Preparing this recipe at home is invaluable because it puts you in control of the ingredients, allowing you to avoid preservatives and excess sugar found in store-bought versions. Whether you’re a seasoned baker or a complete beginner, this no-bake peanut butter bars recipe is your ticket to a foolproof, crowd-pleasing dessert. Plus, if you love quick sweets, you’ll adore exploring more No-Bake Dessert Recipes for endless inspiration.
Ingredients & Kitchen Tools
Ingredients
– 1 cup creamy peanut butter – Use natural, unsweetened peanut butter for a healthier base; avoid oily separation by stirring well.
– 1/2 cup honey or maple syrup – Acts as a natural binder and sweetener; maple syrup adds a subtle caramel note.
– 2 cups rolled oats – Provide texture and fiber; use gluten-free oats if needed.
– 1/2 cup dark chocolate chips – For the topping; choose dairy-free chips for a vegan option.
– 1/4 cup coconut oil – Helps the chocolate layer set smoothly; substitute with butter if preferred.
– 1 teaspoon vanilla extract – Enhances overall flavor depth.
– Pinch of sea salt – Balances sweetness and intensifies peanut butter taste.
Kitchen Tools
– 8×8-inch baking dish – Line with parchment paper for easy removal.
– Mixing bowls – One large for the base, one small for the chocolate.
– Spatula – For even spreading.
– Microwave or double boiler – To melt chocolate gently.
– Measuring cups and spoons – Precision ensures consistent texture.
Optional Substitutions
– Swap honey with agave nectar for a vegan-friendly option.
– Use almond butter or sunflower seed butter for a nut-free version.
– Replace oats with crushed graham crackers for a crunchier bar.
Prep Time & Cooking Schedule
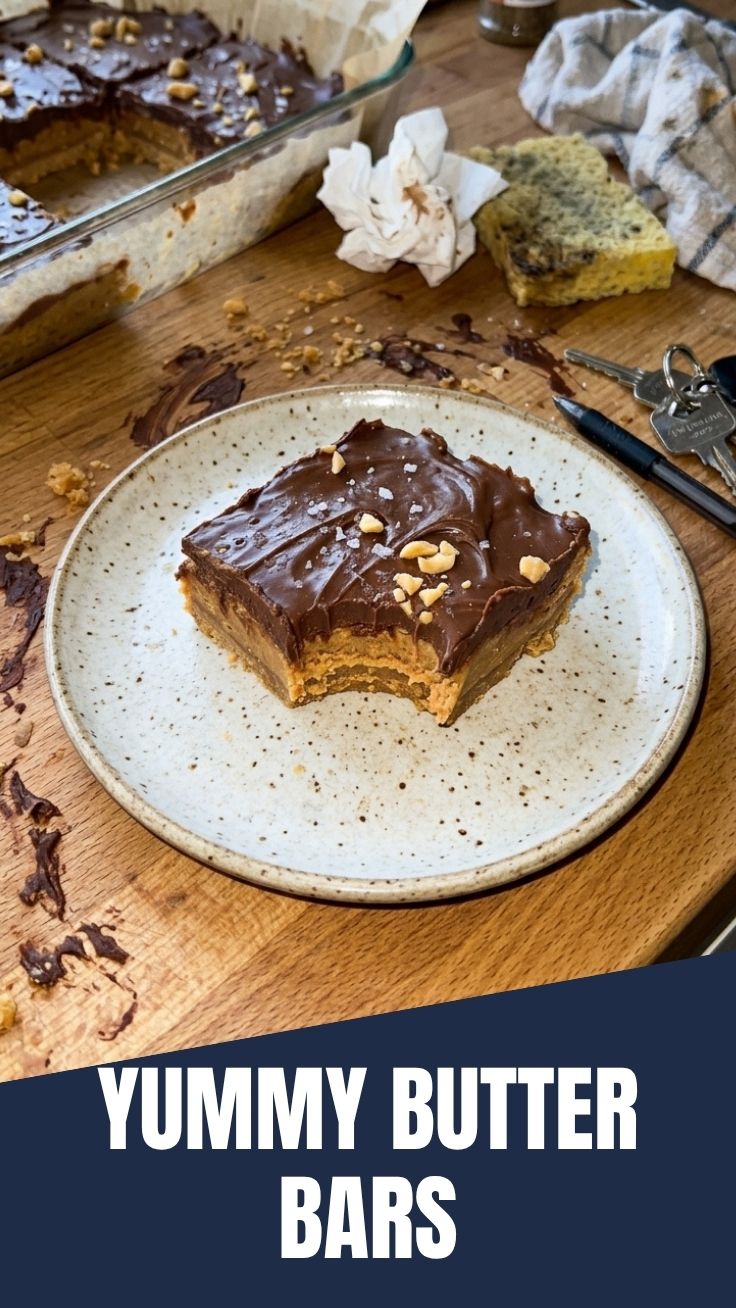
– Prep Time: 15 minutes – Quick mixing and layering.
– Chill Time: 2 hours minimum – Essential for firm bars; overnight chilling yields the best texture.
– Total Time: 2 hours 15 minutes – Perfect for making ahead of a party or weekly meal prep.
Plan ahead: These bars are ideal for Sunday prep, so you have grab-and-go snacks all week. The resting time allows flavors to meld, creating a more cohesive, fudge-like consistency.
Step-by-Step Instructions
1. Prepare the Base: In a large mixing bowl, combine 1 cup creamy peanut butter, 1/2 cup honey, and 1 teaspoon vanilla extract. Stir until smooth and fully incorporated.
2. Add Oats: Fold in 2 cups rolled oats and a pinch of sea salt. Mix until the oats are evenly coated. The mixture should be thick but pliable—if too dry, add 1 tablespoon of warm water.
3. Press into Dish: Transfer the mixture to a parchment-lined 8×8-inch dish. Use a spatula or your hands to press it firmly and evenly. This step is crucial for bars that hold together—apply even pressure across the surface.
4. Make the Chocolate Layer: In a microwave-safe bowl, combine 1/2 cup dark chocolate chips and 1/4 cup coconut oil. Microwave in 30-second bursts, stirring between each, until smooth. Alternatively, use a double boiler.
5. Top and Chill: Pour the melted chocolate over the pressed base, spreading it to the edges. Refrigerate for at least 2 hours, or until the chocolate is set. For clean cuts, let the bars sit at room temperature for 5 minutes before slicing.
6. Slice and Serve: Cut into 12 squares. Enjoy immediately or store for later.
Pro Tip: For a perfect texture cue, the base should feel slightly sticky but not wet. If it crumbles, add a bit more honey. This no-bake peanut butter bars recipe is forgiving, so adjust as needed. For more inspiration, check out these No-Bake Dessert Recipes that follow similar principles.
Nutritional Benefits & Advantages
These bars are a powerhouse of nutrition. Peanut butter provides healthy monounsaturated fats and plant-based protein, keeping you full longer. Oats are rich in beta-glucan, a soluble fiber that supports heart health and stabilizes blood sugar. Dark chocolate offers antioxidants like flavonoids, which may reduce inflammation. Compared to traditional baked desserts, this recipe has no refined flour and uses natural sweeteners, making it a smarter choice for energy-boosting snacks. Each bar contains approximately 200 calories, 8g protein, and 5g fiber—perfect for post-workout recovery or a midday pick-me-up.
Tips Variations & Cooking Advice
– Flavor Variations: Add 1/4 cup shredded coconut or chopped nuts to the base for extra crunch. Swirl in 2 tablespoons of strawberry jam before chilling for a PB&J twist.
– Dietary Adaptations: For a gluten-free version, ensure oats are certified gluten-free. For a dairy-free option, use vegan chocolate chips and coconut oil.
– Portion Changes: Double the recipe for a 9×13-inch pan, increasing chill time to 3 hours. For mini bites, use a silicone mold and reduce chill time to 1 hour.
– Alternative Methods: If you prefer a firmer texture, freeze the bars for 30 minutes after chilling. For a softer, chewier bar, reduce oats to 1.5 cups.
Common Mistakes to Avoid
– Overmixing the Base: This can make the bars dense and tough. Stir just until combined.
– Skipping the Parchment Paper: Without it, bars stick to the dish, making removal messy. Always line the dish.
– Using Runny Peanut Butter: Natural peanut butter that’s too oily won’t bind properly. Stir it well or use a no-stir variety.
– Cutting Too Early: If the chocolate isn’t fully set, it will smear. Wait the full 2 hours, or refrigerate overnight.
– Uneven Pressing: Gaps in the base lead to crumbling. Use a flat-bottomed glass to press firmly.
Storage & Meal Prep Tips
– Refrigeration: Store bars in an airtight container in the fridge for up to 1 week. Layer with parchment paper to prevent sticking.
– Freezing: Wrap individual bars in plastic wrap, then place in a freezer-safe bag. They stay fresh for up to 3 months. Thaw in the fridge overnight or at room temperature for 15 minutes.
– Reheating: For a gooey texture, microwave a bar for 10–15 seconds. Avoid overheating, as chocolate can seize.
– Meal Prep: Make a double batch on Sunday for school lunches or office snacks. These bars travel well and don’t require reheating.
Conclusion
These No-Bake Peanut Butter Bars are a game-changer for anyone seeking a quick, nutritious, and delicious dessert. With minimal effort, you get a treat that satisfies cravings while supporting your health goals. Remember, mastering this no-bake peanut butter bars recipe opens the door to countless No-Bake Dessert Recipes that save time and energy. Try this recipe today, share your results with friends, or explore more no-bake creations for endless culinary adventures. Your taste buds—and your schedule—will thank you.
FAQs
1. Can I use crunchy peanut butter instead of creamy?
Yes, crunchy peanut butter adds texture and works well. Just ensure it’s well-stirred to maintain binding.
2. How do I make these bars vegan?
Use maple syrup instead of honey, and choose dairy-free chocolate chips. Coconut oil is already vegan-friendly.
3. Why are my bars too crumbly?
This usually happens if the mixture is too dry. Add 1–2 tablespoons of warm water or extra honey to improve cohesion.
4. Can I skip the chocolate topping?
Absolutely. The bars are delicious on their own, but the chocolate adds a rich contrast. For a lighter version, dust with cocoa powder.
5. How long do they last at room temperature?
They can sit out for up to 2 hours, but refrigeration is recommended for longer storage to maintain texture and prevent melting.
Quick way to grow No-Bake Peanut Butter Bars
Ingredients
Equipment
Method
- Combine graham cracker crumbs, powdered sugar, peanut butter, and melted butter in a large bowl and mix until well combined.
- Press the mixture evenly into an ungreased 9x13 inch pan.
- Melt chocolate chips and peanut butter together in a microwave-safe bowl or double boiler, stirring until smooth.
- Spread the melted chocolate mixture over the peanut butter layer.
- Refrigerate for at least 30 minutes, or until the chocolate is set.
- Cut into squares and serve.