The Ultimate No Bake Cheesecake: Creamy, Dreamy, and Effortlessly Delicious
Have you ever craved a silky, decadent cheesecake but felt intimidated by the water baths, cracked tops, and lengthy baking times? What if I told you that you could achieve that same rich, velvety texture without ever turning on your oven? This No Bake Cheesecake is the answer to your dessert prayers—a foolproof, luxurious treat that comes together in minutes and sets beautifully in the fridge. Preparing this at home isn’t just about convenience; it’s about controlling every ingredient, customizing the flavor profile to match your cravings, and impressing guests with a dessert that looks and tastes like it came from a high-end patisserie. When you master this base recipe, you unlock the gateway to an Easy Cheesecake that works perfectly every time.
—
Ingredients & Kitchen Tools
For the Crust:
– 1 ½ cups graham cracker crumbs (or digestive biscuits, crushed finely. Substitution: gluten-free vanilla wafers or crushed nuts for a low-carb option)
– 6 tablespoons unsalted butter, melted (clarifies the binding process. Tip: Use coconut oil for a dairy-free crust)
– 2 tablespoons granulated sugar (optional, if your crackers are unsweetened)
For the Filling:
– 16 oz (2 blocks) full-fat cream cheese, softened (must be room temperature to avoid lumps. Note: Neufchâtel cheese works for lower fat but will yield a slightly less firm texture)
– ½ cup granulated sugar (superfine sugar dissolves faster)
– 1 teaspoon vanilla extract (pure, not imitation, for depth)
– 1 cup cold heavy whipping cream (36%+ fat content is critical for stability)
– 1 tablespoon fresh lemon juice (brightens flavor and helps the cream cheese set firmer)
Kitchen Tools:
– 9-inch springform pan (ensures clean release) or 8×8 square dish
– Electric hand mixer or stand mixer (whisk attachment preferred)
– Flexible silicone spatula
– Medium mixing bowl (for crust)
– Large mixing bowl (for filling)
– Measuring cups and spoons
– Parchment paper (for lining pan bottom)
—
Prep Time & Cooking Schedule
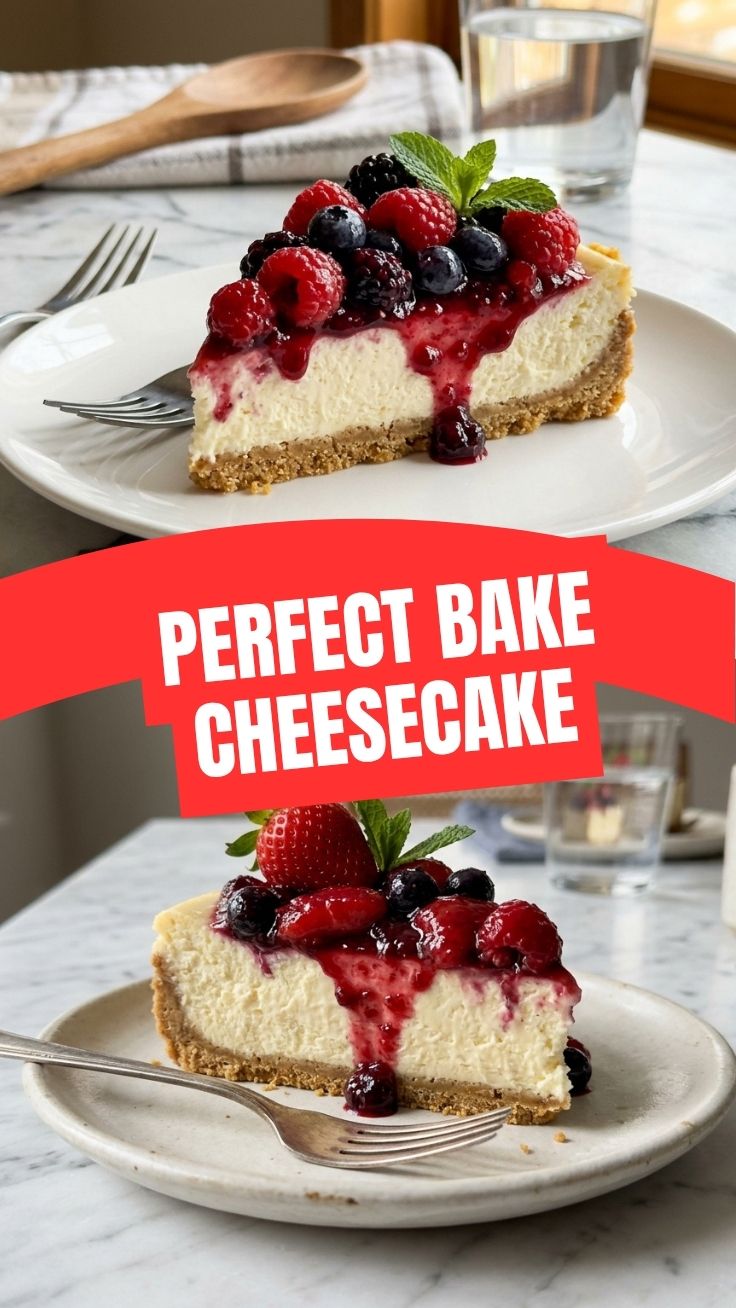
– Prep Time: 20 minutes (active hands-on)
– Chill Time: 6–8 hours (overnight is preferred)
– Total Time: 8 hours 20 minutes
Planning Tip: This is a “make-ahead” champion. Prepare it the day before your event and let it rest in the fridge overnight. This not only ensures a perfect slice every time but also frees up your oven for other dishes. Remember, patience is the key—rushing the chilling process leads to a soft, slice-resistant texture.
—
Step-by-Step Instructions
1. Prepare the Crust: In a medium bowl, combine the graham cracker crumbs with the melted butter and sugar. Stir until every crumb is moistened. Press the mixture firmly into the bottom of your lined springform pan. Use the flat bottom of a measuring cup to compact it tightly—this prevents crumbling later. Transfer to the refrigerator for 15 minutes while you make the filling.
2. Cream the Base: In a large bowl, beat the softened cream cheese with an electric mixer on medium speed until completely smooth and free of lumps (about 2 minutes). Add the sugar and continue beating for another minute until the mixture is light and fluffy. Scrape down the bowl and beaters thoroughly.
3. Add the Tang: Pour in the vanilla extract and fresh lemon juice. Beat on low just until incorporated. Over-mixing at this stage can create a soupy texture. Tip: If you want a more stable No Bake Cheesecake, ensure your cream cheese is truly room temperature.
4. Whip the Cream: In a separate clean bowl, beat the cold heavy whipping cream on high speed until stiff peaks form. This is a critical step—the cream must be stiff enough to hold its shape. Stop immediately once you see peaks that stand straight up without drooping.
5. Fold Gently: Add one-third of the whipped cream to the cream cheese mixture. Fold gently with a spatula using a cutting and lifting motion until no white streaks remain. Add the remaining cream in two batches, folding just until combined. Over-mixing will deflate the cream and result in a dense Easy Cheesecake.
6. Assemble & Chill: Pour the filling over the chilled crust and spread it evenly. Gently tap the pan on the counter to release any air bubbles. Cover with plastic wrap (do not let it touch the surface) and refrigerate for a minimum of 6 hours, but ideally overnight. The longer it sets, the cleaner the slice.
—
Nutritional Benefits & Advantages
This No Bake Cheesecake offers several health-conscious perks compared to its baked cousin. First, because there is no oven heat, the cream cheese retains more of its natural probiotics (though not significant, it’s a plus). The lemon juice provides a dose of vitamin C and helps with digestion. By controlling the sugar, you can easily adjust this to a lower-glycemic dessert using monk fruit or stevia blends. Additionally, the heavy cream offers a source of healthy fats that keep you satiated longer, making this an excellent treat for those following a moderate keto or low-carb lifestyle (just swap the crust). Compared to baked cheesecakes, this version is lighter on the stomach and significantly lower in cholesterol due to the absence of eggs.
—
Tips Variations & Cooking Advice
– Flavor Variations: Add melted dark chocolate to the filling for a chocolate version, or swirl in raspberry puree before chilling. For a tropical twist, fold in toasted coconut and lime zest.
– Dietary Adaptations: For a dairy-free version, use vegan cream cheese, coconut cream (chilled and whipped), and a nut-based crust. Ensure your vanilla is alcohol-free for strict dietary needs.
– Texture Adjustments: If you prefer a firmer slice, dissolve 1 teaspoon of unflavored gelatin in 2 tablespoons of water, let it bloom, then gently heat and stir into the cream cheese mixture before folding in the whipped cream.
– Portion Changes: For mini cheesecakes, use a 12-cup muffin tin lined with paper liners. Press crust into each cup and fill. Chill for 4 hours for perfect individual desserts.
—
Common Mistakes to Avoid
– Using Cold Cream Cheese: This is the #1 mistake. Cold cream cheese creates lumps that no amount of mixing can fix. Always let it sit out for 30–60 minutes.
– Over-whipping the Cream: Once the heavy cream turns into butter, it’s irreversible. Stop at stiff peaks—look for firm, upright peaks that feel slightly dense.
– Insufficient Chilling Time: Cutting into the cheesecake after only 3 hours will result in a runny, messy slice. The chilling allows the fat to solidify and the structure to stabilize.
– Pressing the Crust Too Thin: A weak crust will crumble under the filling’s weight. Press firmly and use enough butter to bind every crumb.
– Over-mixing After Folding: Agitation deflates the whipped cream. Use a gentle hand and stop when just combined.
—
Storage & Meal Prep Tips
– Refrigeration: Store any leftovers in the springform pan tightly covered with plastic wrap or in an airtight container for up to 5 days. The texture remains creamy but will lose some firmness after day 3.
– Freezing: This cheesecake freezes exceptionally well. After chilling overnight, remove the springform ring, wrap the entire cake in plastic wrap, then a layer of aluminum foil. Freeze for up to 2 months. Thaw in the refrigerator for 6–8 hours before serving.
– Reheating: Do not microwave this cheesecake—it will melt into a puddle. If you prefer a slightly softer texture, let a slice sit at room temperature for 10 minutes before eating. For a warm sauce topping, heat the topping separately and pour on at serving time.
– Meal Prep: Prepare the crust and filling separately up to 24 hours in advance. Combine and chill just before serving. This is perfect for busy bakers.
—
Conclusion
Mastering this No Bake Cheesecake is a game-changer for any home cook. It proves that you don’t need an oven, complex techniques, or a pastry degree to create an indulgent, show-stopping dessert. With a creamy, cloud-like texture and a buttery, crunchy crust, this Easy Cheesecake is your go-to for last-minute gatherings, holiday meals, or simply treating yourself. Remember to be patient with the chilling time, and don’t be afraid to experiment with flavors and toppings. The beauty of a no-bake base is its incredible versatility—you can dress it up or keep it classic, and it always delivers. I’d love to hear how this turns out for you! Drop a comment below, share a photo on social media, or explore more no-bake recipes on the blog for effortless indulgence.
—
FAQs
1. Can I use low-fat cream cheese for this recipe?
Yes, but the texture will be slightly less rich and stable. Full-fat cream cheese provides the best consistency for a sliceable cheesecake. If using low-fat, consider adding 1 tablespoon of cornstarch to the sugar to help stabilize.
2. Why is my cheesecake not setting after 6 hours?
This usually happens if the cream cheese was too cold, the heavy cream wasn’t whipped to stiff peaks, or your kitchen is warm/humid. Place it in the coldest part of your refrigerator (back, not near the door) and wait an additional 2–3 hours. If still loose, you can freeze it for 2 hours to firm up before serving.
3. Can I make this gluten-free?
Absolutely! Use gluten-free graham crackers, crushed gluten-free shortbread cookies, or a nut-based crust (almond flour with melted butter and a pinch of salt). Ensure all other ingredients are certified gluten-free.
4. How do I prevent the cheesecake from cracking?
This is actually a benefit of no-bake cheesecakes—they never crack! Since there’s no baking, you don’t have to worry about rapid temperature changes causing surface fissures. Just ensure you don’t over-mix and let it set fully.
5. Can I add fruit puree to the filling?
Yes, but limit it to ¼ cup per batch. Too much liquid will prevent setting. Swirl the puree on top of the filling before chilling rather than mixing it in completely. For best results, reduce the puree on the stove to thicken it first.
No Bake Cheesecake
Ingredients
Equipment
Method
- Combine graham cracker crumbs and melted butter, then press the mixture into the bottom of a 9-inch pie dish or springform pan to form the crust.
- Beat softened cream cheese and granulated sugar together until the mixture is smooth and creamy.
- In a separate bowl, whip the heavy cream until stiff peaks form.
- Gently fold the whipped cream into the cream cheese mixture until fully combined, then spread the filling evenly over the prepared crust.
- Refrigerate the cheesecake for at least 4 hours, or preferably overnight, until it is firm and set.