The Ultimate Homemade Breadsticks Recipe: Soft, Buttery & Irresistible
Have you ever craved the warm, pillowy softness of restaurant-style Breadsticks but thought they were too complicated to make at home? You’re not alone. Many home cooks shy away from yeast-based recipes, fearing they’ll end up with dry, hockey-puck results instead of the tender, golden sticks you dream about. The truth is, crafting these loves of carbohydrate bliss from scratch is not only achievable—it’s incredibly rewarding. When you master the art of homemade breadsticks, you unlock the ability to create side dishes that elevate any pasta night, soup dinner, or salad course. And when you take it a step further, adding aromatic herbs and butter transforms them into Garlic breadsticks that rival any chain restaurant’s offering. Preparing these at home ensures you control the ingredients, the freshness, and the flavor, making every bite a personal triumph.
Ingredients & Kitchen Tools
– All-purpose flour (3 ½ cups): Provides structure; bread flour works for a chewier texture.
– Active dry yeast (1 packet or 2 ¼ tsp): The leavening agent that makes them rise; instant yeast can be substituted without proofing.
– Warm water (1 ¼ cups, 110°F): Activates the yeast; too hot kills it, too cold stalls it.
– Olive oil (3 tbsp + extra for brushing): Adds moisture and richness; avocado oil is a neutral substitute.
– Sugar (1 tbsp): Feeds the yeast and adds slight sweetness; honey works too.
– Salt (1 ½ tsp): Enhances flavor and controls yeast activity.
– Butter (4 tbsp, melted): For that signature brushed top; use vegan butter for dairy-free.
– Garlic powder (1 tsp) & dried oregano (1 tsp): For savory Garlic breadsticks; fresh minced garlic works but burns faster.
– Mixing bowl, measuring cups/spoons, wooden spoon or dough hook, baking sheet, parchment paper, pastry brush, and a clean kitchen towel.
Prep Time & Cooking Schedule
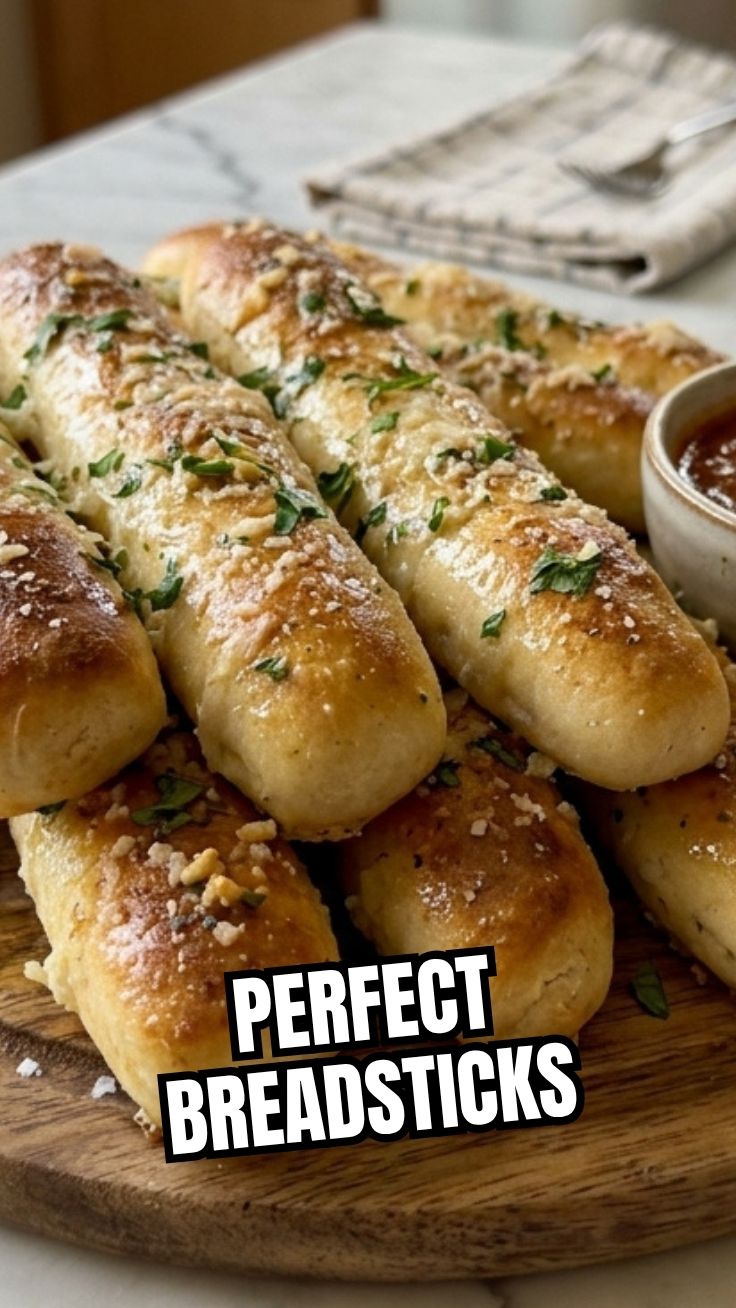
– Prep Time: 20 minutes (mixing, kneading, and shaping)
– Rising Time: 1 to 1.5 hours (first rise) + 30 minutes (second rise after shaping)
– Bake Time: 12-15 minutes at 400°F (200°C)
– Total Time: Approximately 2 hours
Plan your schedule carefully. The active work is minimal (around 30 minutes total), but the dough requires patience during the two rises. You can start these in the morning and bake them just before serving dinner, or prep the dough the night before and refrigerate the shaped sticks overnight, then bake fresh the next day.
Step-by-Step Instructions
1. Activate the yeast: In your mixing bowl, combine warm water (110°F) and sugar. Sprinkle the yeast on top and let it sit for 5–7 minutes until foamy. If it doesn’t foam, your yeast is dead—start over with fresh yeast.
2. Make the dough: Add 3 cups of flour, salt, and 3 tablespoons of olive oil to the yeast mixture. Stir until a shaggy dough forms. Turn it onto a floured surface and knead for 6–8 minutes, adding the remaining ½ cup of flour as needed, until the dough is smooth and elastic.
3. First rise: Place the dough in a lightly oiled bowl, cover with a damp towel, and let it rise in a warm spot until doubled in size (about 1 hour).
4. Shape the breadsticks: Punch down the dough and divide it into 12 equal pieces (use a bench scraper for precision). Roll each piece into a 6-inch rope. Place them on a parchment-lined baking sheet, leaving 2 inches of space between each.
5. Second rise: Cover the shaped breadsticks loosely with plastic wrap and let them rise for another 30 minutes until puffy.
6. Bake: Brush the risen breadsticks with melted butter mixed with garlic powder and oregano. Bake at 400°F for 12–15 minutes until golden brown and hollow-sounding when tapped. These homemade breadsticks are ready when they reach an internal temperature of 190°F. For truly irresistible Garlic breadsticks, brush them with additional garlic butter immediately after pulling them from the oven.
Nutritional Benefits & Advantages
Homemade breadsticks offer distinct benefits over store-bought versions. You control the salt and fat content, meaning you can reduce both substantially. When made with olive oil instead of butter in the dough, you incorporate heart-healthy monounsaturated fats. The main ingredient, carbohydrate-rich flour, provides quick energy (approximately 150–200 calories per breadstick, depending on size). If you use whole-wheat flour for half the recipe, you boost fiber content to about 3 grams per serving. Additionally, the fermentation process in yeast-based breads breaks down phytic acid, making minerals like zinc and magnesium more bioavailable. Preparing them at home also ensures no artificial preservatives, dough conditioners, or high-fructose corn syrup that are common in packaged alternatives.
Tips Variations & Cooking Advice
– Flavor variations: Add ½ cup of shredded Parmesan cheese to the dough for cheesy sticks. Sprinkle sesame seeds, poppy seeds, or flaky sea salt on top before baking. For spicy Garlic breadsticks, add red pepper flakes to the butter mixture.
– Ingredient swaps: Substitute 1 cup of whole-wheat flour for 1 cup of all-purpose flour for a nuttier flavor and higher fiber. Use gluten-free all-purpose flour blend, but add 1 teaspoon of xanthan gum to maintain elasticity.
– Dietary adaptations: For dairy-free version, use vegan butter or simply brush with olive oil infused with garlic. For a low-carb alternative, make cheese-based “fathead” breadsticks using almond flour and mozzarella.
– Cooking method: For extra-crispy bottoms, bake on a preheated pizza stone rather than a baking sheet. You can also grill these on a covered grill over medium heat for 4–5 minutes per side.
Common Mistakes to Avoid
– Killing the yeast: Water over 130°F kills yeast instantly. Always use a thermometer or test with your wrist—it should feel like warm bathwater.
– Not kneading enough: Under-kneaded dough yields dense, tough breadsticks. Knead until the dough passes the “windowpane test” (stretch a small piece thin enough to see light through without tearing).
– Skipping the second rise: If you skip the 30-minute rest after shaping, your breadsticks will be dense and bready instead of light and airy.
– Over-baking: Keep a close eye after the 12-minute mark. Breadsticks go from golden to burnt very quickly. If the tops brown too fast but the bottoms are still pale, move the rack lower in the oven.
– Adding too much flour during kneading: Only add enough to prevent sticking. Excess flour creates dry, crumbly breadsticks.
Storage & Meal Prep Tips
– Room temperature: Store cooled breadsticks in an airtight container lined with paper towels for up to 3 days. Replace the paper towels daily to absorb moisture and prevent sogginess.
– Freezing: Wrap each breadstick individually in plastic wrap, then place them in a freezer bag. They freeze well for up to 3 months. Thaw at room temperature for 30 minutes and crisp in a 350°F oven for 5 minutes.
– Reheating: Never microwave breadsticks—they become rubbery. Instead, wrap them in foil and heat in a 350°F oven for 8–10 minutes. For extra crispness, open the foil for the last 2 minutes.
– Meal prep hack: Make the dough through the first rise, punch it down, wrap tightly, and refrigerate for up to 24 hours. When ready, shape and let rise at room temperature for 1 hour before baking.
Conclusion
Mastering the art of homemade Breadsticks transforms any ordinary meal into a memorable dining experience. Whether you’re serving them alongside a steaming bowl of minestrone or dipping them into marinara sauce as an appetizer, these soft, buttery sticks provide comfort that store-bought versions simply cannot match. By experimenting with the herb-infused butter and creating your own signature Garlic breadsticks, you’ll impress family and dinner guests alike. Give this recipe a try this weekend and taste the difference that fresh, homemade baking makes. Share your results in the comments below—did you try a unique topping or a different cheese? Your culinary creativity might inspire someone else!
FAQs
Q: Can I use instant yeast instead of active dry yeast?
Yes! Instant yeast (also called rapid-rise) can be mixed directly with the dry ingredients without proofing. Reduce the rising time by about 15 minutes and skip the activation step entirely.
Q: Why did my breadsticks turn out hard and dense?
This usually happens from one of three reasons: too much flour during kneading, insufficient rising time, or over-baking at too high a temperature. Use the windowpane test, let the dough double properly, and bake at 400°F max.
Q: Can I make these gluten-free?
Absolutely. Use a high-quality gluten-free all-purpose flour blend (containing xanthan gum or add 1 tsp yourself). Add an extra tablespoon of olive oil for moisture. The texture will be slightly more tender, but they still bake beautifully.
Q: How do I get that restaurant-style golden top?
Brush with a mixture of melted butter, garlic powder, and a pinch of sugar before baking. Then brush again with plain melted butter immediately after they come out of the oven for that shiny, glossy finish.
Q: Can I add cheese directly into the dough?
Yes, but add no more than ½ cup of finely grated Parmesan or cheddar to the flour mixture. Too much cheese weighs down the dough and can make it greasy. For a sharper flavor, sprinkle cheese on top during the last 2 minutes of baking.
Proven way to grow your own 7 Breadsticks
Ingredients
Equipment
Method
- In a large bowl, dissolve yeast and sugar in warm water, then let it sit for 5 minutes until foamy.
- Stir in the olive oil, salt, and gradually add the flour, mixing until a shaggy dough forms.
- Knead the dough on a floured surface for about 5-7 minutes until it becomes smooth and elastic.
- Place the dough in a greased bowl, cover with plastic wrap, and let it rise in a warm place for 1 hour, or until doubled in size.
- Preheat your oven to 400°F (200°C) and lightly grease a baking sheet.
- Punch down the risen dough and divide it into 7 equal pieces, rolling each piece into a 8-10 inch long breadstick shape.
- Arrange the breadsticks on the prepared baking sheet and bake for 15-20 minutes, or until golden brown.
- While the breadsticks are still warm, brush them with melted butter and sprinkle with garlic powder, oregano, and Parmesan cheese.