Here is a comprehensive, SEO-optimized, and engaging blog post following your exact specifications.
—
The Ultimate Guide to Perfectly Crispy Garlic Bread at Home
Have you ever pulled a sad, soggy, or overly greasy piece of garlic bread out of the oven and wondered why it never tastes as good as the restaurant version? That moment of disappointment is all too common, but it doesn’t have to be. The secret to achieving that perfect, golden-brown crunch with a tender, buttery center lies not just in the ingredients, but in the technique. Preparing this classic side dish at home is not only incredibly valuable for your wallet, but it puts you in complete control of the flavor and texture. You can customize it to your exact preference, using fresh, high-quality ingredients that elevate a simple meal. When you master the art of making Garlic Bread, you unlock a world of culinary potential that starts with the magic of a simple, aromatic compound. The foundation of this iconic dish is, without a doubt, a rich and flavorful Garlic Butter.
Ingredients & Kitchen Tools
To ensure your success, gather these ingredients and tools. Using the right equipment makes the process smooth and the results consistent.
Ingredients:
– 1 large loaf of Italian or French bread: A crusty exterior is non-negotiable for the perfect crunch. Avoid soft sandwich bread.
– ½ cup unsalted butter, softened: Softened butter is crucial for easy spreading. Salted butter can be used, but reduce any added salt.
– 4-6 cloves of fresh garlic, minced: Fresh garlic is far superior to powder. For a milder flavor, roast the cloves first.
– 2 tablespoons fresh parsley, finely chopped: Adds freshness and color. Dried parsley is a suitable substitute, but use half the amount.
– ¼ cup grated Parmesan cheese (optional): Creates a delicious, savory crust. Pecorino Romano is a great alternative.
– Pinch of salt and black pepper: To taste.
Kitchen Tools & Utensils:
– Chef’s knife and cutting board: For mincing garlic and chopping parsley.
– Mixing bowl: For combining the butter and aromatics.
– Fork or rubber spatula: For mixing the butter.
– Baking sheet: A rimmed baking sheet catches any dripping butter.
– Parchment paper or aluminum foil: For easy cleanup.
– Pastry brush (optional): For brushing melted butter, though a knife works fine.
Prep Time & Cooking Schedule
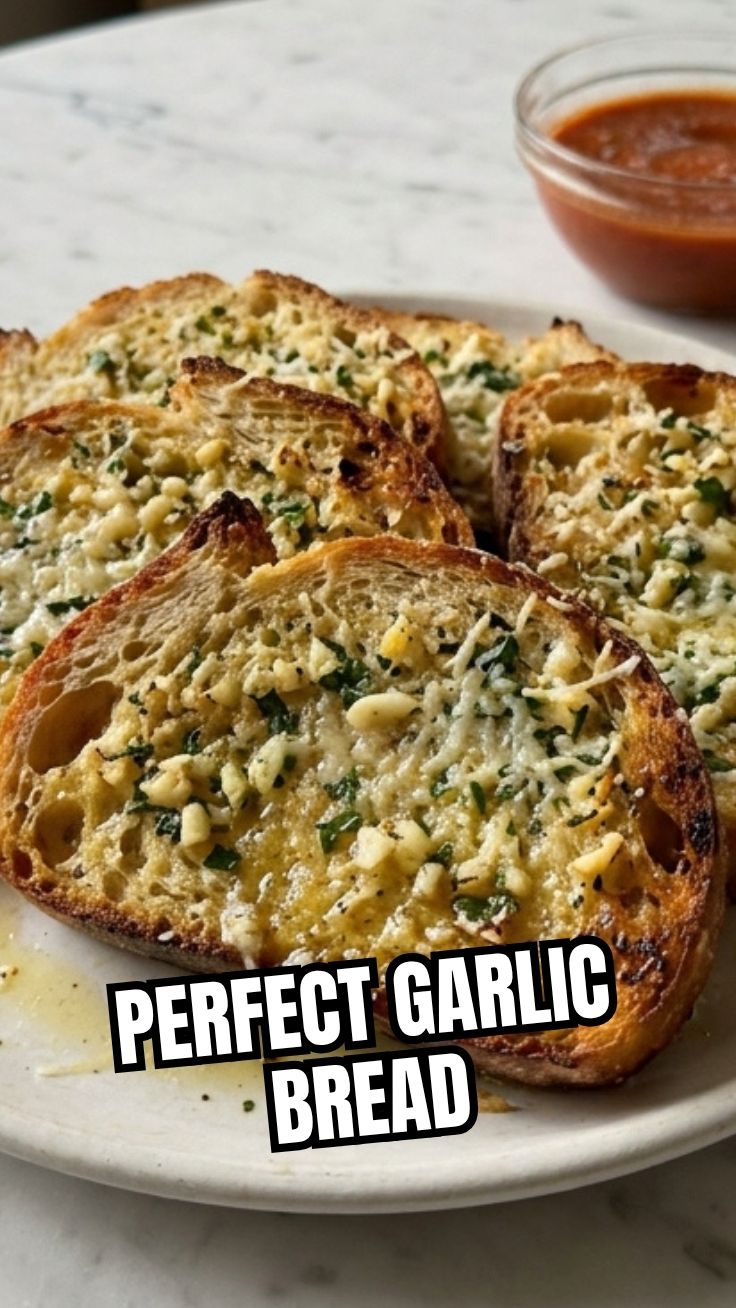
Planning your time is key to a stress-free cooking experience. This recipe is quick and perfect for a weeknight dinner.
– Prep Time: 10 minutes (mincing garlic, chopping parsley, softening butter).
– Cook Time: 12-15 minutes.
– Total Time: 22-25 minutes.
Context: The butter needs to be at room temperature (65-68°F/18-20°C) for the best texture. If you forgot to take it out of the fridge, you can microwave it in 5-second increments, being careful not to melt it. Start preheating your oven while you prepare the butter mixture.
Step-by-Step Instructions
Follow these steps for flawless, restaurant-quality results.
1. Preheat & Prepare: Preheat your oven to 400°F (200°C) . Line a baking sheet with parchment paper.
2. Make the Compound Butter: In a small mixing bowl, combine the softened butter, minced fresh garlic, chopped parsley, and a pinch of salt and pepper. Use a fork to mash and mix everything together until it is completely uniform. This is the heart of your Garlic Bread, and the key is to ensure the garlic is distributed evenly. You can also incorporate the Parmesan cheese at this stage if you are using it.
3. Slice the Bread: Using a serrated bread knife, cut the loaf in half horizontally. You want to create two large, flat halves. This maximizes the surface area for the butter.
4. Butter the Bread: Spread the Garlic Butter mixture generously over the cut side of both halves of the bread. Make sure to get it all the way to the edges to prevent them from drying out.
5. Bake to Perfection: Place the bread halves, buttered side up, on the prepared baking sheet. Bake for 10-12 minutes until the edges are golden brown and the butter is bubbly. For a deeper, more golden crust, switch the oven to broil for the final 1-2 minutes. Watch it closely to prevent burning.
6. Rest and Slice: Remove from the oven and let it rest for 2 minutes before slicing. This allows the butter to set slightly, preventing it from all running out when you cut it. Slice into individual pieces and serve immediately.
Nutritional Benefits & Advantages
While a treat, this dish offers some surprising benefits. Garlic is a powerhouse ingredient, known for its immune-boosting properties and potential to reduce blood pressure. The olive oil version (see tips) adds healthy monounsaturated fats. By making it at home, you control the quality of fat and sodium, avoiding the preservatives and trans fats often found in store-bought versions. Using whole-grain or sourdough bread can also increase fiber content, making it a more balanced accompaniment to a meal.
Tips Variations & Cooking Advice
– Flavor Variations: Add a pinch of red pepper flakes for heat, or a teaspoon of lemon zest for brightness. For a cheesy version, sprinkle shredded mozzarella or provolone on top during the last 3 minutes of baking.
– Dietary Adaptations: For a dairy-free version, substitute the butter with a high-quality vegan butter or a combination of olive oil and a vegan butter alternative. For a gluten-free version, simply use your favorite gluten-free baguette or Italian loaf.
– Alternative Cooking Methods: You can also cook this on a grill. Wrap the buttered bread in foil and place it on the grill for 5-7 minutes per side for a smoky flavor. For an air fryer, cook at 350°F (175°C) for 5-6 minutes.
Common Mistakes to Avoid
– Using Cold Butter: Cold butter doesn’t spread evenly, leaving you with some bites that are dry and others that are greasy.
– Solution: Always use softened butter.
– Burning the Garlic: Garlic burns easily, turning bitter. Broiling for too long is the main culprit.
– Solution: Bake at a moderate temperature and only broil for the final minute, keeping a close eye on it.
– Soggy Bread: This happens if you don’t use a crusty loaf or if you add too much oil.
– Solution: Use a rustic bread with a firm crust and don’t let the butter sit on the bread for too long before baking.
Storage & Meal Prep Tips
Leftovers: Store any leftover garlic bread in an airtight container or wrapped tightly in aluminum foil at room temperature for up to 2 days. Do not refrigerate, as it will become stale and dry.
Freezing: You can freeze the prepared, unbaked garlic bread. Assemble the bread, wrap it tightly in plastic wrap, then foil, and freeze for up to 3 months. Bake from frozen, adding 5-7 minutes to the cooking time.
Reheating: The best way to reheat is in a toaster oven or a 350°F oven for 5-7 minutes. This will restore the crispiness. Avoid microwaving, as it will make the bread tough and rubbery.
Conclusion
Mastering this simple recipe is a game-changer for any home cook. It transforms a humble loaf of bread into a golden, aromatic, and irresistible side dish that pairs perfectly with pasta, soups, salads, or just about anything. The key takeaway is that the magic lies in the details: the quality of the ingredients, the technique of creating a perfect compound butter, and the careful control of heat. By making your own Garlic Bread, you are not just preparing a side; you are creating an experience. We encourage you to try this recipe tonight and see how a perfectly made Garlic Butter can elevate your entire meal. Share your golden-brown results in the comments below!
FAQs
1. Can I use garlic powder instead of fresh garlic?
You can, but fresh garlic is highly recommended for a superior flavor. If using powder, use about 1 teaspoon for the entire recipe. You will miss the aromatic punch and texture of fresh garlic.
2. My bread is browning too fast but isn’t crisp in the center. What should I do?
Your oven might be running hot, or the rack is too close to the heating element. Lower the oven temperature to 375°F (190°C) and bake for a longer time. If the top is getting dark, tent the bread loosely with foil.
3. How can I make my garlic bread extra crispy?
After baking, you can finish it under the broiler for 1-2 minutes. Also, ensure your bread is a day-old or a very crusty variety. The slightly drier texture of day-old bread crisps up better than fresh, soft bread.
4. Can I prepare the garlic butter in advance?
Absolutely! The compound butter can be made 3-5 days in advance and stored in the refrigerator. Let it come to room temperature for 30 minutes before spreading. You can also freeze it in a log shape, then slice it as needed.
5. What if I only have salted butter?
That’s fine. Simply omit the added salt in the recipe. Taste the butter mixture before spreading to ensure it isn’t too salty for your liking.
Best way to grow your perfect Garlic Bread in 3 steps
Ingredients
Equipment
Method
- Preheat oven to 375°F (190°C). In a small bowl, combine softened butter, minced garlic, chopped parsley, salt, and pepper until well mixed.
- Slice the French bread lengthwise or into individual slices. Spread the garlic butter mixture evenly over the cut sides of the bread.
- Place the buttered bread on a baking sheet and bake for 10-15 minutes, or until golden brown and crispy. Serve immediately.