The Ultimate Homemade Turkey Gravy: Your Thanksgiving Dinner Game-Changer
Have you ever sat down to a beautifully roasted turkey, only to find yourself reaching for a store-bought gravy that tastes like salty brown water? There’s no reason to settle. Mastering a rich, velvety Turkey Gravy from scratch transforms your entire Thanksgiving dinner into a culinary masterpiece. Preparing it at home allows you to control every nuance—from the depth of roasted flavor to the perfect silky consistency—making your holiday spread unforgettable. Let’s dive into the science and art of crafting the perfect gravy that will have your guests begging for the recipe.
Ingredients & Kitchen Tools
Essential Ingredients
– Turkey drippings: The golden elixir from your roasting pan; collect about 2 cups (strained)
– Turkey stock or broth: 4 cups, preferably homemade for deeper flavor; low-sodium works well for control
– All-purpose flour: 1/3 cup, for thickening; can substitute with cornstarch for gluten-free
– Unsalted butter: 4 tablespoons; use salted butter if you adjust salt accordingly
– Aromatics: 1 medium onion (quartered), 2 celery stalks (chopped), 2 carrots (chopped)
– Fresh herbs: 3 sprigs thyme, 2 sprigs rosemary, 2 bay leaves
– Salt and black pepper: To taste; white pepper can be used for a subtle flavor difference
– Optional additions: 1/4 cup dry white wine, 1 tablespoon Worcestershire sauce, or 1 teaspoon soy sauce for umami boost
Kitchen Tools
– Roasting pan (preferably heavy-bottomed) for collecting drippings
– Fine-mesh strainer or chinois for silky smooth results
– Fat separator (or a large measuring cup) to remove excess oil
– Whisk (flat or balloon) for lump-free mixing
– Medium saucepan for the final gravy assembly
– Sharp chef’s knife and cutting board
Optional Substitutions
– For gluten-free: Replace flour with 2 tablespoons cornstarch mixed with 2 tablespoons cold water (slurry)
– For dairy-free: Substitute butter with olive oil or plant-based butter
– For deeper color: Add 1 teaspoon Kitchen Bouquet or dark soy sauce
Prep Time & Cooking Schedule
– Prep time: 10 minutes (chopping aromatics, measuring ingredients)
– Active cooking time: 15–20 minutes (making roux, whisking in stock, simmering)
– Resting time: 5 minutes before serving (thickens slightly as it cools)
– Total time: Approximately 25–30 minutes
Planning tip: You can prepare a roux and stock base up to 2 days in advance. However, for the richest flavor, make your gravy immediately after removing the turkey from the oven while drippings are hot and fresh. If hosting a large Thanksgiving dinner, consider making the base one day ahead and finishing it just before serving.
Step-by-Step Instructions
Step 1: Collect and Prepare Drippings
Once your turkey is carved and resting, pour the pan drippings through a fine-mesh strainer into a fat separator (or a large glass measuring cup). Let it sit for 2–3 minutes until the fat rises to the top. Reserve about 4 tablespoons of the fat and set aside the remaining defatted drippings (approximately 1–1.5 cups). You now have the flavor base for your Turkey Gravy.
Step 2: Build the Roux
In your roasting pan (placed over two burners on medium heat), add the reserved 4 tablespoons of fat. Whisk in 1/3 cup all-purpose flour, stirring constantly for 2–3 minutes until the mixture turns a golden-brown color. Key temperature control: Keep the heat at medium—too high, and your flour will burn; too low, and the roux won’t develop enough nutty flavor.
Step 3: Deglaze and Add Aromatics
Slowly pour in 1 cup of dry white wine (optional) or directly begin adding your turkey stock. Whisk vigorously to incorporate the roux, scraping up all the browned bits from the pan bottom. Add your chopped onion, celery, and carrots, along with the fresh herb sprigs. Let the mixture simmer for 5 minutes.
Step 4: Incorporate Drippings and Stock
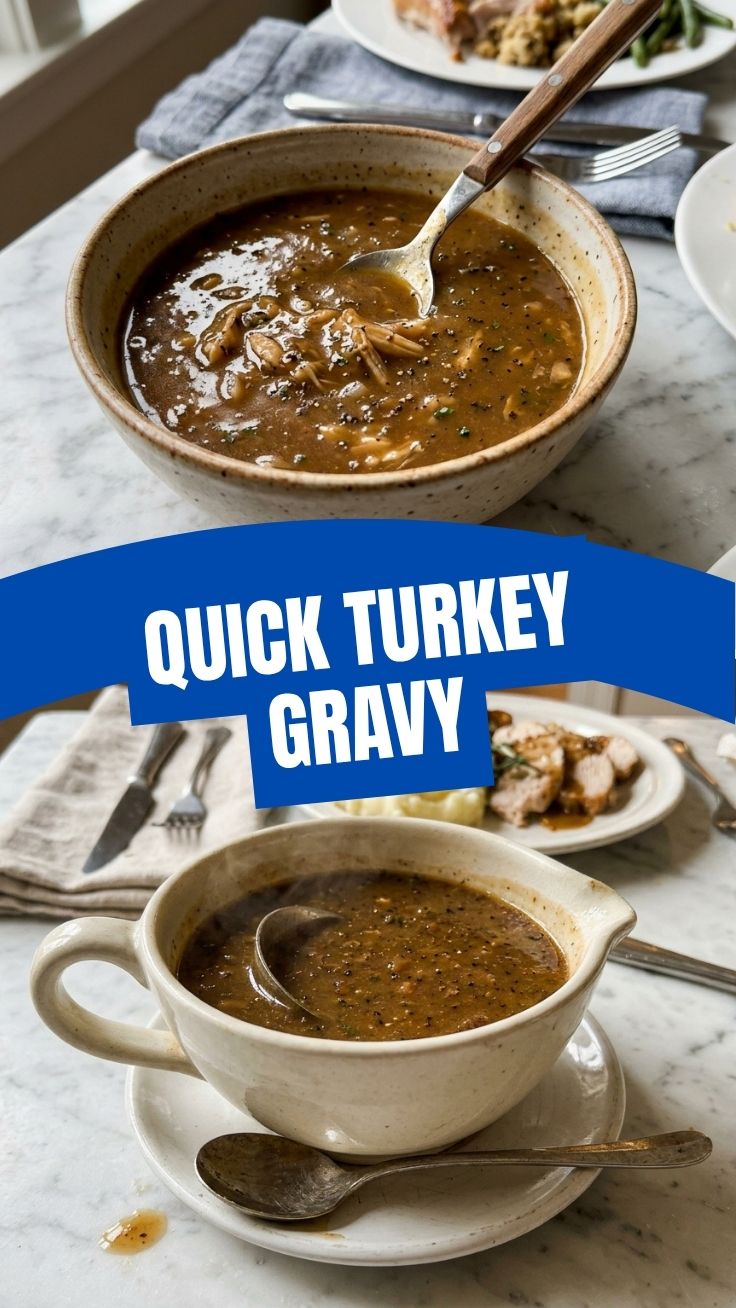
Whisk in the defatted drippings and remaining 3 cups of turkey stock. Increase heat to medium-high until the gravy bubbles, then reduce to low. Simmer for 10–12 minutes, stirring occasionally, until the gravy coats the back of a spoon. Texture cue: The perfect consistency should lightly coat the spoon but not be gloppy—add more stock a tablespoon at a time if needed.
Step 5: Strain and Adjust Seasoning
Pour the gravy through your fine-mesh strainer into a clean saucepan, pressing on solids to extract maximum flavor. Season with salt (start with 1/2 teaspoon), freshly ground black pepper, and any umami boosters like Worcestershire or soy sauce. Taste and adjust. Your Thanksgiving dinner just got a serious upgrade.
Nutritional Benefits & Advantages
Homemade Turkey Gravy offers more than just superior taste. By controlling the ingredients, you reduce sodium by up to 60% compared to store-bought versions. Turkey drippings contain valuable minerals like selenium and zinc, while the bone broth base provides collagen and amino acids that support joint health and digestion. Additionally, the moderate healthy fats from the drippings help your body absorb fat-soluble vitamins (A, D, E, K) from your meal. This isn’t just flavor—it’s functional nourishment.
Tips Variations & Cooking Advice
– Flavor variation: Add 1 teaspoon of Dijon mustard or a splash of balsamic vinegar for acidic brightness
– Ingredient swap: Substitute 1/4 cup of chickpea flour for a gluten-free roux that adds a subtle nuttiness
– Cooking method: For a non-roasting-pan approach, sauté aromatics in a saucepan with butter and flour
– Portion change: Double the recipe easily—just maintain the 1:10 flour-to-liquid ratio by weight
– Dietary adaptation: Use mushroom stock and olive oil for a vegan version, adding 1 teaspoon of nutritional yeast for umami
– Quick hack: If gravy becomes too thick, thin with hot stock or water 1 tablespoon at a time; too thin, whisk in a slurry of 1 tablespoon cornstarch and 1 tablespoon cold water
Common Mistakes to Avoid
– Skipping the fat separation: Excess fat creates greasy, oily gravy; always remove just enough to make the roux
– Using cold stock: Cold liquid clumps with hot roux; always use warm or room-temperature stock
– Over-thickening: Gravy continues to thicken as it cools; remove from heat when it’s still slightly thinner than desired
– Boiling instead of simmering: Violent boiling can break the starch structure, causing thin, watery gravy
– Underseasoning: Remember that gravy carries the entire plate; season boldly with salt and pepper
– Forgetting the resting turkey: Drippings collected from a rested turkey are cleaner and less bloody—don’t rush this step
Storage & Meal Prep Tips
– Refrigeration: Store leftover gravy in an airtight container for up to 4 days. Press plastic wrap directly onto the surface to prevent a skin from forming
– Freezing: Freeze in ice cube trays for 2-tablespoon portions, then transfer to a zip-top bag. Gravy will stay fresh for up to 3 months
– Reheating: Thaw in the refrigerator overnight, then reheat gently in a saucepan over medium-low heat, whisking frequently. Add a splash of stock or water if consistency is too thick
– Texture maintenance: To restore silky smoothness, whisk in 1 teaspoon of butter or a splash of heavy cream just before serving
– Make-ahead tip: Prepare the roux and stock base up to 2 days ahead; simply reheat, add drippings, and finish the day of your meal
Conclusion
Mastering homemade gravy isn’t just about following steps—it’s about transforming your Thanksgiving dinner into a deeply satisfying, flavor-packed experience. This recipe turns humble drippings into liquid gold, elevating every bite of turkey, mashed potatoes, and stuffing. We’ve covered the science of roux, the art of deglazing, and the patience of accurate seasoning. Now it’s your turn. Roll up your sleeves, pour one out for the store-bought packets, and craft a Turkey Gravy that your family will request year after year. Try it this holiday season, snap a photo, and share your results—we’d love to see your masterpiece!
FAQs
1. Can I make gravy without drippings if I don’t roast a whole turkey?
Absolutely. Use a combination of 4 tablespoons butter and 2 cups high-quality turkey or chicken broth as a substitute. Add a teaspoon of poultry seasoning or roasted chicken base for depth.
2. Why is my gravy lumpy?
Lumps form when cold liquid meets hot roux or when you don’t whisk vigorously enough. Prevent this by warming your stock and using a flat whisk. If lumps appear, blend the gravy with an immersion blender or pass it through a fine-mesh strainer.
3. How do I fix gravy that’s too thin?
Create a slurry: whisk 1 tablespoon cornstarch with 2 tablespoons cold water, then stir it into simmering gravy. Let it cook for 2–3 minutes while stirring—it will thicken slowly. Alternatively, let the gravy simmer uncovered to reduce and concentrate.
4. Can I make this gravy dairy-free?
Yes. Replace butter with olive oil or vegan butter for the roux. Use a high-quality vegetable or mushroom stock instead of turkey stock. The rest of the recipe remains unchanged.
5. How far in advance can I make gravy for a large event?
The base (roux, stock, and aromatics) can be made 2 days ahead and refrigerated. Add the drippings and finish the gravy just before serving for maximum freshness and flavor.
Best way to grow a rich Turkey Gravy in 3 steps
Ingredients
Equipment
Method
- In a saucepan over medium heat, whisk together the turkey drippings and flour for 1-2 minutes until a golden-brown roux forms.
- Gradually whisk in the chicken or turkey broth, bringing the mixture to a simmer and stirring constantly until the gravy thickens to your desired consistency.
- Season the gravy with salt and pepper to taste, then remove from heat and serve hot.