The Ultimate Loaded Taco Bowl: A Flavor-Packed Meal That’s Easier Than Takeout
Are you tired of bland salads and repetitive dinner routines? Imagine a dish that combines the crunch of fresh vegetables, the warmth of seasoned protein, and the creamy richness of melted cheese—all in one bowl. That’s exactly what a homemade Taco Bowl delivers. Preparing this vibrant meal at home not only saves money but also gives you complete control over ingredients, allowing you to customize it for your taste and dietary needs. Whether you’re feeding a busy family or meal-prepping for the week, mastering this dish is a game-changer. In this guide, we’ll walk you through the perfect taco bowl recipe step by step, ensuring restaurant-quality results every time.
Ingredients & Kitchen Tools
For the Bowl Base
– Protein (ground beef, turkey, or plant-based crumbles): Opt for lean ground beef (80/20) for rich flavor without excess grease.
– Black beans (canned or cooked from dry): Rinse canned beans to reduce sodium; adds fiber and creaminess.
– Corn kernels (frozen, canned, or fresh): Adds sweetness and texture; charred corn brings smoky notes.
– Mixed greens or cilantro-lime rice (or cauliflower rice for low-carb): Choose sturdy greens like romaine or spinach for crunch.
– Cherry tomatoes (halved): Provides acidity and freshness.
– Shredded cheddar or Monterey Jack cheese: Melts beautifully and adds richness.
– Sour cream or Greek yogurt: Tangy contrast; Greek yogurt boosts protein.
– Avocado (sliced): Healthy fats and creamy texture.
– Fresh cilantro and lime: Essential for brightness.
Seasonings & Sauce
– Chili powder, cumin, smoked paprika, garlic powder, onion powder, salt, and pepper: Core taco seasoning mix; adjust for heat.
– Salsa or pico de gallo: Store-bought or homemade; choose medium or hot.
– Hot sauce (optional): For extra kick.
Kitchen Tools
– Large skillet or cast-iron pan: Even heat distribution for browning.
– Mixing bowls (small and large): For combining ingredients and serving.
– Chef’s knife and cutting board: For chopping vegetables.
– Measuring spoons: For precise seasoning.
– Tongs or spatula: For flipping and mixing.
– Optional: Rice cooker (if using rice), blender (for creamy sauces).
Quick Substitutions: Use ground chicken or tofu for leaner protein; swap cheese for vegan shreds; replace sour cream with cashew cream for dairy-free.
Prep Time & Cooking Schedule
– Prep Time: 15 minutes (chopping veggies, mixing seasoning, rinsing beans)
– Cook Time: 20 minutes (browning meat, warming beans, cooking rice or veggies)
– Resting Time: 5 minutes (letting flavors meld before assembly)
Total: 40 minutes. This timeline ensures everything is hot when served. For meal prep, note that grains and proteins stay fresh for up to 4 days when stored separately—reheat and assemble just before eating.
Step-by-Step Instructions
1. Prepare the Protein: Heat a tablespoon of oil in a large skillet over medium-high heat. Add 1 lb ground beef and break it apart with a spatula. Cook until browned, about 6–8 minutes. Drain excess fat if needed. Stir in 2 tablespoons of taco seasoning (or your mix) along with ¼ cup water. Simmer for 2 minutes until thickened. Touch the meat—it should feel slightly firm but not dry.
2. Warm the Beans and Corn: In a separate small pan, heat canned black beans (rinsed) and corn over medium heat with a pinch of cumin and salt. Cook for 3–4 minutes until steaming.
3. Build the Foundation: For a lettuce base, toss mixed greens with lime juice. For rice, fluff pre-cooked cilantro-lime rice. Spread a layer in your bowl (about 1 cup per serving).
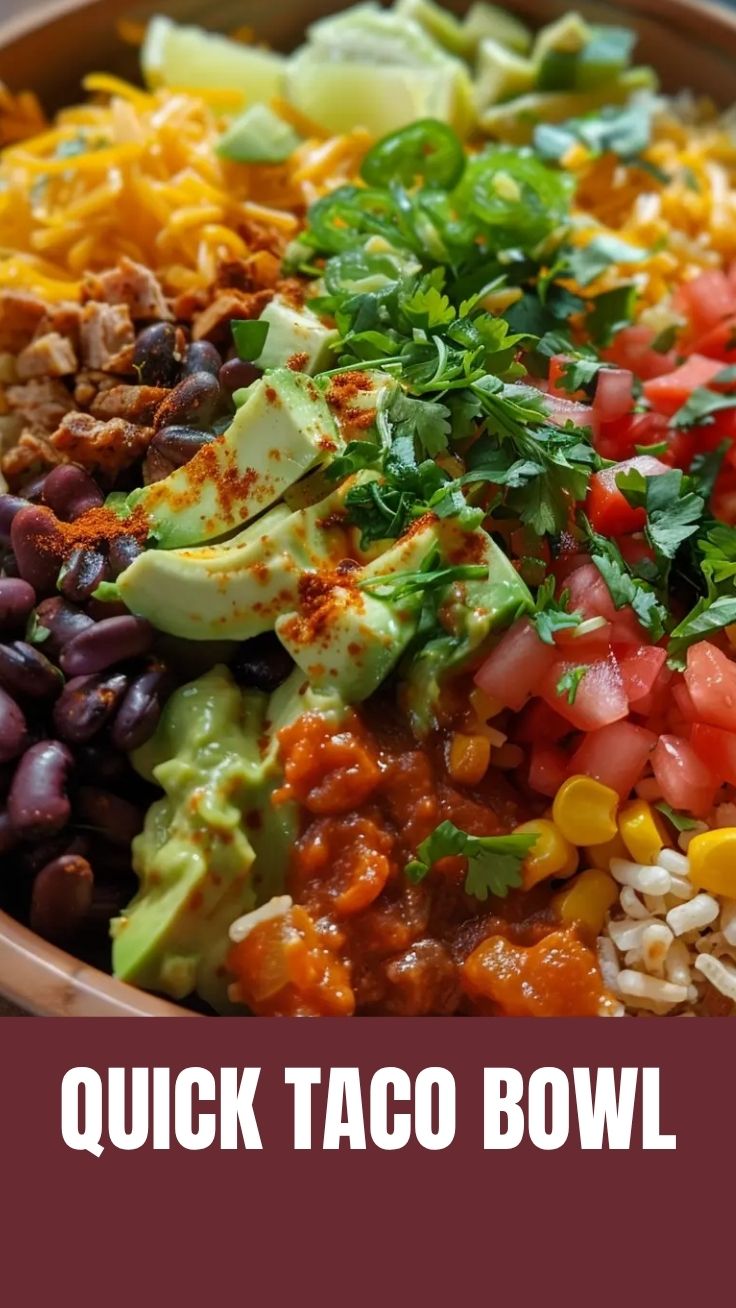
4. Assemble the Layers: Arrange the seasoned protein on one side, then add beans and corn. Top with cherry tomatoes, shredded cheese, avocado slices, and a dollop of sour cream. Drizzle salsa and hot sauce as desired. Garnish with fresh cilantro.
5. Serve Immediately: For the best texture, eat right after assembly. The contrast between warm fillings and cool toppings is key.
Tip: To prevent soggy bowls, place wet ingredients (sour cream, salsa) on top rather than mixing them into the base. This Taco Bowl becomes a weeknight staple once you master the layering—our family’s go-to taco bowl recipe requires no specialty equipment, just fresh ingredients and a bit of planning.
Nutritional Benefits & Advantages
A loaded taco bowl is a nutritional powerhouse. The protein (beef or turkey) provides iron and B vitamins, while black beans deliver fiber and plant-based protein for sustained energy. Avocado contributes heart-healthy monounsaturated fats, and tomatoes offer lycopene, an antioxidant linked to reduced inflammation. Using a bed of greens instead of rice cuts carbs by 30% while boosting vitamins A, C, and K. This meal is naturally gluten-free (verify seasoning labels) and can be made dairy-free with ease. The balanced macros (roughly 35g protein, 40g carbs, 20g fat per serving) make it ideal for fitness enthusiasts and busy parents alike.
Tips Variations & Cooking Advice
– Flavor Twists: Swap ground beef for shredded chicken (cooked in salsa) or grilled steak strips. Use chipotle peppers in adobo for a smoky heat.
– Ingredient Swaps: Replace black beans with pinto or refried beans; use avocado crema (blend avocado with lime and cilantro) instead of sour cream.
– Cooking Methods: Try an Instant Pot for the meat (sauté setting) or air-fry the corn on the cob for deeper char.
– Portion Changes: Serve in large tortilla bowls or over crispy tostadas for a fun presentation.
– Dietary Adaptations: For vegan version, use lentils or jackfruit seasoned with taco spices, and nutritional yeast for cheesy flavor.
Common Mistakes to Avoid
1. Overcrowding the Skillet: Brown meat in batches if needed—crowding steams instead of searing, leading to dry, gray protein.
2. Skipping the Drain: Not draining fat after browning results in a greasy bowl. Use a slotted spoon or tilt the pan.
3. Wet Components Drowning the Base: Soggy lettuce or rice ruins texture. Pat tomatoes dry, and avoid adding wet salsa until just before serving.
4. Under-seasoning: Taste the protein before assembly—taco seasoning needs enough salt and acid (lime) to pop. Adjust gradually.
5. Overloading the Bowl: Too many toppings can make it messy. Stick to 4–5 key components for balance.
Storage & Meal Prep Tips
– Refrigeration: Store cooked protein, beans, and corn separately in airtight containers for up to 4 days. Keep greens and toppings (avocado, tomatoes, cheese) in separate bags.
– Freezing: The seasoned beef freezes well for up to 3 months. Thaw overnight in the fridge.
– Reheating: Warm protein and beans in a skillet over medium heat with a splash of water to restore moisture. Microwave greens-free bowls on 70% power for 1 minute. Avoid reheating avocado—slice fresh instead.
– Meal Prep Tip: Prep all chopped veggies and seasoning mix in advance. Assemble individual bowls when ready—this saves 15 minutes nightly.
Conclusion
Creating a homemade Taco Bowl is about more than just dinner—it’s about building a meal that’s flexible, nutritious, and deeply satisfying. From the first bite of seasoned meat to the final scoop of creamy avocado, every layer plays a role. We’ve shared a foolproof taco bowl recipe that cuts out takeout costs while maximizing flavor. The key is balancing textures and temperatures: hot fillings, cool toppings, and crunchy accents. Whether you stick to the classic version or experiment with Thai-inspired or Mediterranean twists, this dish adapts to your cravings. Try it tonight, snap a photo of your creation, and share your favorite variation in the comments. For more bowl-based inspiration, explore our collection of 20-minute weeknight meals—your taste buds will thank you.
FAQs
1. Can I make this taco bowl gluten-free?
Absolutely. Use certified gluten-free taco seasoning (many blends are), and serve over greens or rice instead of flour tortillas. Corn tortillas chips are a great crunchy addition if tolerated.
2. What’s the best way to cook ground turkey without it drying out?
Brown turkey in a skillet with a tablespoon of oil, don’t over-stir, and add the seasoning mixture with a little extra water. Cook only until no pink remains—about 5–7 minutes. Add a splash of chicken broth if needed.
3. How do I keep avocado from browning after slicing?
Brush cut sides with lime or lemon juice, and store in an airtight container with a pit (yes, the pit helps). For prepped bowls, add avocado just before eating.
4. Can I use frozen corn directly without thawing?
Yes. Add frozen corn to a hot skillet—it will char nicely as the moisture evaporates. Cook 3–4 minutes until tender and slightly browned.
5. What if I don’t have taco seasoning?
Make your own: mix 1 tablespoon chili powder, 1 teaspoon cumin, 1 teaspoon paprika, ½ teaspoon garlic powder, ½ teaspoon onion powder, ½ teaspoon salt, and ¼ teaspoon black pepper. This works for 1 lb of protein.
Proven way to grow 5 amazing Taco Bowl
Ingredients
Equipment
Method
- Brown the ground beef or turkey in a large skillet, then drain any excess fat.
- Add the taco seasoning and water according to package directions, simmering until thickened.
- Warm taco shells or tortilla bowls as directed on the package before filling with the seasoned meat.
- Arrange a variety of fresh toppings such as shredded lettuce, diced tomatoes, chopped onion, shredded cheese, salsa, sour cream, and avocado slices.
- Optionally, add black beans and corn to each bowl for extra flavor and substance.