The Ultimate Guide to Baking a Perfect Pumpkin Pie at Home
Have you ever wondered why a homemade Pumpkin Pie tastes so much richer than anything from a store shelf? The secret lies in the careful balance of silky pumpkin purée, creamy evaporated milk, and a fragrant blend of warming spices. Preparing this classic autumn dessert from scratch not only fills your kitchen with an irresistible aroma but also lets you control every ingredient for a fresher, more personalized result. Whether you are a seasoned baker or a beginner, this guide will walk you through each step to ensure your pie turns out flawless. The star of the show is, of course, the pumpkin pie spice—a cozy mix of cinnamon, nutmeg, ginger, and cloves that gives the filling its signature warmth.
Ingredients & Kitchen Tools
To create a velvety, perfectly spiced pie, gather the following ingredients and tools. Each item plays a specific role in texture, flavor, or structural integrity.
– Pie crust (9-inch, unbaked) – Use a store-bought deep-dish shell or your favorite homemade pastry. A chilled crust prevents shrinking.
– Pumpkin purée (1 can, 15 oz) – Not pumpkin pie filling. Pure purée gives you control over sweetness and spice.
– Evaporated milk (1 can, 12 oz) – Adds creaminess without the fat content of heavy cream. Substitute with coconut milk for a dairy-free version.
– Large eggs (2) – Provide structure and richness. For a vegan option, use flax eggs (1 tbsp ground flax + 3 tbsp water per egg).
– Granulated sugar (¾ cup) – Balances the earthy pumpkin. You can reduce to ½ cup for a less sweet pie.
– Light brown sugar (¼ cup, packed) – Adds molasses depth. Dark brown sugar works too.
– Pumpkin pie spice (2 teaspoons) – This is the hallmark blend. Make your own: 1 tsp cinnamon, ½ tsp ginger, ¼ tsp nutmeg, ¼ tsp cloves.
– Vanilla extract (1 teaspoon) – Enhances the spices.
– Salt (¼ teaspoon) – Sharpens all flavors.
Essential tools: 9-inch pie dish, mixing bowls, whisk, measuring cups/spoons, rolling pin (if making crust), cooling rack, and a pie shield or foil for the crust edge.
Prep Time & Cooking Schedule
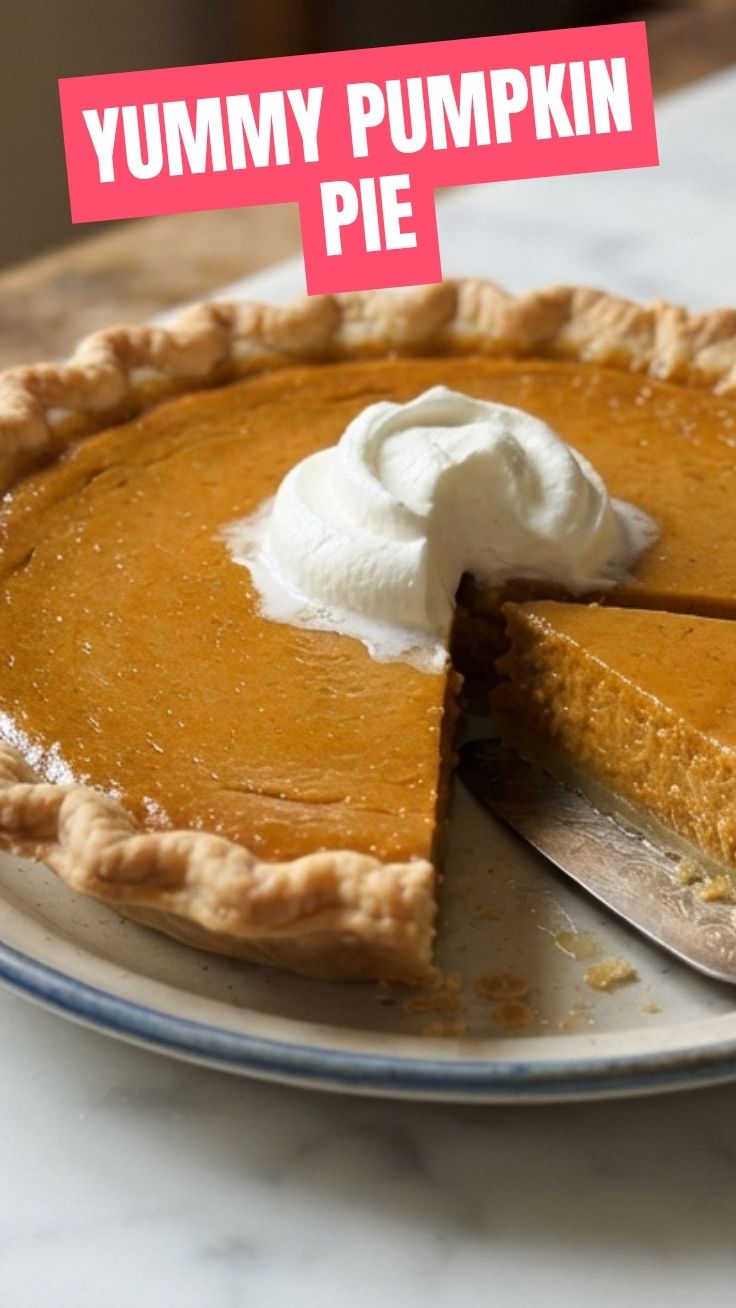
Planning your time is crucial for a stress-free bake. Here is the breakdown:
– Active prep time: 15 minutes – Whisk the filling, roll out the crust, and assemble.
– Blind baking (optional but recommended): 15 minutes – Par-bake the crust at 375°F (190°C) with pie weights to prevent a soggy bottom.
– Bake time: 45–50 minutes at 375°F (190°C) – The filling should be set around the edges but still slightly jiggly in the center.
– Cooling time: At least 2 hours at room temperature, then 2–4 hours in the refrigerator. This allows the custard to fully set for clean slices.
Tip: Bake your pie a day ahead. The flavors deepen overnight, making it even more delicious.
Step-by-Step Instructions
1. Preheat the oven to 375°F (190°C). Position a rack in the lower third of the oven to ensure the bottom crust bakes thoroughly.
2. Prepare the crust. If using homemade, roll it out to ⅛-inch thickness and press into a 9-inch pie dish. Crimp the edges. For a store-bought shell, simply place it in the dish. If you dislike soggy bottoms, line the crust with parchment, fill with pie weights or dried beans, and blind bake for 15 minutes. Remove weights and parchment, then bake for another 5 minutes until lightly golden.
3. Make the filling. In a large bowl, whisk together the pumpkin purée, evaporated milk, eggs, granulated sugar, brown sugar, vanilla, salt, and pumpkin pie spice. Whisk until completely smooth and uniform. Taste the raw filling—it should be well-spiced with a balanced sweetness.
4. Pour the filling into the warm crust. Fill to about ⅛ inch below the rim to allow for slight puffing.
5. Bake with care. Place the pie on the lower oven rack. Bake for 45–50 minutes. To prevent the crust edge from over-browning, cover it with a pie shield or strips of foil after the first 20 minutes. The pie is done when the center wobbles just slightly like set Jell-O, and a knife inserted 1 inch from the edge comes out clean. The internal temperature should reach 175°F (80°C).
6. Cool completely. Transfer to a wire rack and cool for 2 hours at room temperature. Then refrigerate, uncovered, for at least 2 more hours before serving. This step is non-negotiable for a sliceable Pumpkin Pie.
Nutritional Benefits & Advantages
Pumpkin is a nutritional powerhouse. One cup of cooked pumpkin provides over 200% of your daily vitamin A needs, supporting eye health and immune function. It is also rich in fiber, potassium, and vitamin C. The pumpkin pie spice blend adds antioxidants from cinnamon, which may help regulate blood sugar, and ginger, which aids digestion. Using evaporated milk instead of heavy cream reduces saturated fat while keeping the texture luxuriously creamy. This dessert can be part of a balanced holiday meal—especially if you opt for a whole-wheat crust and reduce the sugar by one-third.
Tips, Variations & Cooking Advice
– Flavor twist: Add 1 tablespoon of bourbon or dark rum to the filling for a grown-up kick.
– Spice swap: If you lack pumpkin pie spice, use 1½ tsp cinnamon, ½ tsp ginger, ¼ tsp nutmeg, and a pinch of cloves.
– Dietary adaptations: For a gluten-free crust, use a blend of almond flour and oat flour, or a pre-made gluten-free shell. For a dairy-free pie, substitute evaporated milk with full-fat coconut milk (shake the can well before measuring).
– Texture upgrade: For a super-smooth filling, strain the pumpkin purée through a fine-mesh sieve before whisking.
– Portion change: This recipe works perfectly as mini pies in a standard muffin tin. Reduce baking time to 20–25 minutes.
Common Mistakes to Avoid
– Overbaking the filling. A dry, cracked pie is the result of too much oven time. Remove it when the center is still jiggly—it will continue to set as it cools.
– Soggy bottom crust. Blind bake the crust for 15 minutes, and always pour the filling into a warm crust. Avoid overfilling, as excess liquid seeps into the pastry.
– Not cooling properly. Slicing a warm pie will turn it into a mess. Follow the minimum 4-hour cooling schedule.
– Using pumpkin pie filling instead of pure purée. Pre-sweetened fillings contain added sugar and spices, throwing off the balance of your recipe.
Storage & Meal Prep Tips
– Refrigeration: Store leftover pie covered with plastic wrap or in an airtight container in the refrigerator for up to 4 days.
– Freezing: Wrap the fully cooled pie tightly in two layers of plastic wrap and one layer of foil. Freeze for up to 3 months. Thaw overnight in the refrigerator before serving.
– Reheating: To revive a cold pie, warm individual slices in a 300°F (150°C) oven for 10 minutes. This restores the crust’s crispness and the filling’s creaminess. Avoid microwaving, as it will make the crust rubbery.
– Meal prep: You can make the pie crust and filling separately up to 2 days in advance. Store the crust in the fridge and the filling in a sealed container. Assemble and bake on the day you plan to serve.
Conclusion
Mastering a homemade Pumpkin Pie is a rewarding skill that brings warmth and tradition to any table. By taking the time to balance the silky pumpkin filling with the aromatic pumpkin pie spice, you create a dessert that is infinitely more satisfying than any store-bought version. The key takeaways are simple: blind bake your crust, avoid overbaking, and allow ample cooling time. With these techniques, you will consistently produce a pie with a flaky, golden crust and a velvety, sliceable center. I encourage you to try this recipe for your next holiday gathering or cozy autumn weekend. Share your results with friends and family, and explore related desserts like spiced pumpkin cheesecake or pumpkin bread for even more seasonal inspiration.
FAQs
1. Can I use fresh pumpkin instead of canned purée?
Yes. Roast a sugar pumpkin (not a carving pumpkin) at 350°F for 45 minutes until tender. Scoop out the flesh and purée in a food processor. Strain through a cheesecloth to remove excess moisture—fresh pumpkin is often more watery than canned.
2. How do I know when my pumpkin pie is done?
The edges should be set and slightly puffed, while the center should jiggle like a firm custard. A thermometer inserted into the center should read 175°F (80°C). The surface will be matte, not shiny.
3. Why did my pie crust shrink during baking?
Shrinking happens when the dough is overworked or the gluten is too developed. Chill the crust for at least 30 minutes before baking, and avoid stretching the dough when pressing it into the dish.
4. Can I make this pie ahead of time?
Absolutely. The pie tastes better after a day in the fridge, as the flavors meld. Bake it up to 2 days in advance, cool completely, and store tightly covered in the refrigerator.
5. My pie filling is watery. What went wrong?
This usually occurs from underbaking or using fresh pumpkin that wasn’t drained properly. Ensure your pie reaches the correct internal temperature, and always strain fresh pumpkin purée through a cheesecloth or fine sieve.
Quick way to grow Pumpkin Pie
Ingredients
Equipment
Method
- Preheat your oven to 425°F (220°C) and prepare the pie crust by placing it in a 9-inch pie dish.
- In a large bowl, whisk together the pumpkin puree, evaporated milk, eggs, sugar, cinnamon, ginger, cloves, and salt until smooth.
- Pour the pumpkin mixture into the prepared pie crust and bake for 15 minutes at 425°F (220°C).
- Reduce the oven temperature to 350°F (175°C) and continue baking for another 35-40 minutes, or until a knife inserted near the center comes out clean.
- Let the pie cool completely on a wire rack before serving, which allows the filling to set properly.