The Ultimate Guide to Perfectly Creamy Mac and Cheese: A Comfort Food Classic
Is there anything more satisfying than diving into a bowl of rich, velvety mac and cheese? This timeless dish has earned its place as the ultimate comfort food—the kind of meal that soothes the soul after a long day and brings families together around the dinner table. While boxed versions offer convenience, preparing this Mac and Cheese from scratch unlocks a world of flavor and texture that simply can’t be replicated. The secret lies in the perfect cheese blend, proper sauce technique, and a touch of patience. Mac and cheese made at home costs less per serving than restaurant versions and allows you to control every ingredient. Let’s dive into how you can create a restaurant-quality version that rivals any gourmet kitchen.
Ingredients & Kitchen Tools
Essential Ingredients:
– Elbow macaroni (8 oz) – Holds sauce perfectly; cavatappi or shells work well too
– Sharp cheddar (2 cups shredded) – Provides bold, tangy flavor
– Gruyère (1 cup shredded) – Adds nutty, creamy meltability
– Whole milk (2 cups) – Creates richness; 2% works but avoid skim
– Unsalted butter (3 tbsp) – For roux and richness control
– All-purpose flour (3 tbsp) – Thickens sauce without lumps
– Dijon mustard (1 tsp) – Brightens flavor without tasting mustardy
– Salt & white pepper – White pepper blends invisibly; black pepper works too
– Panko breadcrumbs (½ cup) – For crispy golden topping
Kitchen Tools:
– Large pot – For boiling pasta
– Medium saucepan – For béchamel sauce
– Whisk – Essential for lump-free roux
– 8×8 baking dish – Standard size; 9×9 works too
– Cheese grater – Pre-shredded cheese contains anti-caking agents that prevent smooth melting
– Colander – For draining pasta
Optional Substitutions:
– Milk alternative – Whole milk + ¼ cup heavy cream for extra richness
– Cheese swap – Monterey Jack, Gouda, or fontina for different flavor profiles
– Gluten-free option – Gluten-free pasta + 1:1 gluten-free flour blend
Prep Time & Cooking Schedule
– Prep time: 15 minutes (shred cheese, measure ingredients, grease dish)
– Cook time: 25 minutes total
– Bake time: 20 minutes at 375°F
– Resting time: 5 minutes after baking (critical for sauce to set)
– Total time: 45 minutes
Planning tip: Shred cheese while pasta water comes to a boil to maximize efficiency. The sauce can be made up to 24 hours ahead and refrigerated—just reheat gently before combining.
Step-by-Step Instructions
Step 1: Preheat and Season Water
Preheat oven to 375°F. Bring a large pot of generously salted water to a rolling boil (1 tablespoon salt per quart). The pasta absorbs salt during cooking, seasoning from within.
Step 2: Cook Pasta Al Dente
Add elbow macaroni and cook 1 minute less than package directions—pasta continues cooking in the oven. Reserve ½ cup pasta water before draining. This starchy liquid is gold for adjusting sauce consistency.
Step 3: Build the Roux
In a saucepan, melt butter over medium heat. Whisk in flour and cook for 2 minutes, stirring constantly until mixture turns pale golden. This removes raw flour taste and ensures proper thickening.
Step 4: Create the Creamy Base
Slowly pour in milk while whisking vigorously. Continue whisking for 3-4 minutes until sauce thickens enough to coat the back of a spoon. The mixture should bubble gently—adjust heat to prevent scorching.
Step 5: Add Cheese and Seasonings
Reduce heat to low. Add shredded cheese by handfuls, stirring until completely melted before adding more. Stir in Dijon mustard, ½ teaspoon salt, and ¼ teaspoon white pepper. Taste and adjust—aged cheddar may require less salt. The sauce should be glossy and smooth.
Step 6: Combine and Transfer
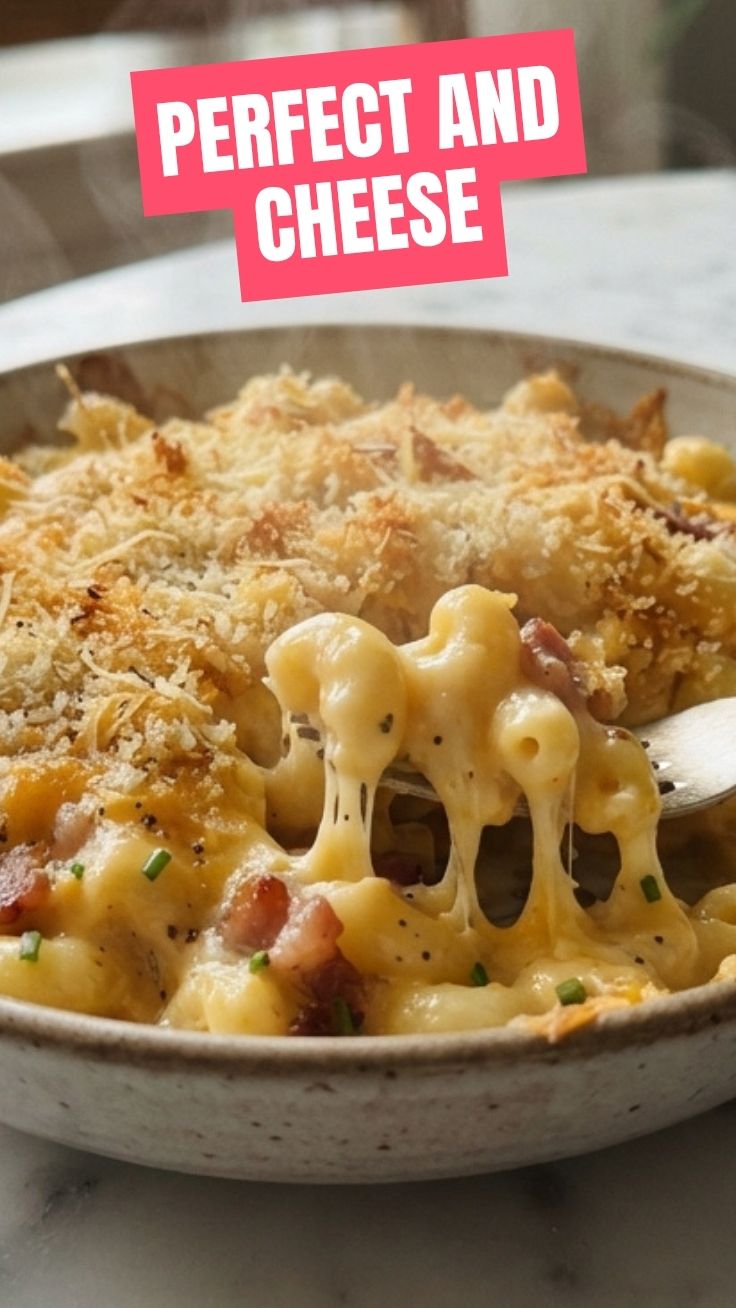
Pour sauce over drained pasta and fold gently with a rubber spatula. If sauce seems thick, add reserved pasta water a tablespoon at a time. Transfer to greased baking dish and top with panko breadcrumbs mixed with 1 tablespoon melted butter. For an extra indulgence, add crispy bacon bits—this comfort food variation has become a family favorite.
Step 7: Bake to Golden Perfection
Bake uncovered for 20 minutes until bubbling and golden. For a deeper crust, broil for 2 minutes (watch carefully). Let rest 5 minutes before serving—this allows the sauce to stabilize.
Nutritional Benefits & Advantages
This homemade mac and cheese offers significant nutritional advantages over processed versions. Mac and cheese prepared with whole milk and real cheese provides 15-20% of daily calcium needs per serving, supporting bone health. The protein content (approximately 18g per serving) comes from high-quality dairy and pasta, providing sustained energy. Using sharp cheddar allows you to use less cheese overall while maximizing flavor—naturally reducing calories compared to milder cheeses.
A single serving contains around 420 calories, 22g fat, 38g carbohydrates, and 3g fiber when using whole-grain pasta. The satiety factor is remarkably high due to the protein-fat-carbohydrate balance, meaning you’ll feel satisfied with a reasonable portion. For those monitoring sodium, making from scratch reduces sodium by 40-60% compared to boxed mixes.
Tips Variations & Cooking Advice
Flavor Variations:
– Smoked paprika – Adds smoky depth without heat
– Truffle oil – Drizzle 1 teaspoon before serving for luxury
– Lobster mac – Fold in 8 oz cooked lobster meat before baking
– Buffalo chicken – Mix in shredded rotisserie chicken + hot sauce
Dietary Adaptations:
– Dairy-free – Use plant-based butter, oat milk (creamiest alternative), and vegan cheese shreds
– Lower fat – Substitute 2% milk and reduce cheese by ¼ cup; add puréed cauliflower for creaminess
– High-protein – Swap half the pasta for cooked lentils or use chickpea pasta
Cooking Methods:
– Stovetop only – Omit breadcrumbs; cook pasta in sauce for 5 minutes
– Slow cooker – Assemble in greased slow cooker; cook on low 2-3 hours
– Instant Pot – Pressure cook pasta 4 minutes; stir in sauce and broil topping
Portion changes: Double recipe for a 9×13 dish; half recipe fits an 8×8 pan perfectly.
Common Mistakes to Avoid
Mistake 1: Overcooking pasta
Mushy pasta destroys texture. Always cook 1 minute less than package directions—the oven finish will bring it to perfection.
Mistake 2: Pre-shredded cheese
Anti-caking agents prevent smooth melting. Always grate cheese fresh from a block for silky sauce.
Mistake 3: Sauce separates (grainy texture)
Caused by high heat or adding cheese too quickly. Keep heat low and add cheese gradually, stirring constantly.
Mistake 4: Sauce too thin
Under-cooked roux is the culprit. Cook flour-butter mixture for full 2 minutes until it smells nutty.
Mistake 5: Bland results
Underseasoning is common. Taste cheese sauce before adding pasta—it should be slightly more seasoned than desired, as pasta dilutes flavor.
Mistake 6: Soggy topping
Breadcrumbs absorb moisture if dish sits before baking. Apply topping immediately before baking.
Storage & Meal Prep Tips
Refrigeration: Store in airtight container for up to 5 days. To reheat, add 1 tablespoon milk per serving and microwave in 30-second bursts, stirring between each. Alternatively, reheat in 350°F oven covered with foil for 15 minutes.
Freezing: Mac and cheese freezes exceptionally well. Cool completely, wrap tightly in plastic wrap then foil, and freeze for up to 3 months. Thaw overnight in refrigerator before reheating. Avoid freezing if you used cream cheese or sour cream as they may separate.
Meal prep: Assemble completely but don’t bake. Cover and refrigerate up to 48 hours before baking. Add 5-10 minutes to baking time if starting from cold. For best results, let dish sit at room temperature 30 minutes before baking.
Reheating tip: To restore creamy texture in leftovers, sprinkle with a little water and cover when microwaving. For stovetop reheating, add a splash of milk and stir over low heat.
Conclusion
Creating the perfect mac and cheese at home transforms a simple side dish into a memorable culinary experience. The creamy sauce, perfectly cooked pasta, and golden crust come together to deliver comfort food at its finest. Homemade mac and cheese offers superior flavor, better nutrition, and wallet-friendly savings compared to restaurant or boxed alternatives. Whether you serve it alongside grilled chicken or as a standalone meal, the satisfaction of pulling a bubbling, golden dish from the oven is unmatched.
Now it’s your turn—gather your ingredients, fire up the stove, and create a batch that will have everyone asking for seconds. Share your results in the comments, tag us in your photos, and explore our collection of classic recipes for more family favorites. Your perfect mac and cheese journey starts now!
FAQs
Can I use pre-shredded cheese in a pinch?
Yes, but expect a slightly grainier texture. Look for “bagged” shredded cheese that contains no anti-caking agents like potato starch or cellulose. Shredding your own block cheese always yields superior results.
Why did my sauce turn out lumpy?
Lumps occur when flour isn’t fully incorporated or milk is added too quickly. Whisk constantly while adding milk in a slow stream. If lumps appear, use an immersion blender to smooth the sauce.
How can I make this gluten-free?
Use gluten-free pasta (cook 1 minute less than directed) and substitute all-purpose flour with a 1:1 gluten-free baking blend. Add 2 minutes to roux cooking time to remove raw flour taste.
Can I make the sauce ahead of time?
Absolutely! Prepare the cheese sauce up to 24 hours in advance, cool completely, and refrigerate. Reheat gently over low heat, adding milk to restore consistency before combining with pasta.
What’s the best cheese combination for maximum flavor?
Equal parts sharp cheddar, Gruyère, and smoked Gouda creates an unbeatable flavor profile. Add a splash of truffle oil or a pinch of cayenne for gourmet flair.