Why This Homemade Apple Pie Will Change Your Baking Game Forever
Have you ever bitten into a store-bought pie and felt something was missing—that perfect balance of buttery crust, cinnamon-spiced apples, and a golden-brown finish? This homemade Apple Pie recipe delivers exactly that: a warm, comforting dessert that fills your kitchen with nostalgia and your table with smiles. Preparing it at home isn’t just about saving money; it’s about controlling every ingredient—from selecting the juiciest apples to customizing the sweetness level. Whether you’re a seasoned baker or a first-timer, this guide ensures your results rival any bakery. Plus, mastering this recipe opens the door to exploring countless dessert recipes with confidence. Let’s dive into the data-driven secrets for the perfect pie.
Ingredients & Kitchen Tools
For the Crust
– 2 ½ cups all-purpose flour (or gluten-free blend for dietary needs)
– 1 cup cold unsalted butter (cubed; crucial for flakiness via steam pockets)
– 1 tsp salt (balances sweetness)
– 1 tbsp sugar (optional, for slight caramelization)
– 6–8 tbsp ice water (add gradually; too much makes dough tough)
For the Filling
– 6–7 medium apples (mix Granny Smith and Honeycrisp for tartness + sweetness)
– ¾ cup granulated sugar (adjust based on apple sweetness)
– 2 tbsp all-purpose flour (thickener; substitute cornstarch for gluten-free)
– 1 tsp cinnamon (star spice of many dessert recipes)
– ¼ tsp nutmeg
– 1 tbsp lemon juice (prevents browning and brightens flavor)
– 1 tbsp butter (dotted on top before baking)
Kitchen Tools
– 9-inch pie dish (glass or ceramic for even heat)
– Rolling pin, pastry cutter or food processor, sharp knife, and pastry brush (for egg wash).
Prep Time & Cooking Schedule
– Prep Time: 30 minutes (including peeling and dicing apples)
– Chill Time: 1 hour (dough rests to relax gluten, prevents shrinkage)
– Bake Time: 50–60 minutes at 375°F (190°C)
– Cool Time: 2–3 hours (essential for set filling; rush this and it’ll run)
Pro tip: Start the dough first so it chills while you prep the filling. This timing prevents soggy bottoms and ensures a crisp, golden crust.
Step-by-Step Instructions
1. Make the dough: In a bowl, combine flour and salt. Cut in cold butter until pea-sized crumbs form. Add ice water tablespoon by tablespoon, mixing until dough just holds together—don’t overwork. Divide into two discs, wrap in plastic, chill for 1 hour.
2. Prepare the filling: Peel, core, and slice apples (⅛-inch thick for even cooking). In a bowl, toss with sugar, flour, cinnamon, nutmeg, and lemon juice. Let sit 15 minutes to release juices—a key step for this Apple Pie to avoid a watery center. This technique is common in many dessert recipes for fruit-based pies.
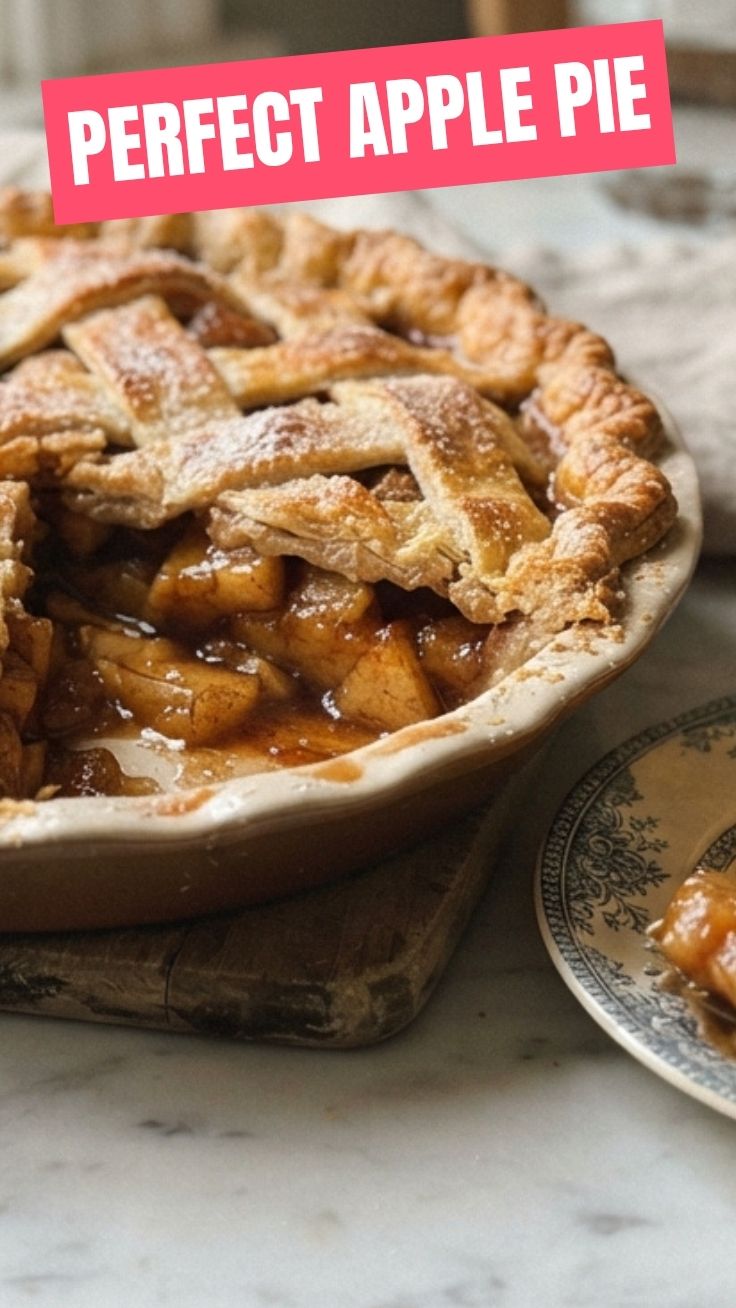
3. Assemble: Roll out one dough disc to 12-inch circle, transfer to pie dish, trim edges. Add apple filling, dot with butter. Roll second disc, cut into strips for lattice or place full top crust with slits. Crimp edges, brush with egg wash (1 egg + 1 tbsp water), and sprinkle coarse sugar.
4. Bake: Place on a baking sheet (catch drips). Bake at 375°F for 50–60 minutes; cover edges with foil if browning too fast. Check doneness by seeing juices bubble through vents. Cool completely on a wire rack—3 hours minimum for clean slices.
Temperature control: If your oven runs hot, reduce to 350°F and extend time by 10 minutes. For a glossy crust, use a milk wash instead of egg.
Nutritional Benefits & Advantages
– Apples: Rich in fiber (pectin) and vitamin C; supports digestion and immunity.
– Cinnamon: Anti-inflammatory and blood sugar regulating—a dark horse in dessert recipes.
– Butter: Provides vitamin A (in moderation) for healthy skin and eyes.
– Homemade advantage: No preservatives, high-fructose corn syrup, or trans fats found in store-bought versions. You control sugar and fat levels—swap for coconut sugar or avocado oil if desired.
Tips, Variations & Cooking Advice
– Flavor variations: Add ½ cup raisins or chopped walnuts for texture, or a splash of bourbon for adult flair.
– Dietary adaptions: Use gluten-free flour blend (add 1 tsp xanthan gum if blend lacks it) and coconut oil in crust for dairy-free.
– Cooking methods: Try an air fryer (35 minutes at 325°F) for a quick, smaller batch—use a silicone mold.
– Portion changes: Make mini tartlets (20 minutes bake) using a muffin tin—perfect for a brunch crowd.
Common Mistakes to Avoid
| Mistake | Solution |
|———|———-|
| Soggy bottom crust | Blind bake crust 10 minutes before adding filling, or brush with egg white as a barrier. |
| Tough, crumbly dough | Don’t overwork; add extra ice water 1 tsp at a time if cracking. |
| Watery filling | Use flour/cornstarch thickener and let apples macerate 15 minutes, then drain excess liquid. |
| Burnt edges | Use a pie shield or foil ring after 25 minutes of baking. |
| Underbaked center | Use an instant-read thermometer—filling should hit 200°F. |
Storage & Meal Prep Tips
– Refrigeration: Cool completely, then cover loosely with foil. Keeps 3–4 days. Reheat slices at 350°F for 10 minutes to revive crust crispness.
– Freezing: Wrap unfilled baked pie (without cut top) tightly in plastic wrap, then foil, freeze up to 3 months. Thaw overnight in fridge, reheat at 350°F for 20 minutes.
– Make-ahead: Prep dough discs and store in refrigerator up to 2 days, or freeze 1 month. Slice apples and mix dry ingredients separately day of.
Conclusion
This Apple Pie isn’t just a recipe—it’s your ticket to mastering a timeless classic that impresses every time. From the flaky, butter-forward crust to the spiced apple filling that tastes like autumn in every bite, you now have the tools to bake with confidence. Remember, the secret isn’t just in the ingredients but in the technique: chill that dough, let the apples rest, and don’t rush the cooling. Whether you’re serving it à la mode or alongside coffee, this dessert remains a cornerstone of timeless dessert recipes. We’d love to see your results—share your baking photos and any twists you tried in the comments below!
FAQs
1. Can I use other apple varieties?
Yes! Fuji or Gala work well but are sweeter—reduce sugar by 2 tablespoons. Avoid Red Delicious (mushy when baked). A 50/50 mix of tart and sweet yields the best depth.
2. How do I prevent the crust from shrinking?
Chill dough at least 30 minutes after rolling but before baking, and don’t stretch the dough into the pie dish—gently press it in.
3. Can I make this vegan?
Absolutely. Use cold vegan butter or coconut oil for the crust, and replace butter in filling with coconut oil. Skip egg wash; brush with almond milk and agave.
4. My pie is bubbling over—what went wrong?
Filling was too full, or oven temperature too low. Use a deep-dish pie plate and place a baking sheet underneath to catch drips.
5. How do I know when it’s fully done?
Look for bubbling juices through vents (not just steam), golden brown crust, and an internal filling temperature of 200°F. If in doubt, bake 5 more minutes—firm apples soften as they cool.