The Ultimate Guide to Perfect Homemade Ice Cream (Vanilla): Creamy, Dreamy, and Better Than Store-Bought
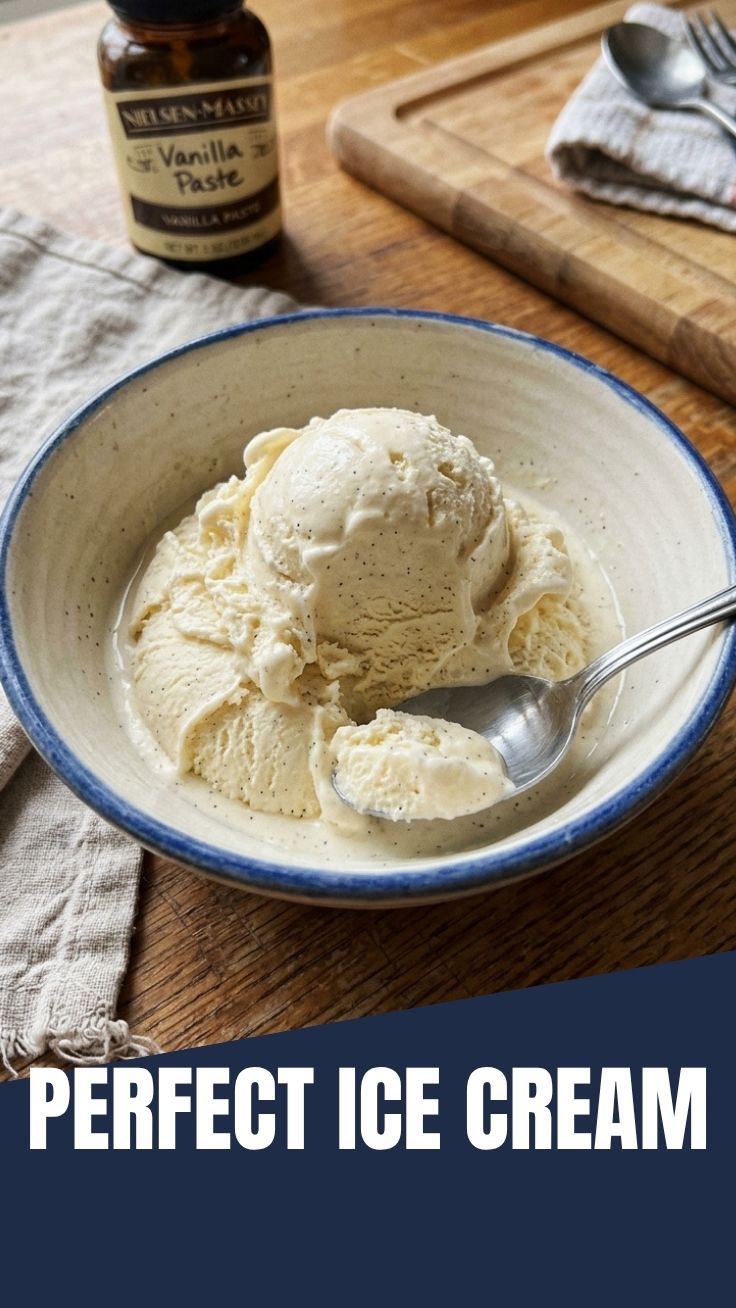
Have you ever tasted a scoop of vanilla ice cream so rich and velvety that it instantly transported you to a summer afternoon on a porch swing? That’s the magic of homemade ice cream (vanilla). While store-bought versions often rely on stabilizers and artificial flavors, crafting this dessert from scratch gives you total control over quality, sweetness, and texture. Plus, the process is surprisingly simple and deeply rewarding. In this guide, we’ll explore a foolproof Homemade Ice Cream (Vanilla) recipe that delivers a custard-like creaminess every time. You’ll also discover essential Ice Cream Recipes tips and techniques to elevate your frozen creations. Let’s dive in!
Ingredients & Kitchen Tools
For the Ice Cream Base:
– 2 cups heavy cream (35% fat) – Provides richness and a smooth mouthfeel. Opt for high-quality cream for best results.
– 1 cup whole milk – Balances the fat content; don’t use skim milk as it yields icy texture.
– ¾ cup granulated sugar – Sweetens and lowers the freezing point for a scoopable texture.
– 1 vanilla bean (or 2 teaspoons pure vanilla extract) – The star flavoring. Scrape the seeds for authentic specks.
– 5 large egg yolks – Act as natural emulsifiers and thickeners for a custard-style base.
– ¼ teaspoon salt – Enhances flavor and reduces ice crystal formation.
Kitchen Tools:
– Medium saucepan – For heating the cream mixture.
– Whisk – Essential for smooth custard.
– Fine-mesh strainer – Removes cooked egg bits for silky ice cream.
– Ice cream maker – Churns and aerates the base (no-churn alternatives listed below).
– Instant-read thermometer – Ensures perfect custard temperature (170°F/77°C).
– Airtight freezer container – Stores finished ice cream.
– Rubber spatula – For scraping every last drop.
Optional Substitutions:
– Dairy-free: Replace cream and milk with full-fat coconut milk and almond milk; skip eggs for a vegan version.
– Sugar: Swap granulated sugar with honey, maple syrup, or coconut sugar (adjust liquid ratio slightly).
Prep Time & Cooking Schedule
– Prep Time: 20 minutes (active work)
– Cook Time: 10 minutes (stovetop custard)
– Chill Time: 4–6 hours (or overnight) – Crucial for texture. The base must be fully cold before churning.
– Churn Time: 20–25 minutes (in ice cream maker)
– Freeze Time: 2–4 hours (for scoopable firmness)
Planning Tip: Start the base the day before serving. This allows maximum flavor melding and ensures your ice cream maker can work efficiently. For best results, prepare the custard in the evening, chill overnight, and churn the next morning.
Step-by-Step Instructions
1. Prepare the Vanilla Base: Split the vanilla bean lengthwise and scrape the seeds. Combine cream, milk, half the sugar, vanilla seeds (and pod), and salt in a saucepan. Heat over medium until steaming (not boiling), stirring occasionally.
2. Temper the Egg Yolks: In a bowl, whisk yolks with remaining sugar until pale and thick. Slowly pour a cup of hot cream mixture into yolks while whisking constantly—this prevents scrambling.
3. Cook the Custard: Pour tempered yolk mixture back into the saucepan. Cook over low heat, stirring with a spatula, until the custard thickens enough to coat the back of a spoon (170°F/77°C). This is critical for that classic homemade ice cream (vanilla) custard texture.
4. Strain and Chill: Immediately strain through a fine-mesh sieve into a bowl set over an ice bath. Discard the vanilla pod. Stir occasionally until cool. Cover and refrigerate for 4–6 hours (or overnight).
5. Churn the Base: Pour chilled custard into your ice cream maker and churn according to manufacturer instructions (usually 20–25 minutes). The mixture should resemble soft-serve.
6. Freeze to Firm: Transfer churned ice cream to an airtight container. Press a sheet of parchment directly onto the surface to prevent ice crystals. Freeze for 2–4 hours until scoopable. For advanced Ice Cream Recipes techniques, try folding in crunchy mix-ins during the last 2 minutes of churning.
Pro Tip: If your ice cream turns icy, it’s likely because the base wasn’t chilled enough or churned too long. Always use a thermometer to confirm custard temperature.
Nutritional Benefits & Advantages
Homemade vanilla ice cream offers several advantages over commercial versions. First, you control the sugar content—many store-bought brands hide high-fructose corn syrup and artificial thickeners. Using real vanilla bean provides antioxidants like vanillin, which may have anti-inflammatory properties. The egg yolks add protein and healthy fats, while the full-fat dairy offers calcium and vitamin D for bone health. Since you avoid preservatives, the flavor is cleaner and more vibrant. Additionally, homemade ice cream (vanilla) lets you customize dietary needs, such as lowering sugar for diabetics or using oat milk for lactose intolerance.
Tips Variations & Cooking Advice
– Flavor Twists: Add ½ cup melted dark chocolate to the custard before chilling for chocolate vanilla swirl. Or steep lavender or mint leaves in the cream for 30 minutes before cooking.
– Dietary Adaptations: For a dairy-free version, use full-fat coconut milk and coconut cream. For a no-egg version, use cornstarch (2 tablespoons) as a stabilizer.
– No-Churn Method: Whip 2 cups cold heavy cream with 1 can sweetened condensed milk and vanilla. Freeze without churning.
– Prep Efficiency: Make a double batch and store in labeled containers. Ice cream keeps well for 2 weeks.
– Equipment Tips: If you don’t have an ice cream maker, use the no-churn method or freeze the base in a shallow dish, whisking every 30 minutes for 3 hours to break up ice crystals.
Common Mistakes to Avoid
1. Cooking the Custard Too Fast: High heat causes curdled eggs. Always cook on low and stir constantly.
2. Skipping the Strain: Even with careful tempering, tiny cooked egg bits can form. Straining ensures a silky texture.
3. Churning Too Little or Too Much: Under-churning yields dense ice cream; over-churning makes it buttery. Follow your machine’s timing.
4. Using Low-Fat Ingredients: Skim milk or light cream creates icy, hard ice cream. Stick to full-fat options.
5. Freezing Without a Lid Seal: Air exposure causes freezer burn and ice crystals. Use parchment paper directly on the surface.
Storage & Meal Prep Tips
– Short-Term Storage: Place in an airtight container with a tight lid. For extra protection, press plastic wrap onto the surface before closing. Store in the freezer (not the freezer door) where temperature is most stable.
– Shelf Life: Homemade ice cream stays fresh for 2–3 weeks. After that, texture may become icy. For best flavor, consume within 1 week.
– Reheating for Scoopability: Ice cream straight from the freezer can be rock-hard. Let it sit at room temperature for 5–10 minutes before scooping. You can also microwave for 10–15 seconds.
– Meal Prep: Make the custard base up to 3 days ahead. Churn and freeze just before serving.
Conclusion
Creating homemade ice cream (vanilla) at home is a rewarding culinary adventure that yields a dessert far superior to anything from a carton. By mastering the custard base, controlling ingredients, and using proper chilling, you’ll achieve a creamy, decadent treat that wows family and friends. This guide also opens the door to endless Ice Cream Recipes—from mint chip to strawberry swirl—so you can experiment with confidence. We encourage you to try this recipe, customize it with your favorite flavors, and share your results in the comments below. For more inspiration, explore our collection of frozen desserts and seasonal treats. Happy churning!
FAQs
Q1: Can I use vanilla extract instead of vanilla bean?
Yes! Use 2 teaspoons of pure vanilla extract. Add it after straining the custard (cold) to preserve its volatile aromatics.
Q2: My ice cream turned out icy. What went wrong?
Icy texture often results from under-chilling the base, churning too long, or using low-fat dairy. Ensure the base is thoroughly chilled (below 40°F/4°C) before churning and follow churning time exactly.
Q3: How do I make this recipe dairy-free and vegan?
Replace cream and milk with full-fat coconut milk and unsweetened almond milk. Omit eggs and use 2 tablespoons cornstarch mixed with 3 tablespoons of the liquid as a thickener. Churn as usual.
Q4: Can I skip the ice cream maker?
Absolutely! Use the no-churn method: whip 2 cups cold heavy cream to stiff peaks, fold in 1 can sweetened condensed milk and vanilla, then freeze. This creates a dense, creamy ice cream without machinery.
Q5: How long should I churn the ice cream?
Most ice cream makers require 20–25 minutes. The mixture should look like soft-serve and increase in volume by about 30%. Stop when it holds its shape but is still spreadable.
Proven way to grow 7 Homemade Ice Cream (Vanilla)
Ingredients
Equipment
Method
- Combine heavy cream, whole milk, and granulated sugar in a large bowl, whisking until the sugar dissolves completely.
- Stir in the vanilla extract to ensure even distribution of flavor.
- Cover the bowl and refrigerate the mixture for at least 2 hours, or preferably overnight, to chill thoroughly.
- Pour the chilled mixture into your ice cream maker bowl and churn according to the manufacturer's instructions, which typically takes 20-25 minutes.
- The ice cream is ready when it reaches a soft-serve consistency.
- Transfer the soft ice cream to an airtight container and freeze for at least 4 hours, or until firm, for optimal scooping consistency.
- Allow it to sit at room temperature for a few minutes before serving for easier scooping.