The Ultimate Guide to Perfect Fudgy Chocolate Brownies: A Data-Driven Recipe for Home Bakers
Have you ever pulled a pan of brownies out of the oven only to find them dry, cakey, or worse—burnt on the edges and raw in the middle? You’re not alone. Achieving that elusive, bakery-quality texture at home can feel like a culinary gamble. But here’s the good news: mastering the perfect Chocolate Brownies is entirely possible with the right techniques, precise timing, and a few science-backed tricks. This guide will walk you through every step, ensuring you create decadent, fudgy brownies that rival any professional bakery. With the right approach, you can control everything from cocoa quality to bake time, making this not just a recipe but a valuable kitchen skill.
—
Ingredients & Kitchen Tools
Essential Ingredients
– 1 cup (2 sticks) unsalted butter – Use high-fat European-style butter for richer flavor. Salted butter works but reduce added salt.
– 2 ¼ cups granulated sugar – White sugar creates the classic crackly top. Brown sugar adds moisture but reduces the crisp crust.
– 4 large eggs – Room temperature eggs emulsify better, ensuring a fudgy crumb.
– 1 tablespoon vanilla extract – Use pure extract, not imitation, for depth.
– 1 cup unsweetened cocoa powder – Dutch-processed cocoa gives a darker, smoother taste. Natural cocoa is more acidic and reactive.
– 1 cup all-purpose flour – Measured correctly (spoon and level) to avoid dryness.
– ½ teaspoon salt – Enhances chocolate flavor and balances sweetness.
– Optional: 1 cup chocolate chips or chopped dark chocolate – Adds gooey pockets of melted chocolate.
Kitchen Tools
– 9×13-inch metal baking pan – Metal conducts heat better than glass for even baking.
– Parchment paper – Creates a sling for easy lifting and clean slices.
– Large mixing bowls (2) – One for wet ingredients, one for dry.
– Whisk – Avoid overmixing batter; a spatula is also fine.
– Spatula – For folding and scraping every bit of batter.
– Cooling rack – Prevents soggy bottoms by allowing airflow.
– Oven thermometer – Essential; ovens often run hot/cold by 25°F.
—
Prep Time & Cooking Schedule
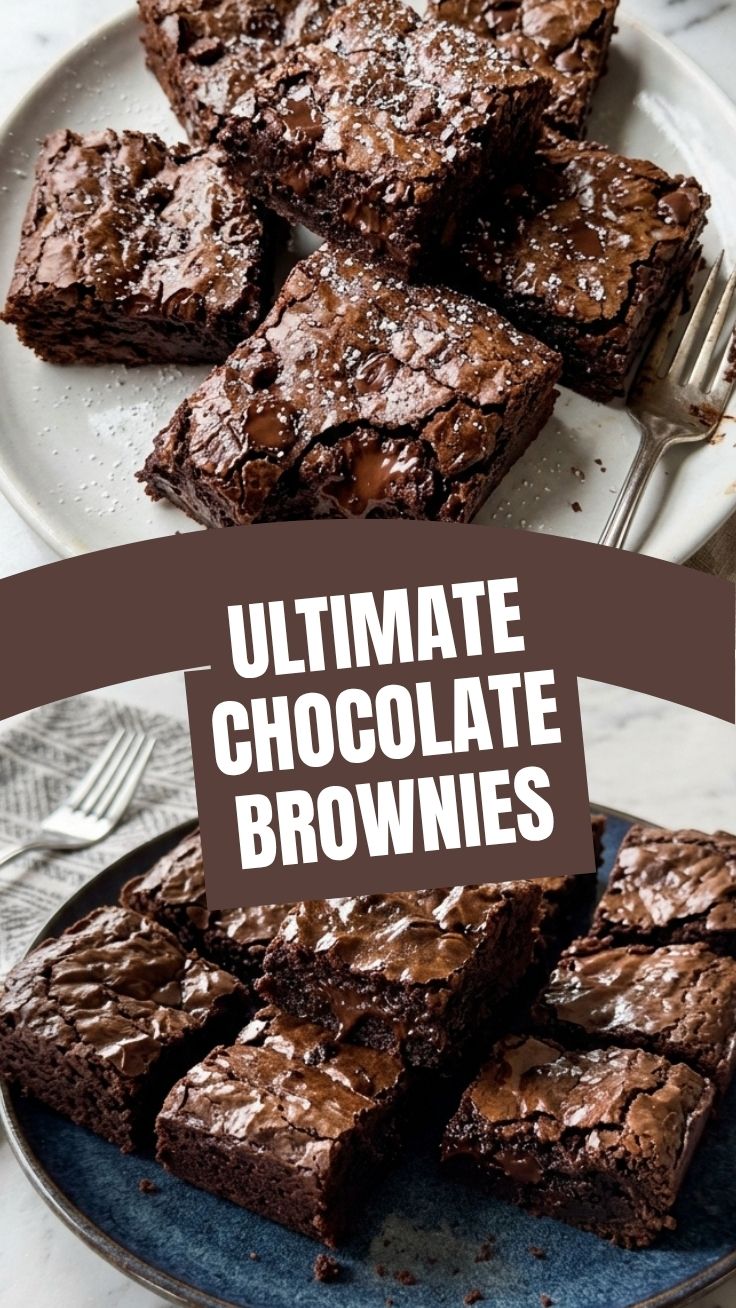
– Prep Time: 15 minutes – Includes measuring, melting butter, and lining the pan.
– Bake Time: 25–30 minutes at 350°F (175°C) – Start checking at 22 minutes.
– Resting Time: 1–2 hours (or overnight) – Crucial for set structure and intensified flavor.
– Total Time: Approximately 2 hours 45 minutes.
Planning Tip: Bake these the day before serving. The flavor matures overnight as cocoa particles hydrate fully, and the texture becomes more cohesive. For best results, resist slicing until completely cool.
—
Step-by-Step Instructions
1. Preheat and Prep: Position oven rack in the middle. Preheat to 350°F. Line the pan with parchment paper, leaving overhang on two opposite sides.
2. Melt Butter and Mix Sugar: In a medium saucepan over low heat, melt the butter completely. Remove from heat and immediately stir in the sugar. Whisk vigorously for 1–2 minutes until the mixture looks glossy and slightly cooled. This step dissolves sugar crystals, contributing to the signature crackly top of Chocolate Brownies.
3. Add Eggs One at a Time: Let the butter-sugar mixture cool for 2 minutes, then whisk in eggs one by one. Beat each egg for 20 seconds until fully incorporated. The batter should become thick and lighter in color.
4. Incorporate Vanilla and Dry Ingredients: Stir in vanilla. In a separate bowl, sift together cocoa powder, flour, and salt. Gradually fold dry ingredients into wet mixture using a spatula. Stop folding as soon as no white streaks remain—overmixing develops gluten, making brownies cakey rather than fudgy. For truly fudgy chocolate brownies, fold in chocolate chips at this stage if desired.
5. Bake with Precision: Pour batter into prepared pan, spreading evenly. Bake for 25 minutes, then begin testing. Insert a toothpick into the center: it should emerge with a few moist crumbs attached, not wet batter. The edges will be set and slightly pulling away from the pan.
6. Cool Completely: Transfer pan to a cooling rack for 1 hour. Then refrigerate for another 30 minutes before lifting out and cutting. This resting period ensures clean, square edges and a dense, moist interior.
Temperature Control Tip: If you prefer extra-gooey centers, underbake by 2 minutes and let residual heat finish cooking. Always use an oven thermometer for accuracy.
—
Nutritional Benefits & Advantages
These brownies provide more than just indulgence. Dark cocoa is rich in flavonoids, particularly flavanols, which support heart health by improving blood flow and reducing inflammation. A single 2-inch square (about 40g) contains approximately:
– 180 calories – Moderation is key.
– 12g fat – Mostly from butter, which aids absorption of fat-soluble antioxidants.
– 2g protein – Eggs and flour contribute small but meaningful protein.
– 1g fiber – Cocoa provides a surprising amount.
Advantage: By making these at home, you control sugar content and can substitute high-quality dark chocolate (70%+ cacao) for even more antioxidants. Commercial mixes often contain hydrogenated oils and preservatives—this recipe uses whole ingredients only.
—
Tips, Variations & Cooking Advice
– Gluten-Free Version: Swap all-purpose flour with a 1:1 gluten-free baking blend. Add ¼ teaspoon xanthan gum if the blend doesn’t include it.
– Dairy-Free Version: Use coconut oil or vegan butter in equal weight. Confirm chocolate chips are dairy-free.
– Flavor Twists: Add 1 teaspoon espresso powder to deepen chocolate notes. Swirl in peanut butter or caramel before baking.
– Alternative Cooking Methods: Use an 8×8-inch pan for thicker brownies (increase bake time by 5–7 minutes). For mini bites, bake in a mini muffin tin for 12–15 minutes.
– Portion Adjustment: Halve the recipe for a smaller batch—use an 8×8 pan and reduce eggs to 3 (yes, odd numbers work here).
—
Common Mistakes to Avoid
1. Overmixing Batter – Leads to tough, dry brownies. Fold only until combined.
2. Using Cold Eggs – Prevents proper emulsification, causing a greasy texture. Always bring to room temperature.
3. Opening Oven Door Too Early – Temperature fluctuations can cause sinking centers. Wait until at least the 20-minute mark.
4. Skipping Parchment Paper – Makes removal and cutting a sticky mess. Always line the pan.
5. Cutting While Warm – Brownies become gummy and fall apart. Patience is essential.
—
Storage & Meal Prep Tips
– Room Temperature: Store in an airtight container for up to 3 days. Place a slice of bread in the container to absorb excess moisture and maintain fudginess.
– Refrigeration: Brownies keep for up to 1 week when refrigerated. Wrap individually in plastic wrap, then foil, to prevent drying.
– Freezing: Flash-freeze uncut brownies on a baking sheet, then wrap tightly. They last 3 months. Thaw in the refrigerator overnight.
– Reheating: Microwave a single brownie for 10–15 seconds to revive that just-baked gooeyness. For multiple brownies, wrap in foil and warm in a 300°F oven for 5 minutes.
Meal Prep Hack: Bake on Sunday, slice on Monday. Store in single-serving portions for easy dessert access all week.
—
Conclusion
Creating the perfect batch of Chocolate Brownies at home is a rewarding skill that pays dividends in taste, quality, and satisfaction. By following these data-driven steps—from precise temperature control to proper resting times—you’ll consistently achieve fudgy chocolate brownies that will impress family and friends. The combination of rich cocoa, perfect texture, and customizable options makes this recipe a staple for any home baker. Now it’s your turn—preheat that oven, gather your ingredients, and experience the joy of homemade perfection. Share your results in the comments or tag us on social media; we’d love to see your crackly tops!
—
FAQs
Q: Can I substitute cocoa powder with melted chocolate?
A: Yes, but adjust the fat. Replace 1 cup cocoa with 4 oz melted dark chocolate plus 2 tablespoons butter. Expect a denser, less crackly top.
Q: Why are my brownies cakey instead of fudgy?
A: Likely overmixing or too much flour. Measure flour by spooning and leveling, and stop folding as soon as dry ingredients disappear.
Q: How do I make these brownies vegan?
A: Use flax eggs (1 tablespoon flaxseed meal + 3 tablespoons water per egg), coconut oil instead of butter, and dairy-free chocolate chips.
Q: My brownies stuck to the pan—what went wrong?
A: Insufficient greasing or no parchment paper. Always use parchment with overhang for easy removal.
Q: Can I reduce the sugar without ruining the texture?
A: You can reduce by up to ¼ cup, but this may affect the crisp top and moisture. Substitute with 2 tablespoons of honey or maple syrup for sweetness without sacrificing texture.
Proven way to grow Chocolate Brownies 5 ways.
Ingredients
Equipment
Method
- Preheat your oven to 350°F (175°C) and grease and flour a 9x13 inch baking pan.
- Melt butter in a large saucepan over medium heat, then remove from heat and stir in sugar.
- Beat in eggs one at a time, followed by vanilla extract.
- In a separate bowl, whisk together flour, cocoa powder, and salt, then gradually add the dry ingredients to the wet ingredients, mixing until just combined.
- Fold in chocolate chips, then spread the batter evenly into the prepared baking pan.
- Bake for 25-30 minutes, or until a toothpick inserted into the center comes out with moist crumbs, then let cool completely before cutting into squares.