The Ultimate Guide to Homemade Caramel Apples: A Sweet Fall Treat
Have you ever bitten into a store-bought caramel apple only to find a sticky, artificial mess that pulls out your fillings? Homemade Caramel Apples are a completely different experience — crisp, juicy apples enrobed in a silky, buttery caramel that clings perfectly without being rock-hard. Making them at home lets you control the quality of ingredients, avoid preservatives, and customize flavors. Plus, the process is surprisingly simple once you understand a few temperature tricks. Whether you’re preparing for a Halloween party, a fall gathering, or just a cozy weekend treat, mastering this classic dessert is incredibly rewarding. And don’t forget the optional caramel dip for drizzling leftovers — it’s the ultimate indulgence.
Ingredients & Kitchen Tools
For the apples and caramel coating:
– 6 medium apples (Granny Smith, Honeycrisp, or Fuji work best — tart apples balance the sweet caramel)
– 1 cup heavy cream (for richness; substitute coconut cream for dairy-free)
– 1 cup light brown sugar, packed (gives deep molasses notes)
– ½ cup unsalted butter (plus extra for greasing)
– ¼ cup light corn syrup (prevents crystallization; honey can be used with caution)
– 1 teaspoon vanilla extract
– ¼ teaspoon salt (enhances caramel flavor)
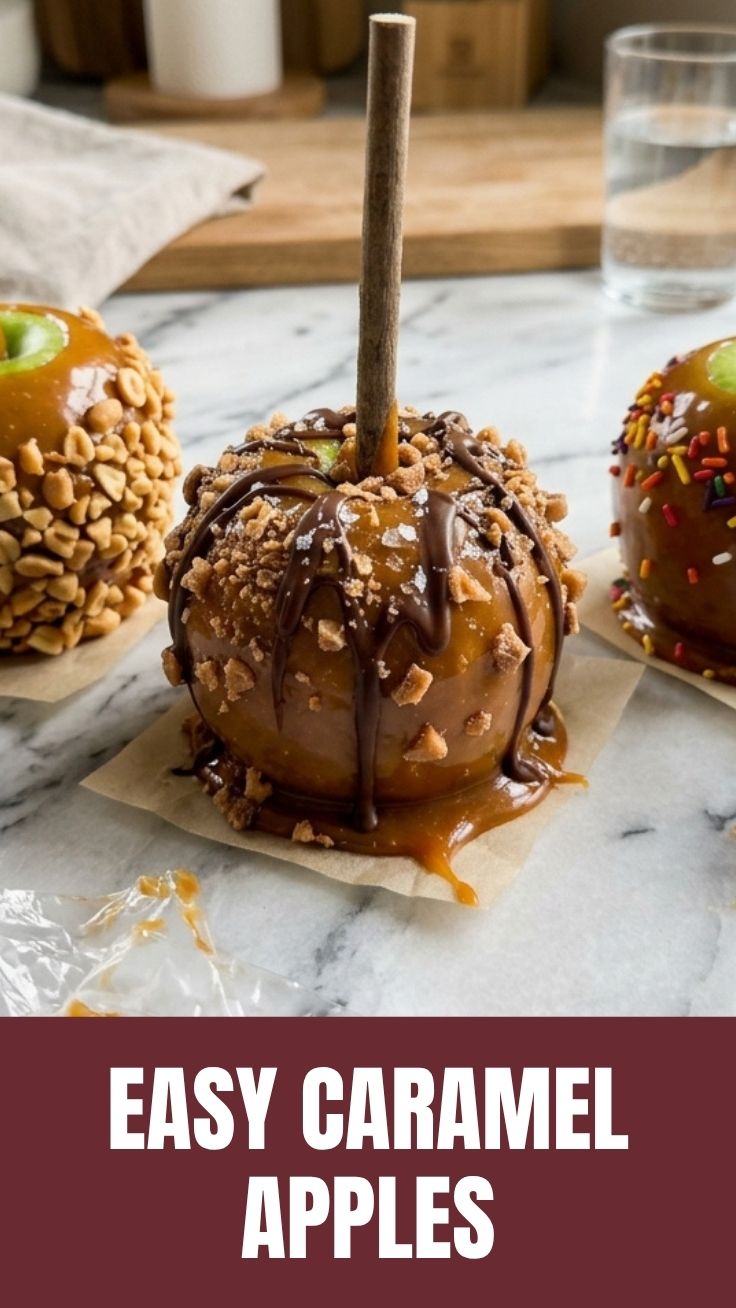
– Optional: ½ cup chopped peanuts, crushed cookies, or sprinkles for rolling
Kitchen tools:
– Wooden skewers or lollipop sticks
– Parchment paper or silicone baking mat
– Candy thermometer (essential for perfect texture)
– Medium heavy-bottomed saucepan
– Whisk or heatproof spatula
– Large bowl for ice water (testing caramel)
– Apple corer (optional, for easy eating later)
Prep note: Wash and dry apples thoroughly — any wax residue can prevent caramel from sticking. Remove stems and push a stick into the top of each apple, about two-thirds of the way through.
Prep Time & Cooking Schedule
– Prep time: 20 minutes (washing, drying, inserting sticks, preparing toppings)
– Cook time: 15–20 minutes (caramel cooking from start to soft-ball stage)
– Resting time: 30–40 minutes (allowing caramel to set at room temperature or in the fridge)
– Total active time: about 40 minutes, plus resting
Plan to make these in the late afternoon so they set completely before serving. The caramel remains workable for about 8–10 minutes after reaching temperature, so have all your apples prepped and toppings ready before you start cooking.
Step-by-Step Instructions
1. Prepare your workspace. Line a baking sheet with parchment paper and grease it lightly with butter. Arrange your sticks-inserted apples nearby, along with any toppings in shallow bowls.
2. Combine caramel ingredients. In a heavy-bottomed saucepan over medium heat, melt the butter, brown sugar, heavy cream, and corn syrup. Stir constantly with a whisk until the mixture is smooth and bubbling.
3. Cook to soft-ball stage. Insert a candy thermometer and continue cooking, stirring occasionally, until the temperature reaches 235°F–240°F (113°C–115°C). This takes about 10–15 minutes. Do not walk away — caramel can scorch quickly.
4. Remove from heat and add vanilla. Carefully stir in the vanilla extract and salt. The mixture will bubble up, so add slowly. Let it cool for 2–3 minutes — the caramel thickens slightly as it cools.
5. Dip the apples. Hold an apple by the stick and tilt the pan to pool the caramel. Submerge the apple, letting excess drip off for a few seconds. For a thicker coat, dip twice with a 30-second interval. Rotate the apple to ensure even coverage.
6. Add toppings (if using). Immediately roll the coated apple in nuts, cookies, or sprinkles before the caramel sets. Place on the prepared baking sheet.
7. Let them set. Allow the Caramel Apples to rest at room temperature for 30 minutes or refrigerate for 15 minutes. The caramel should be firm but chewy — not hard. If you prefer a softer consistency, skip refrigeration and let them sit longer at room temp.
8. Serve or store. For extra indulgence, drizzle with a warm caramel dip just before eating. The dip adds a luscious, pourable contrast to the firm coating.
Temperature control tip: If your caramel becomes too thick to dip, gently reheat it over low heat, adding a tablespoon of cream. If it’s too runny, it likely didn’t reach soft-ball stage — next time, cook until it passes the ice water test (a few drops in cold water form a soft, pliable ball).
Nutritional Benefits & Advantages
Apples are rich in dietary fiber, vitamin C, and antioxidants like quercetin, which support heart health and immunity. Homemade caramel uses real butter and cream, providing calcium and healthy fats (when consumed in moderation). Unlike store-bought versions, you control the sugar content — reducing corn syrup or using alternative sweeteners is possible. Serving Caramel Apples as an occasional treat offers a satisfying balance of fruit and indulgence, especially when paired with a caramel dip that can be portioned separately. The satiety from fiber and fat helps curb cravings more effectively than processed candy.
Tips Variations & Cooking Advice
– Flavor twists: Add ½ teaspoon cinnamon or a pinch of cayenne to the caramel for warmth. Stir in espresso powder for a mocha note.
– Apple swaps: Use pears or firm peaches when in season — adjust caramel thickness accordingly (softer fruits need a thicker coating).
– Dietary adaptations: For dairy-free, use coconut cream and vegan butter (add 1 tablespoon more corn syrup to stabilize). For gluten-free, ensure your toppings (e.g., crushed cookies) are certified gluten-free.
– Alternative method: If you don’t have a candy thermometer, use the ice water test: drop a small spoonful into cold water; if it forms a soft ball that flattens when pressed, it’s ready.
– Portion changes: Make mini caramel apples using lady apples or cut large apples into chunks, skewer each piece, and dip individually — perfect for parties.
Common Mistakes to Avoid
| Mistake | Solution |
|———|———-|
| Caramel slides off apple | Wash apples with vinegar water to remove wax; dry thoroughly. Also, let caramel cool slightly before dipping — too hot causes slipping. |
| Caramel is too hard or brittle | You overcooked it past soft-ball stage. Aim for 235–240°F and test with ice water. |
| Caramel crystallizes (grainy texture) | Stir minimally once sugar dissolves; avoid scraping sides of pan. Add a pinch of cream of tartar or use corn syrup. |
| Apple floats in caramel | Ensure the pan is tilted and caramel depth is at least 2 inches. Use a narrow, tall saucepan. |
| Sticks pull out | Insert sticks all the way to the apple core, and let caramel set fully before lifting. |
Storage & Meal Prep Tips
Store Caramel Apples in the refrigerator on a parchment-lined tray, loosely covered with plastic wrap. They stay fresh for up to 3 days — after that, apples may release moisture and soften the caramel. Do not freeze whole caramel apples; the texture degrades severely. If you have leftover caramel and apple pieces, you can chop the apples and stir them into the caramel dip for a quick dessert topping. To reheat caramel dip (if stored separately), microwave in 10-second bursts, stirring until smooth. For best texture, bring refrigerated caramel apples to room temperature for 10 minutes before serving.
Conclusion
Homemade Caramel Apples are a quintessential fall treat that delights both kids and adults. With the right technique — controlling temperature, prepping apples thoroughly, and timing your dips — you’ll create a glossy, chewy coating that complements the crisp fruit perfectly. This recipe also pairs beautifully with a warm caramel dip for extra richness. Whether you stick to classic or experiment with toppings, these Caramel Apples are sure to impress. Try them this weekend, share your photos with #HomemadeCaramelApples, and explore more seasonal desserts on our blog!
FAQs
1. Can I use any type of apple for caramel apples?
Yes, but tart, firm varieties like Granny Smith or Honeycrisp hold up best. Sweet apples like Gala can become too sugary and soft after coating.
2. How do I prevent the caramel from becoming too hard after refrigerating?
If you plan to refrigerate, cook the caramel to the lower end of soft-ball stage (235°F). Also, let the apples sit at room temperature for 10–15 minutes before serving to soften slightly.
3. Can I make caramel apples without a candy thermometer?
Absolutely. Use the ice water test: after about 10 minutes of cooking, drop a small amount of caramel into a bowl of cold water. If it forms a soft, pliable ball, it’s ready. If it’s too runny, cook 1–2 minutes more and test again.
4. What’s the best way to reheat leftover caramel dip?
Transfer the dip to a microwave-safe bowl. Microwave on medium power for 15–20 seconds, stir, and repeat until smooth. Or warm in a saucepan over low heat, adding a splash of cream if too thick.
5. Can I make these dairy-free or vegan?
Yes. Substitute full-fat coconut cream for heavy cream and vegan butter (like Miyoko’s or Earth Balance). Increase corn syrup by 1 tablespoon to help with texture. Note that vegan butter has a lower burning point, so stir constantly and watch the temperature closely.