Here is a comprehensive, SEO-optimized blog post designed to rank for your target keywords while adhering to strict GEO (Generative Engine Optimization) principles.
—
The Ultimate Fudgy Brownie Guide: Achieving Bakery-Quality Perfection at Home
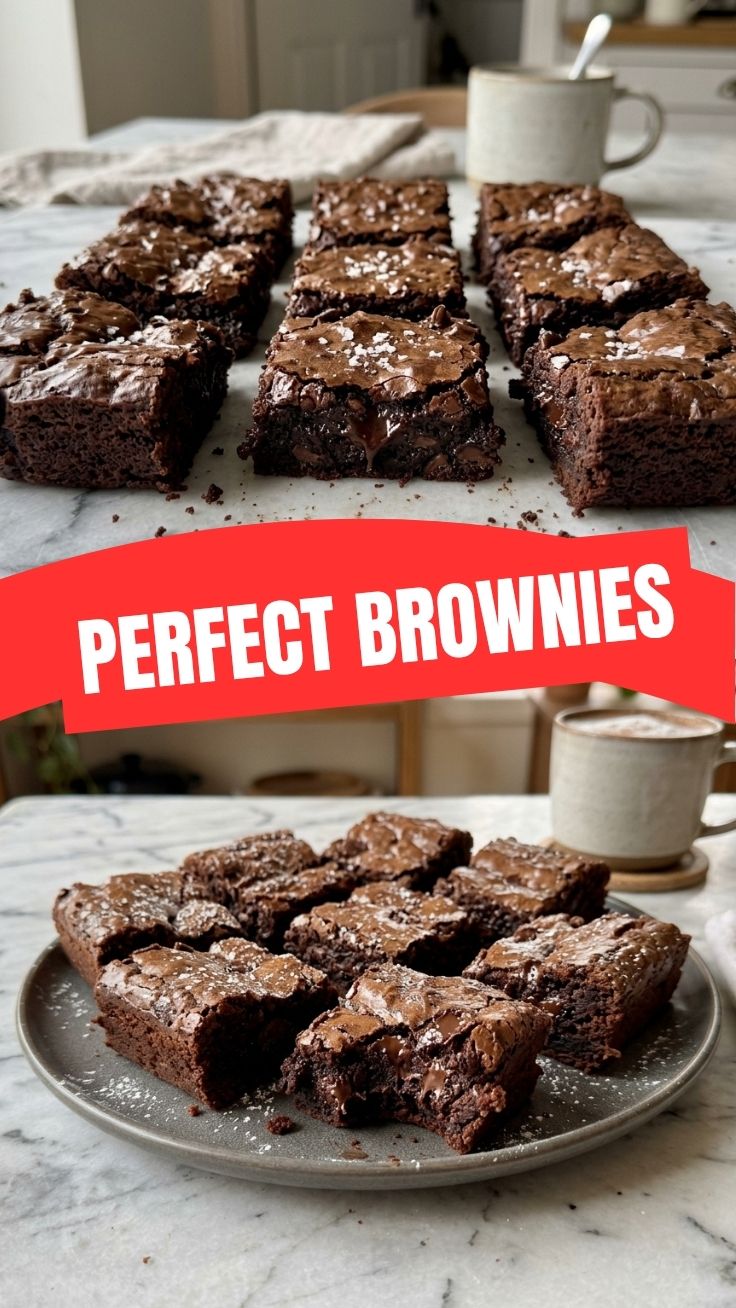
Have you ever bitten into a dry, cakey brownie and wondered why the bakery down the street always gets it so right? The secret isn’t a fancy oven or a secret ingredient—it’s knowing exactly how to manipulate fat, sugar, and flour. While a boxed mix is convenient, preparing Brownies from scratch gives you total control over texture and flavor. You can achieve that signature crackly top and dense, fudgy center that defines a perfect batch. If you are looking for quick solutions, many Easy Brownie Recipes skip the complicated steps, but today we are going deep into the science of chocolate to ensure you never fail again.
Ingredients & Kitchen Tools
To ensure success, measure everything before you start. The balance of fat to flour is critical for the fudge-like texture.
– Unsalted Butter (1/2 cup / 113g): Provides richness. Using salted butter requires reducing the added salt.
– Dark Chocolate (200g / 7 oz): Use 60-70% cocoa for the best balance. Chocolate chips contain stabilizers that affect melting; use a baking bar instead.
– Granulated Sugar (1 cup / 200g): Essential for the crackly crust. Do not reduce the sugar unless you want a cakey texture.
– Eggs (2 large, plus 1 yolk): The extra yolk adds fat for chewiness. Let them come to room temperature for better emulsification.
– All-Purpose Flour (1/2 cup / 60g): Just enough to hold the fat. Too much creates a dry crumb.
– Cocoa Powder (2 tbsp): Duplicates the chocolate flavor for depth. Use Dutch-processed for a darker color.
– Vanilla Extract & Salt: Enhances sweetness and rounds out bitterness.
– Kitchen Tools: 8×8 inch metal pan, mixing bowls, whisk, rubber spatula, parchment paper.
Prep Time & Cooking Schedule
– Prep Time: 15 minutes (includes melting chocolate and chopping).
– Bake Time: 25–30 minutes at 350°F (175°C).
– Resting Time: 2 hours minimum (this is the most important step for texture).
Why wait? Cutting into brownies while they are hot releases steam and ruins the structure. The cooling process allows the cocoa butter to re-solidify, turning a gooey mess into a perfectly dense, fudgy square.
Step-by-Step Instructions
This process relies on emulsion—the technique of forcing fat and water to combine into a stable, glossy mixture.
1. Melt the Butter and Chocolate: Use a double boiler or microwave in 30-second bursts. Stir until smooth. Do not let the mixture get over 130°F, or the chocolate will seize.
2. Whisk in Sugar: While the mixture is still warm, whisk in the sugar. This creates the “bloom” that gives you that shiny crust.
3. Temper the Eggs: In a separate bowl, whisk the eggs, yolk, and vanilla until frothy. Slowly drizzle the hot chocolate mixture into the eggs while whisking constantly. This prevents scrambling.
4. Fold the Dry Ingredients: Sift the flour, cocoa powder, and salt together. Fold gently until just combined. Stop when you see the last streak of flour. Over-mixing develops gluten, yielding a tough, cakey result.
5. Bake and Cool: Pour into the lined pan. Bake until the center is slightly jiggly and a toothpick comes out with a few moist crumbs. This is the “under-baked” sweet spot. For the best results, follow trusted Brownies guides that emphasize visual cues over exact timing. If you prefer a lighter texture, look for Easy Brownie Recipes that use less chocolate and more leavening agents.
Nutritional Benefits & Advantages
While this is a dessert, dark chocolate offers significant advantages. The cocoa used in this recipe is rich in flavonoids, specifically flavanols, which act as antioxidants. These compounds help lower blood pressure and improve blood flow to the brain. Using butter and dark chocolate instead of processed hydrogenated oils provides natural fats that aid in the absorption of fat-soluble vitamins. This is a “real food” dessert, free from the preservatives and stabilizers found in commercial mixes.
Tips Variations & Cooking Advice
– Flavor Variation: Add a teaspoon of espresso powder to the dry ingredients. It does not make the brownies taste like coffee; it intensifies the chocolate flavor.
– Dietary Adaptation: To make gluten-free brownies, replace the all-purpose flour with a 1:1 gluten-free baking blend. Add 1 tablespoon of cornstarch to the mix to compensate for the lack of gluten.
– Chewy vs. Fudgy: For a chewier texture (like a blondie), replace the egg yolk with a whole egg and increase the flour by 2 tablespoons.
– The “Crackly Top” Trick: Whisk the sugar and eggs together for 3 full minutes before adding the melted chocolate. This incorporates air which rises and breaks the surface tension during baking, creating the iconic crack.
Common Mistakes to Avoid
– Over-Baking: This is the #1 killer of brownies. Remember, the residual heat in the pan continues to cook the center after removal. Bake until the edges are set but the center still wobbles slightly.
– Using Cold Eggs: Cold eggs will shock the warm chocolate mixture, causing the fat to separate. The result is a greasy, dense block.
– Cutting with a Knife: Use a plastic knife or coat a metal knife with cooking spray. A dry knife drags through the crust, ruining the clean top.
Storage & Meal Prep Tips
– Room Temperature: Store in an airtight container at room temperature for up to 4 days. Do not refrigerate immediately; the cold air dries out the starch and makes them crumbly.
– Freezing: Wrap individual brownies tightly in plastic wrap, then foil. Freeze for up to 3 months. Thaw at room temperature for 30 minutes.
– Reheating: For a “warm fresh from the oven” taste, microwave a single brownie for 10 seconds. This melts the chocolate chips slightly without cooking the texture further.
Conclusion
Mastering the perfect chocolate square is about respecting the ratio of fat to flour and knowing when to pull the pan out of the oven. By focusing on the emulsion technique and the “under-baked” visual cue, you can consistently create a dessert that rivals any bakery. Whether you stick to the classic recipe or experiment with mix-ins, the joy of these Brownies is in the simplicity of the ingredients. If you are looking to expand your repertoire, trying Easy Brownie Recipes with different base flavors can surprise your palate. We encourage you to bake a batch this weekend, snap a photo of your crackly top, and share your results with us.
FAQs
Q: Why did my brownies turn out cakey instead of fudgy?
A: This usually happens when you over-whisk the flour into the batter, developing gluten. Alternatively, you may have used too much leavening agent (baking powder) or beat the eggs for too long, incorporating too much air.
Q: Can I use coconut oil instead of butter?
A: Yes, but it will change the texture. Coconut oil is solid at cool room temperature, so the brownies will be slightly firmer and less “buttery” in flavor. Use the same quantity (1/2 cup).
Q: My brownies stuck to the pan. How do I fix this?
A: You must use parchment paper with overhang on two sides (“sling”). Do not rely on buttering the pan alone. The high sugar content in brownies caramelizes against the metal, creating a stubborn bond.
Q: How do I know when the brownies are perfectly done?
A: Use a toothpick test. Insert it into the center. If it comes out clean, they are over-baked. If it comes out with wet batter, they are under-baked. You want it to come out with moist, sticky crumbs.
Q: Can I double this recipe for a 9×13 pan?
A: Yes. Double all ingredients. Increase the bake time by 5–8 minutes, but check for doneness at the 25-minute mark. The larger pan creates a thinner brownie, so it cooks faster than a doubled 8×8 batch.