Why Store-Bought Will Never Compete: The Ultimate Guide to Creamy, Homemade Hummus
Have you ever wondered why the hummus you make at home never tastes as silky and vibrant as the one from your favorite Mediterranean spot? The secret isn’t a fancy ingredient or a hidden spice—it’s all about technique. Creating an authentic, restaurant-quality hummus from scratch is not only surprisingly simple but also far more rewarding than anything you’ll find in a plastic tub at the grocery store. When you prepare it at home, you control the quality of the oil, the amount of garlic, the creaminess of the texture, and the freshness of every single bite. Plus, you unlock the true potential of the star ingredient: the humble yet mighty chickpea. This ancient legume, when treated with respect, transforms into a velvety canvas for bold flavors.
Ingredients & Kitchen Tools
To achieve that flawless, spoonable consistency, you need the right ingredients and equipment. Here is everything required, along with helpful substitutions for dietary needs.
Core Ingredients:
– 1 can (15 oz) or 1.5 cups cooked chickpea – Drained and rinsed well. Pro tip: reserve the liquid (aquafaba) for a lighter texture.
– ⅓ cup tahini – A high-quality, well-stirred sesame paste is non-negotiable for authentic flavor.
– 3 tbsp fresh lemon juice – Use freshly squeezed; bottled juice dulls the brightness.
– 1 small garlic clove, minced – Start with less; you can always add more.
– 3 tbsp ice-cold water – The key to that cloud-like fluffiness.
– ¼ cup extra virgin olive oil – Plus more for drizzling.
– ½ tsp ground cumin – A warm, earthy undertone (optional, but recommended).
– Salt, to taste – Kosher or sea salt works best.
Optional Substitutions:
– Tahini swap: You can use sunflower seed butter or Greek yogurt (for a tangier, less nutty version).
– Oil alternatives: Avocado oil for a neutral flavor or walnut oil for a nuttier profile.
– Garlic-free: Use a pinch of asafoetida powder or roasted garlic for a milder taste.
Kitchen Tools:
– Food processor – A high-speed blender can work, but a food processor yields the best texture.
– Fine-mesh strainer – To rinse and, optionally, peel the chickpeas.
– Rubber spatula – For scraping down the sides.
– Bowl and whisk – For emulsifying the tahini and lemon juice.
– Measuring spoons and cups – Precision matters for balanced seasoning.
—
Prep Time & Cooking Schedule
Prep Time: 15 minutes
Cook Time: 0 minutes (no cooking required if using canned chickpeas)
Resting Time: 30 minutes (optional, but highly recommended for flavor melding)
Total Time: 15–45 minutes
Planning Tip: For the smoothest result, boil the canned chickpeas for 20 minutes with a pinch of baking soda. This softens their skins, which are the main culprit behind grainy hummus. Cold water and ice cubes are your friends here—chilling the final texture prevents the emulsion from breaking during blending.
—
Step-by-Step Instructions
Follow these clear directions to create a dip that rivals any Mediterranean restaurant. Pay close attention to the temperature and emulsification steps.
1. Prepare the tahini base: In the food processor, combine the tahini, lemon juice, and minced garlic. Blitz for 60 seconds until the mixture turns pale, thick, and creamy. You’ll notice it lightens in color—this is a good sign.
2. Add the oil and water: With the processor running, slowly drizzle in the olive oil, then the ice-cold water. Scrape down the sides and blitz again for another 30 seconds. This emulsion creates the foundation for a fluffy Hummus.
3. Incorporate the legume: Add the drained chickpea (and a pinch of cumin, if using). Process for a full 3–4 minutes. Don’t rush this step—longer blending yields a silkier finish.
4. Adjust consistency: If the mixture is too thick, add one tablespoon of cold water at a time while processing. If it’s too thin, add a few more chickpeas.
5. Season and rest: Add salt to taste (start with ½ teaspoon). Process for a final 30 seconds. For the best flavor, let the hummus rest in the fridge for at least 30 minutes before serving.
—
Nutritional Benefits & Advantages
This hummus recipe is a nutritional powerhouse, thanks largely to the key ingredient: the chickpea. Each serving (about 2 tablespoons) is packed with plant-based protein (around 3–4 grams), dietary fiber (2 grams), and healthy unsaturated fats from both the olive oil and tahini. Chickpeas are also rich in folate, iron, and manganese, which support blood health and energy metabolism. The combination of fiber and protein helps stabilize blood sugar and promotes satiety, making it an excellent choice for weight management or a post-workout snack.
Moreover, tahini provides a significant dose of calcium and phosphorus, which are essential for bone health. When you make this dish from scratch, you avoid the preservatives, excess salt, and low-quality oils often found in commercial versions. It’s naturally vegan, dairy-free, and gluten-free, fitting seamlessly into a wide range of dietary patterns.
—
Tips, Variations & Cooking Advice
Adapt this recipe to your palate or what you have on hand.
– Flavor Variations: Add a roasted red pepper, a handful of fresh basil, or a tablespoon of harissa paste for a spicy twist.
– Texture Swaps: For a chunkier hummus, reserve a few whole chickpeas and fold them in after blending.
– Herb Infusion: Fold in finely chopped fresh parsley, cilantro, or dill just before serving.
– Cooking Method Alternative: Use dry chickpeas that have been soaked overnight and boiled until very tender. This often produces a creamier result.
– Dietary Adaptations: To make it oil-free, omit the olive oil and increase the aquafaba or water by 2–3 tablespoons.
—
Common Mistakes to Avoid
1. Using room-temperature water: Cold water is critical for re-emulsifying the paste and avoiding a greasy texture.
2. Skipping the tahini whisking step: If you don’t process the tahini with lemon juice first, it won’t emulsify properly.
3. Over-seasoning too early: Add salt at the very end, after the water, because different brands of chicken broth (if used) or aquafaba vary in saltiness.
4. Under-blending: A grainy hummus is almost always the result of not letting the food processor run long enough. Give it a full 3–4 minutes.
5. Not peeling the chickpeas: This is optional but makes a profound difference. If you want ultra-smooth hummus, pinch the outer skin off each chickpea before blending.
—
Storage & Meal Prep Tips
Refrigeration: Store in an airtight container in the fridge for up to 5 days. The flavor will actually improve after 24 hours as the ingredients meld.
Freezing: Hummus freezes exceptionally well. Transfer to a freezer-safe container, leaving ½ inch of headroom, and freeze for up to 3 months. Thaw overnight in the refrigerator.
Reheating: To serve again, remove from the fridge 20 minutes before serving. If you prefer it warm, microwave in 10-second bursts, stirring in between, or place in a heatproof bowl over hot water. Always drizzle with a little fresh olive oil to revive the texture and shine.
—
Conclusion
Mastering homemade hummus is a game-changer for your cooking repertoire. It’s a versatile, nutrient-dense dip that can be a snack, a sandwich spread, or a star on a mezze platter. The journey begins with a single, humble chickpea, but the result is something far greater than the sum of its parts. By following these steps—emulsifying the tahini, processing long enough, and using icy water—you’ll consistently create a dip that’s creamier, fresher, and more flavorful than anything store-bought. Now, grab your food processor and taste the difference for yourself. Don’t forget to share your results with friends and family, or explore our other Mediterranean-inspired recipes for more culinary adventures!
—
FAQs
1. Can I use canned chickpeas without boiling them?
Yes, but boiling them for 20 minutes with baking soda softens the skins, resulting in a dramatically creamier hummus. If you skip this step, be prepared for a slightly grainier texture.
2. My hummus is too thick. How do I fix it?
Add cold water, one tablespoon at a time, while the food processor is running. Ice water is best because it helps rebuild the emulsion without making it oily.
3. Why is my hummus bitter?
Bitterness often comes from old or low-quality tahini. Always taste your tahini before using it. If it’s already bitter, add a pinch of sugar or a little more lemon juice to balance the flavor.
4. Can I make this hummus without tahini?
Absolutely. Use sunflower seed butter, Greek yogurt (for a tangy, creamy version), or even blended silken tofu for a completely different but delicious dip.
5. How long does homemade hummus last at room temperature?
For food safety, do not leave it out for more than 2 hours. If serving at a party, set the bowl in a larger bowl filled with ice to keep it cool.
Proven way to grow creamy Hummus in 3 steps Hummus
Ingredients
Equipment
Method
- Combine chickpeas, tahini, lemon juice, garlic, olive oil, salt, and cumin in a food processor, then process until the mixture is thick and creamy, scraping down the sides as needed.
- With the food processor running, gradually add 2-4 tablespoons of cold water or ice water, one tablespoon at a time, until the hummus reaches your desired smooth and creamy consistency.
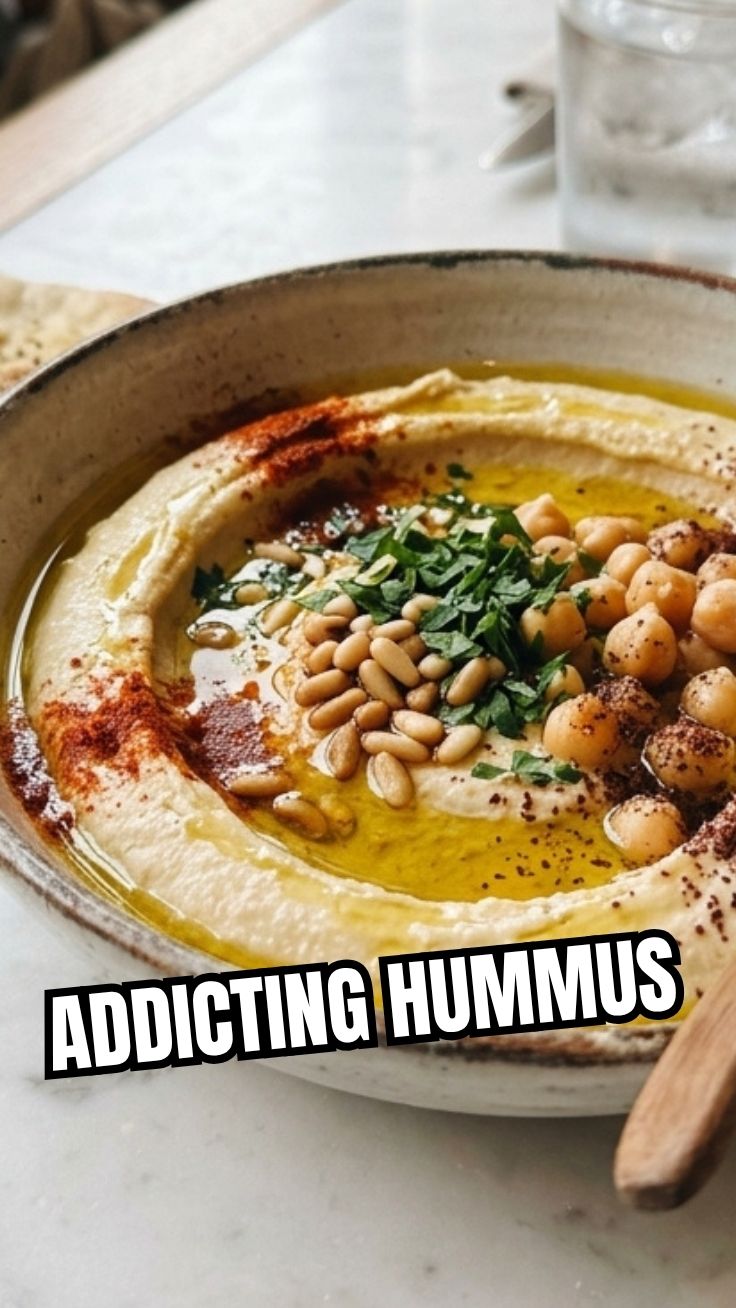
- Transfer the hummus to a serving bowl, drizzle with extra olive oil, and garnish with paprika or fresh parsley if desired; serve immediately or store in an airtight container.