The Ultimate Honey Garlic Chicken: A Sticky, Sweet, and Savory Masterpiece
Have you ever craved a dish that perfectly balances the deep umami of soy sauce with the floral sweetness of honey, all wrapped around tender, juicy chicken? That’s the magic of Honey Garlic Chicken, a weeknight hero that transforms simple pantry staples into a restaurant-quality meal. Preparing this recipe at home isn’t just about saving money; it’s about controlling the quality of ingredients, avoiding hidden preservatives, and mastering a foolproof technique. The secret lies in a perfectly balanced Honey Garlic Sauce, which glazes the chicken into a glossy, caramelized finish. Whether you’re a seasoned cook or a kitchen novice, this guide will walk you through every detail—from searing the perfect crust to achieving that signature sticky glaze.
Ingredients & Kitchen Tools
Main Ingredients
– Chicken thighs (boneless, skinless): 1.5 lbs. Thighs stay juicier than breasts and tolerate high heat better.
– Honey: ⅓ cup. Use raw, runny honey for the best floral notes. Avoid crystallized honey unless melted.
– Soy sauce (low sodium): ¼ cup. This provides the salty backbone. Tamari works for gluten-free.
– Garlic: 6 cloves (minced). Fresh garlic is non-negotiable for punchy flavor.
– Rice vinegar: 2 tablespoons. Adds brightness to cut the sweetness.
– Cornstarch: 1 tablespoon (for sauce) + 1 tablespoon (for dusting chicken). For thickening and crispiness.
– Vegetable oil: 2 tablespoons. Use a neutral oil with a high smoke point (avocado or canola).
– Optional: Sesame seeds, sliced green onions, red pepper flakes (for garnish).
Kitchen Tools
– Cast-iron or heavy-bottomed skillet: Retains heat for a flawless sear.
– Microplane or garlic press: Ensures garlic dissolves evenly into the Honey Garlic Sauce.
– Tongs: For flipping chicken without piercing the meat.
– Small bowl: To whisk the sauce ingredients.
– Wire rack: For resting chicken to keep the crust crispy.
Prep Time & Cooking Schedule
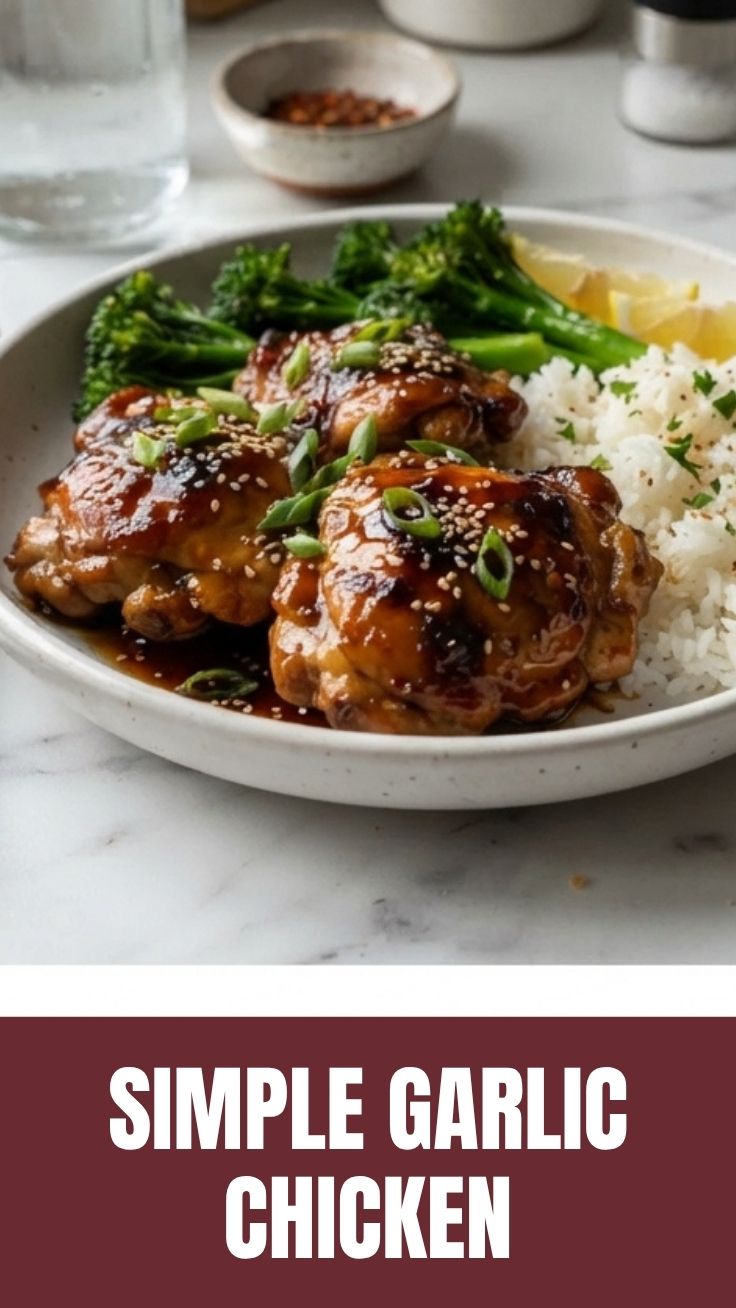
– Prep time: 15 minutes (mince garlic, whisk sauce, pat chicken dry).
– Marinating time: Optional but recommended (20 minutes for deeper flavor).
– Cook time: 18–22 minutes (sear, glaze, and rest).
– Resting time: 5 minutes on a wire rack.
Pro tip: Start cooking the rice or noodles while the chicken rests to save time. The glaze thickens as it cools, so serve immediately.
Step-by-Step Instructions
1. Prep the chicken: Pat the chicken thighs completely dry with paper towels (moisture = steam, not a sear). Season generously with salt and pepper, then lightly dust with cornstarch. This creates a thin, crackling crust.
2. Sear to perfection: Heat 2 tablespoons of oil in your skillet over medium-high heat until it shimmers. Place the chicken skin-side down (if using skin-on) or one side flat. Cook undisturbed for 4–5 minutes until golden brown. Flip and repeat. The internal temperature should reach 165°F (74°C). Temperature control tip: If the pan smokes excessively, reduce heat to medium. You want a sizzle, not a scorch.
3. Craft the glaze: In a small bowl, whisk together honey, soy sauce, rice vinegar, minced garlic, and 1 tablespoon cornstarch. Pour this mixture over the cooked chicken in the pan. Texture cue: The sauce will look watery at first—resist the urge to stir too aggressively. Let it bubble and reduce for 2 minutes.
4. Finish the dish: Lower the heat to medium-low. Spoon the rapidly thickening Honey Garlic Sauce over the chicken as it caramelizes. The sauce should coat the back of a spoon like a syrup. Remove from heat immediately to prevent burning. Seasoning adjustment: Taste the sauce—if too sweet, add a splash of rice vinegar; if too salty, a teaspoon of water.
5. Rest and serve: Transfer the chicken to a cutting board for 5 minutes. Slice against the grain and drizzle with the residual pan sauce. Garnish with sesame seeds and green onions.
> Keyword note: The rich Honey Garlic Chicken achieves its signature sticky glaze when the Honey Garlic Sauce reduces to a syrupy consistency. Low heat is critical here—high heat will burn the sugar in the honey.
Nutritional Benefits & Advantages
This dish is a powerhouse of balanced nutrition:
– Protein: Chicken thighs provide 23g protein per serving, supporting muscle repair and satiety.
– Honey: A natural antimicrobial with antioxidants (flavonoids) that combat inflammation.
– Garlic: Contains allicin, which boosts immune function and may lower blood pressure.
– Caloric balance: At roughly 420 calories per serving, it fits into moderate-carb diets. For lower sugar, reduce honey by 2 tablespoons and add a pinch of stevia.
Tips, Variations & Cooking Advice
– Flavor variations: Add 1 teaspoon grated ginger or a splash of sriracha to the glaze for heat. For citrus notes, substitute orange juice for half the rice vinegar.
– Dietary adaptations:
– Gluten-free: Use tamari or coconut aminos instead of soy sauce.
– Dairy-free: This recipe is naturally dairy-free.
– Low-carb: Swap honey with monk fruit sweetener and use coconut aminos.
– Cooking methods:
– Oven-baked: Sear chicken in an oven-safe skillet, then bake at 400°F for 15 minutes. Add sauce in the last 5 minutes.
– Slow cooker: Brown chicken first, then cook on low for 4 hours with sauce. Thicken with cornstarch slurry at the end.
– Air fryer: Cook at 375°F for 12 minutes, tossing with sauce in the last 2 minutes.
Common Mistakes to Avoid
– Soggy skin: Always pat the chicken dry and dust with cornstarch. Skipping this step leads to a steamed, rubbery texture.
– Burned garlic: Add garlic only after you’ve poured the liquid sauce, not directly into hot oil. Garlic burns in 30 seconds.
– Runny sauce: Measure cornstarch accurately—too little dilutes the glaze. If the sauce is thin, simmer an extra minute while stirring.
– Overcrowding the pan: Cook in batches. Crowding drops the pan temperature and creates steam instead of a sear.
– Skipping the rest: Cutting into hot chicken releases juices, leaving a dry dish. Always rest for 5 minutes.
Storage & Meal Prep Tips
– Refrigeration: Store in an airtight container for up to 4 days. The sauce will thicken—add a splash of water when reheating.
– Freezing: Freeze in labeled bags for up to 3 months. Thaw overnight in the fridge. The texture of the sauce may separate slightly; whisk vigorously while reheating.
– Reheating: Use a skillet over medium heat with 1 tablespoon water to rehydrate the glaze. Microwave on 50% power in 30-second bursts to avoid rubbery chicken.
– Meal prep: Double the sauce batch and store it separately. Cook chicken and sauce separately, then combine just before serving for fresher flavor.
Conclusion
There you have it—a foolproof approach to creating Honey Garlic Chicken that rivals any takeout. The key elements are straightforward: a hot pan, a precise sauce ratio, and patience during the caramelization process. Whether you’re serving it with steamed jasmine rice or a bed of stir-fried vegetables, the Honey Garlic Sauce elevates the entire meal into something extraordinary. I encourage you to try this tonight, snap a photo of your glossy creation, and share your results. Experiment with the variations above, and don’t be afraid to double the sauce—you’ll want extra for dipping everything from spring rolls to roasted broccoli.
FAQs
1. Can I use chicken breasts instead of thighs?
Yes, but reduce cooking time by 3–4 minutes. Slice breasts in half horizontally for even cooking. Monitor internal temperature closely to avoid dryness.
2. My sauce turned out too salty. How do I fix it?
Add 1–2 tablespoons honey and a squeeze of lemon juice to balance the salt. You can also stir in ¼ cup coconut milk or cream for a Thai-inspired variant.
3. Can I make this recipe without cornstarch?
Certainly. Use arrowroot powder or tapioca starch as a 1:1 substitute. For a grain-free option, reduce the sauce by simmering uncovered for 5–6 minutes until naturally thick.
4. How do I prevent the garlic from burning?
Always add garlic with the liquid sauce, not alone in hot oil. If using minced garlic, grate it finely so it dissolves instantly into the sauce.
5. Can I prep the sauce ahead of time?
Absolutely. Whisk the sauce ingredients (excluding cornstarch) and refrigerate for up to 5 days. Add cornstarch just before cooking to maintain thickening power.
Best way to grow your Honey Garlic Chicken
Ingredients
Equipment
Method
- In a medium bowl, whisk together minced garlic, honey, soy sauce, apple cider vinegar, olive oil, salt, and black pepper to create the marinade.
- Add the chicken pieces to the bowl, ensuring they are fully coated with the marinade; let them marinate for at least 15 minutes, or preferably for 30 minutes to an hour in the refrigerator.
- Preheat your oven to 400°F (200°C) and lightly grease a baking dish.
- Arrange the marinated chicken in the prepared baking dish in a single layer.
- Bake for 25-30 minutes, or until the chicken is cooked through and the internal temperature reaches 165°F (74°C).
- For a crispier skin, you can broil the chicken for the last 2-3 minutes, watching carefully to prevent burning.
- Remove the chicken from the oven and let it rest for a few minutes before serving.
- Garnish with sesame seeds and sliced green onions, if desired, and serve warm with your favorite side dishes.