The Ultimate Turkey Gravy Recipe: Elevate Your Thanksgiving Turkey with Homemade Richness
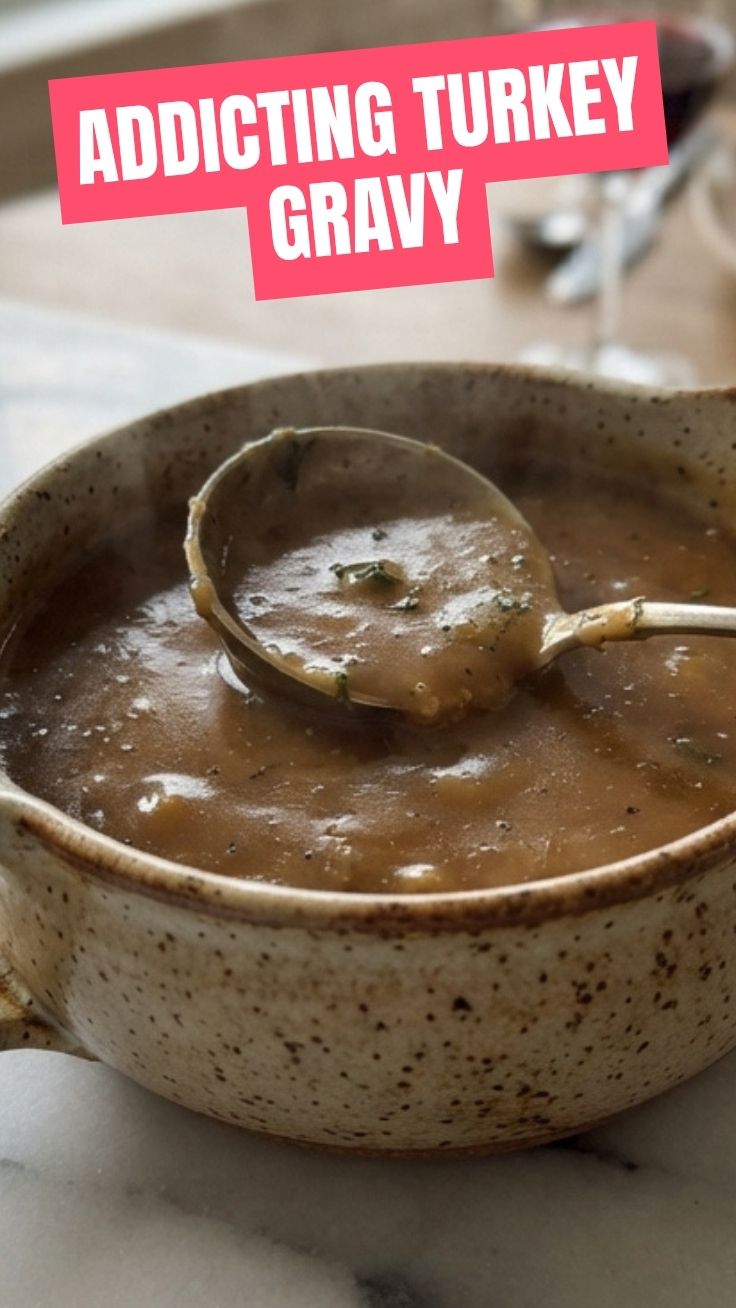
Have you ever sat down to a beautifully roasted Thanksgiving Turkey, only to be disappointed by a watery, flavorless gravy that does nothing for your carefully crafted meal? You are not alone. The truth is, a great turkey gravy is the unsung hero of any holiday feast. It transforms simple potatoes, stuffing, and slices of turkey into something truly memorable. Preparing this Turkey Gravy at home is not just about better taste; it is about taking control of the ingredients, avoiding preservatives, and infusing your table with the deep, savory richness that only comes from real pan drippings and a touch of patience. In this guide, you will learn how to create a velvety, luxurious gravy that will have your guests asking for seconds.
Ingredients & Kitchen Tools
To create a flawless gravy, you need the right ingredients and tools. Here is your complete checklist.
Ingredients:
– Pan Drippings from Roasted Turkey: The star of the show. These contain caramelized bits (fond) that are pure flavor gold.
– Turkey Stock or Broth (4 cups): Use low-sodium store-bought or homemade. Stock has a richer body than broth.
– Unsalted Butter (¼ cup): Forms the base of the roux. Using unsalted allows you to control the salt level.
– All-Purpose Flour (¼ cup): The thickening agent. Gluten-free alternative: Use an equal amount of cornstarch mixed with cold water (slurry).
– Salt & Black Pepper: Essential for seasoning.
– Optional Aromatics: Fresh thyme, sage, or a bay leaf can add incredible depth.
Kitchen Tools:
– Large Skillet or Roasting Pan: To deglaze and cook the gravy.
– Fine-Mesh Strainer: Essential for a silky smooth texture.
– Whisk: Prevents lumps and ensures a smooth roux.
– Measuring Cups & Spoons: For accuracy.
– Fat Separator (Optional but helpful): Makes removing excess fat from drippings effortless.
Prep Time & Cooking Schedule
Total Time: Approximately 20 minutes.
– Prep Time: 5 minutes (measuring stock, chopping herbs).
– Cook Time: 15 minutes (making roux, simmering).
– Resting Time: 2 minutes (to adjust consistency and seasoning before serving).
Planning Tip: Gravy is best made after your turkey has been roasted and is resting. This timing ensures you have fresh, hot drippings and a table-ready sauce.
Step-by-Step Instructions
Follow these steps for a perfect, lump-free gravy every time.
1. Deglaze the Pan: After removing your Thanksgiving Turkey from the roasting pan, place the pan over two burners on medium heat. Pour in about 1 cup of your turkey stock. Use a wooden spoon to scrape up all the browned bits from the bottom. This is the foundation of your flavor.
2. Strain and Measure Drippings: Pour the liquid from the pan through a fine-mesh strainer into a fat separator or a large measuring cup. Let it sit for 2 minutes, then pour off the liquid, leaving the fat behind. You should have about 2 cups of defatted drippings.
3. Make the Roux: In a medium saucepan, melt the butter over medium heat. Whisk in the flour and cook for 1–2 minutes until it smells nutty and is lightly golden. This removes the raw flour taste. The key to a perfect Turkey Gravy is cooking the roux just enough to color it slightly, which adds nuttiness.
4. Whisk in the Liquids: Slowly pour in the defatted drippings and the remaining 3 cups of stock while whisking constantly. This prevents lumps from forming. Add your optional aromatics (thyme, sage) at this point.
5. Simmer to Thicken: Bring the gravy to a gentle simmer, then reduce heat to low. Cook for 5–7 minutes, whisking occasionally, until it thickens enough to coat the back of a spoon.
6. Season and Strain: Remove from heat. Strain the gravy again through a fine-mesh sieve into a serving boat. Season with salt and pepper to taste.
Nutritional Benefits & Advantages
Gravy is often seen as an indulgence, but making it at home from scratch offers several benefits. The primary advantage is control. By using homemade stock and real drippings, you drastically reduce the sodium and MSG levels found in store-bought packets or jars. The fat content comes from a natural source (butter and turkey drippings), which can be easily skimmed to suit your dietary preferences. A simple turkey gravy is also a good source of protein from the stock, and the collagen from the turkey bones adds to the richness. Homemade gravy is naturally gluten-free if you use a cornstarch slurry instead of flour, making it a versatile option for restrictive diets.
Tips Variations & Cooking Advice
– Flavor Variations: Stir in a splash of white wine or dry sherry after deglazing. Add sautéed mushrooms for a “mushroom gravy.” Finish with a tablespoon of heavy cream for a luxurious, velvety texture.
– Gluten-Free Version: Replace all-purpose flour with an equal amount of cornstarch. Mix the cornstarch with cold water to create a “slurry” before adding it to the hot liquid.
– Cooking Methods: This recipe is designed for stovetop, but you can also make the roux in the roasting pan over your grill or campfire if you are cooking outdoors.
– Portion Changes: This recipe yields 4 cups of gravy. For a smaller batch, halve all ingredients. For a larger crowd, simply double all ingredients.
– Dairy-Free Option: Substitute the butter with a high-quality vegan butter or even olive oil. The flavor will be slightly different but still delicious.
Common Mistakes to Avoid
– Lumpy Gravy: This occurs when you add liquid too quickly or don’t whisk enough. Solution: Always add liquid slowly while whisking vigorously.
– Bland Gravy: Often caused by using a commercial broth without seasoning. Solution: Season generously with salt and pepper at the end, and consider a splash of Maggi sauce or soy sauce for umami.
– Greasy Gravy: Forgetting to defat the drippings. Solution: Use a fat separator or skim the fat with a spoon. If you skip this step, your gravy will have a pool of oil on top.
– Burnt Roux: Cooking the roux too high or too long. Solution: Keep heat at medium-low and stir constantly. If you see brown specks, start over.
Storage & Meal Prep Tips
– Refrigeration: Leftover gravy can be stored in an airtight container in the refrigerator for up to 4 days.
– Freezing: Pour cooled gravy into freezer-safe bags or containers. It will freeze well for up to 3 months.
– Reheating: To preserve the silky texture, reheat the gravy in a saucepan over low heat, whisking occasionally. If it has thickened too much, add a splash of stock or water to loosen it. If it is too thin, simmer for a few minutes uncovered to reduce. Avoid microwaving, as this can cause uneven heating and separation.
Conclusion
This simple, from-scratch Turkey Gravy is the true companion to your Thanksgiving Turkey, ensuring every plate is complete with rich, savory flavor. By mastering this technique, you elevate a simple sauce into a highlight of the entire meal. Now that you have the recipe, I encourage you to gather your ingredients and give it a try this holiday season. Your guests will be amazed, and you will never reach for a packet again. Share your results in the comments below or tag us in your holiday photos. Happy cooking!
Frequently Asked Questions (FAQs)
1. Can I make turkey gravy ahead of time?
Yes, you can make it up to 3 days in advance. Simply cool it completely and store it in an airtight container in the fridge. Reheat gently on the stovetop while whisking.
2. My gravy is too salty. How do I fix it?
The easiest fix is to add an unsalted liquid—either water, unsalted broth, or even a splash of milk or cream. Alternatively, adding a peeled, raw potato slice to the hot gravy for 10 minutes can help absorb some of the salt.
3. Can I use cornstarch instead of flour for a gluten-free gravy?
Absolutely. For every 2 cups of liquid, mix 2 tablespoons of cornstarch with 2 tablespoons of cold water to form a slurry. Whisk it into the hot liquid and simmer for 1 minute. Note that cornstarch does not hold up as well to reheating and can become thin after freezing.
4. What if I don’t have pan drippings?
If you are not roasting a whole turkey, you can use high-quality roasted turkey wings or drumsticks to make a quick “pan drippings.” Simply roast them in a pan until browned, then deglaze with stock. Alternatively, use a high-quality store-bought turkey base (like Better Than Bouillon) for better flavor.
5. How do I make the gravy thicker without lumps?
The best method is to use a roux (butter + flour) or a cornstarch slurry. A roux creates a stable, velvety thickness. If you already have a thin gravy, mix a teaspoon of cornstarch with an equal amount of cold water, whisk it in, and simmer for one minute.
Quick way to grow delicious Turkey Gravy with 3 easy stepsTurkey Gravy
Ingredients
Equipment
Method
- Separate the fat from the turkey drippings using a fat separator or by chilling and skimming, then reserve 2 tablespoons of the fat and 2 cups of the drippings.
- Heat the reserved turkey fat in a medium saucepan over medium heat, then whisk in the flour and cook for 1-2 minutes until a golden-brown roux forms.
- Gradually whisk in the reserved turkey drippings and chicken or turkey broth into the roux.
- Bring the mixture to a simmer, whisking constantly, and cook for 5-7 minutes until the gravy thickens to your desired consistency.
- Season the gravy with salt and black pepper to taste, adding more if needed.
- Serve the delicious turkey gravy hot over your favorite turkey dishes.