The Ultimate Guide to Perfect Homemade Rice Krispie Treats
Have you ever craved that nostalgic, gooey, crispy snack that instantly transports you back to childhood bake sales and school lunchboxes? There’s no substitute for a batch of homemade Rice Krispie Treats fresh from the pan. Preparing them at home not only lets you control the sweetness and texture, but it also costs a fraction of store‑bought versions. With just a few pantry staples like rice krispie cereal, butter, and marshmallows, you can whip up a dessert that’s both simple and crowd‑pleasing. In this data‑driven guide, we’ll walk through every step to ensure your treats turn out perfectly chewy, not rock hard.
Ingredients & Kitchen Tools
Ingredients
– 6 cups (about 170 g) rice krispie cereal – the crispy base; avoid generic puffed rice that may be stale.
– 4 cups (about 340 g) mini marshmallows – melt faster and create a smoother binder. Regular marshmallows work too, but cut them into quarters.
– 3 tablespoons unsalted butter – use salted butter if you prefer a slight salt contrast.
– ½ teaspoon vanilla extract – brightens flavor.
– ¼ teaspoon fine sea salt – balances sweetness.
Optional substitutions: Vegan marshmallows and plant‑based butter for a dairy‑free version; gluten‑free crispy rice cereal for a GF treat.
Kitchen Tools
– Large heavy‑bottomed saucepan (3‑4 quart)
– Silicone spatula – resists heat and won’t scratch non‑stick pans.
– 9×13‑inch baking pan (or 8×8 for thicker treats)
– Parchment paper – line the pan for easy removal.
– Measuring cups and spoons
Prep Time & Cooking Schedule
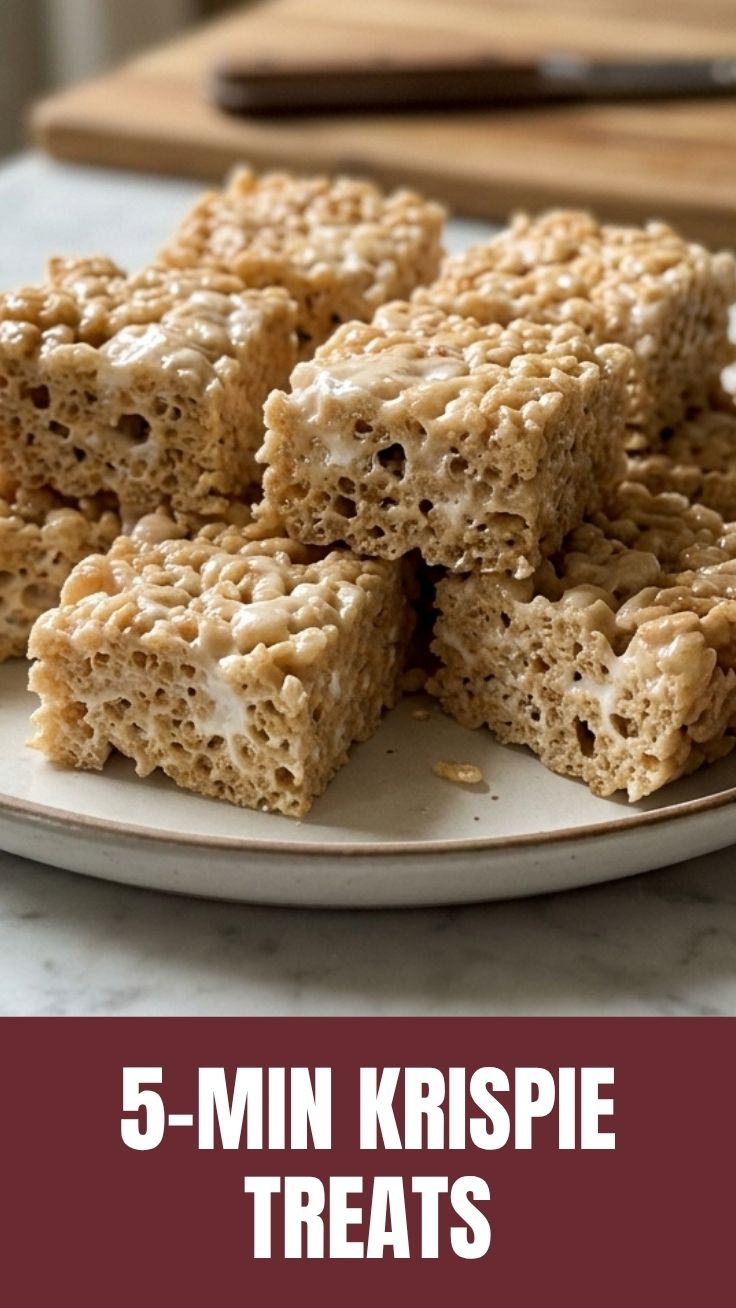
– Prep time: 5 minutes (measure ingredients, line pan)
– Cook time: 10–12 minutes (melting butter and marshmallows + mixing)
– Resting & cooling time: 30–45 minutes at room temperature (or 15 minutes in the fridge)
Plan your timeline so the treats have time to set before slicing. If you’re in a hurry, a quick 15‑minute chill works, but room‑temperature cooling yields a softer, more tender bite.
Step‑by‑Step Instructions
1. Prepare the pan. Line your 9×13‑inch pan with parchment paper, leaving overhang on two sides. Lightly grease the paper with butter or non‑stick spray.
2. Melt butter and marshmallows. In a large saucepan over low heat, melt 3 tablespoons of butter. Add 4 cups of mini marshmallows and stir constantly with a silicone spatula until fully melted and smooth – about 5 minutes. Do not let the mixture bubble or turn golden, or your treats will become hard.
3. Remove from heat. Immediately stir in ½ teaspoon vanilla and ¼ teaspoon salt.
4. Fold in cereal. Gently pour in 6 cups of rice krispie cereal. Fold carefully with the spatula until every grain is coated. Over‑mixing can crush the cereal and make treats dense.
5. Press into pan. Transfer the mixture to the prepared pan. Using a second piece of parchment paper or a lightly greased spatula, press the mixture into an even layer. Don’t push too hard – a light, even pressure ensures a tender, chewy texture.
6. Cool and cut. Let the pan sit at room temperature for at least 30 minutes. Lift the block out using the parchment overhang and slice into squares with a sharp knife. For cleaner cuts, dip the knife in warm water between slices.
Pro tip: When making these Rice Krispie Treats, always keep the heat low – high heat causes the sugar in marshmallows to caramelize and stiffen.
Nutritional Benefits & Advantages
One standard 2×2‑inch treat (about 25 g) contains roughly 115 calories, 2 g fat, 22 g carbohydrates, and 1 g protein. While not a health food, homemade treats offer advantages:
– No preservatives – store‑bought versions often contain artificial flavors and stabilizers.
– Controlled sugar – you can reduce marshmallows or use a sugar‑free marshmallow alternative.
– Whole‑grain options – choose a whole‑grain crispy brown rice cereal for added fiber.
– Quick energy – the simple carbohydrates provide a fast burst, ideal for kids’ snacks or post‑workout treats.
Tips, Variations & Cooking Advice
Flavor twists
– Chocolate peanut butter: Melt ¼ cup peanut butter with the butter, then stir in ½ cup chocolate chips just before pressing.
– S’mores: Add ½ cup mini chocolate chips and ½ cup crushed graham crackers after folding in cereal.
– Fruity: Fold in 1 cup freeze‑dried strawberries (crushed) for a tangy pop.
Dietary adaptations
– Vegan: Use vegan marshmallows (e.g., Dandies) and plant‑based butter.
– Gluten‑free: Most crisp rice cereals are naturally gluten‑free, but double‑check the label.
Alternative methods – microwave method: melt butter and marshmallows in a large microwave‑safe bowl in 30‑second bursts, stirring between each. This works well but requires careful timing to avoid scorching.
Common Mistakes to Avoid
| Mistake | Solution |
|———|———-|
| Hard, brittle treats | Don’t overheat the marshmallow mixture. Remove from heat as soon as it’s smooth. Also, press the mixture gently. |
| Treats crumble apart | Not enough marshmallow binder. Use a full 4 cups of mini marshmallows and ensure they are completely melted. |
| Stale, chewy cereal | Always use a fresh bag of crisp rice cereal. Check the expiration date – old cereal won’t stay crunchy. |
| Sticking to pan | Line the pan with parchment paper and grease it lightly. Alternatively, use a non‑stick spray. |
| Uneven texture | Fold in cereal just until coated – over‑mixing crushes the puffs, causing hard spots. |
Storage & Meal Prep Tips
Room temperature: Store treats in an airtight container at room temperature for up to 3 days. Place a piece of parchment paper between layers to prevent sticking.
Refrigeration: Not recommended – the fridge draws moisture, making treats soggy.
Freezing: Wrap each square tightly in plastic wrap, then place in a freezer‑safe bag. Freeze for up to 6 weeks.
Reheating: To restore softness, microwave one treat on a plate for 8–10 seconds. For a crispier edge, pop it in a preheated 300°F oven for 3 minutes.
Conclusion
Homemade Rice Krispie Treats are a timeless, three‑ingredient wonder that anyone can master. By following the tips above – especially keeping the heat low and pressing gently – you’ll achieve that perfect balance of chewy and crisp every time. The key is starting with fresh rice krispie cereal and not rushing the cooling process. We’d love to see your creations! Try this recipe tonight, snap a photo, and share your results with us. For more dessert hacks and foolproof snacks, explore our other posts.
FAQs
1. Can I use large marshmallows instead of mini?
Yes – 4 cups of mini marshmallows equals about 40 regular marshmallows (1 bag). Cut them into quarters before melting to speed up melting.
2. Why did my treats turn out rock hard?
Likely because the butter and marshmallows were cooked too long or at too high heat. Always use low heat and remove the pan as soon as the mixture is smooth and glossy.
3. Can I make these vegan?
Absolutely. Use vegan marshmallows (Dandies are excellent) and a plant‑based butter. The rest of the recipe stays the same.
4. How do I cut clean squares without a sticky mess?
Let the treats cool completely. Then use a sharp chef’s knife dipped in hot water and wiped dry between cuts. For extra ease, score the block with a pizza cutter.
5. What can I substitute for butter?
Coconut oil or vegan butter work 1:1. For a richer flavor, try browned butter – melt butter in the pan until it turns golden and smells nutty, then proceed.
Quick way to grow Rice Krispie Treats
Ingredients
Equipment
Method
- In a large saucepan, melt butter over low heat.
- Add marshmallows and stir until completely melted.
- Remove from heat and stir in Rice Krispies cereal until well coated.
- Press the mixture evenly into a buttered 9x13 inch pan.
- Let cool completely before cutting into squares and serving.