The Ultimate Guide to Perfect Quesadillas: Crispy, Cheesy, and Irresistible
Have you ever taken a bite of a sad, soggy quesadilla and wondered why restaurant versions taste so much better? The secret isn’t magic—it’s technique. Learning to make flawless Quesadillas at home transforms a simple snack into a culinary masterpiece. This guide will walk you through every detail, from ingredient selection to advanced cooking tips, ensuring your homemade version rivals any restaurant. Whether you’re a fan of traditional Mexican food or looking to experiment with fusion flavors, mastering this dish is easier than you think. Let’s unlock the secrets together.
—
Ingredients & Kitchen Tools
Before you start, gather everything you need. Organization is key to a stress-free cooking experience.
Essential Ingredients:
– Flour tortillas (large, 10-inch): Corn tortillas work for gluten-free options, but flour provides the best crispy-chewy texture.
– Shredded cheese (Oaxaca, Monterey Jack, or mozzarella): Melts beautifully and stretches perfectly. Avoid pre-shredded bags if possible—they contain anti-caking agents.
– Protein (optional): Cooked chicken, ground beef, or black beans add heft.
– Vegetables: Sautéed bell peppers, onions, mushrooms, or spinach.
– Oil or butter: For pan-frying; use a neutral oil with a high smoke point like avocado or vegetable oil.
– Seasonings: Cumin, chili powder, smoked paprika, salt, and pepper.
Kitchen Tools & Utensils:
– Large non-stick skillet or cast-iron pan: Ensures even browning and easy flipping.
– Spatula: A wide, flexible metal or silicone spatula helps flip without tearing.
– Sharp knife and cutting board: For prepping vegetables and proteins.
– Paper towels: To drain excess oil after cooking.
Optional Substitutions:
– Dairy-free: Use vegan shredded cheese or nutritional yeast for a “cheesy” flavor.
– Gluten-free: Corn tortillas or gluten-free flour tortillas work perfectly.
– Protein swaps: Try shredded jackfruit, tofu crumbles, or leftover carnitas.
—
Prep Time & Cooking Schedule
Understanding timing helps you serve hot, crispy quesadillas without last-minute chaos.
– Prep Time: 15–20 minutes (chopping vegetables, shredding cheese, and pre-cooking protein)
– Cook Time: 5–7 minutes per quesadilla (2–3 minutes per side)
– Resting Time: 1–2 minutes after cooking (allows cheese to set slightly before cutting)
Pro Planning Tip: Precook proteins and vegetables up to 2 days ahead. When ready to serve, assembly and cooking take under 10 minutes per person. This makes them perfect for weeknight dinners or last-minute gatherings.
—
Step-by-Step Instructions
Follow these steps precisely for perfectly golden, gooey quesadillas every time.
1. Prep your ingredients. Shred cheese by hand for optimal meltability. Chop vegetables into small, even pieces. If using protein, ensure it’s pre-cooked and seasoned.
2. Preheat your skillet over medium heat. Too hot, and the tortilla burns before cheese melts; too low, and it turns soggy. Test with a drop of water—if it sizzles, you’re ready.
3. Lightly brush one tortilla with oil. Place it oiled-side down into the skillet. Immediately sprinkle cheese evenly across half of the tortilla (about ½ cup).
4. Add fillings. Layer your chosen protein, vegetables, and spices on top of the cheese. Avoid overfilling (max ¾ cup total) to prevent spillage.
5. Fold the tortilla in half using your spatula, pressing gently. Cook for 2–3 minutes until the bottom is golden brown and cheese begins to melt.
6. Flip carefully. Use your spatula to flip the quesadilla. Cook another 2–3 minutes until the second side is crispy and the cheese is fully melted.
7. Rest and cut. Transfer to a cutting board. Let sit for 90 seconds, then slice into wedges with a sharp knife.
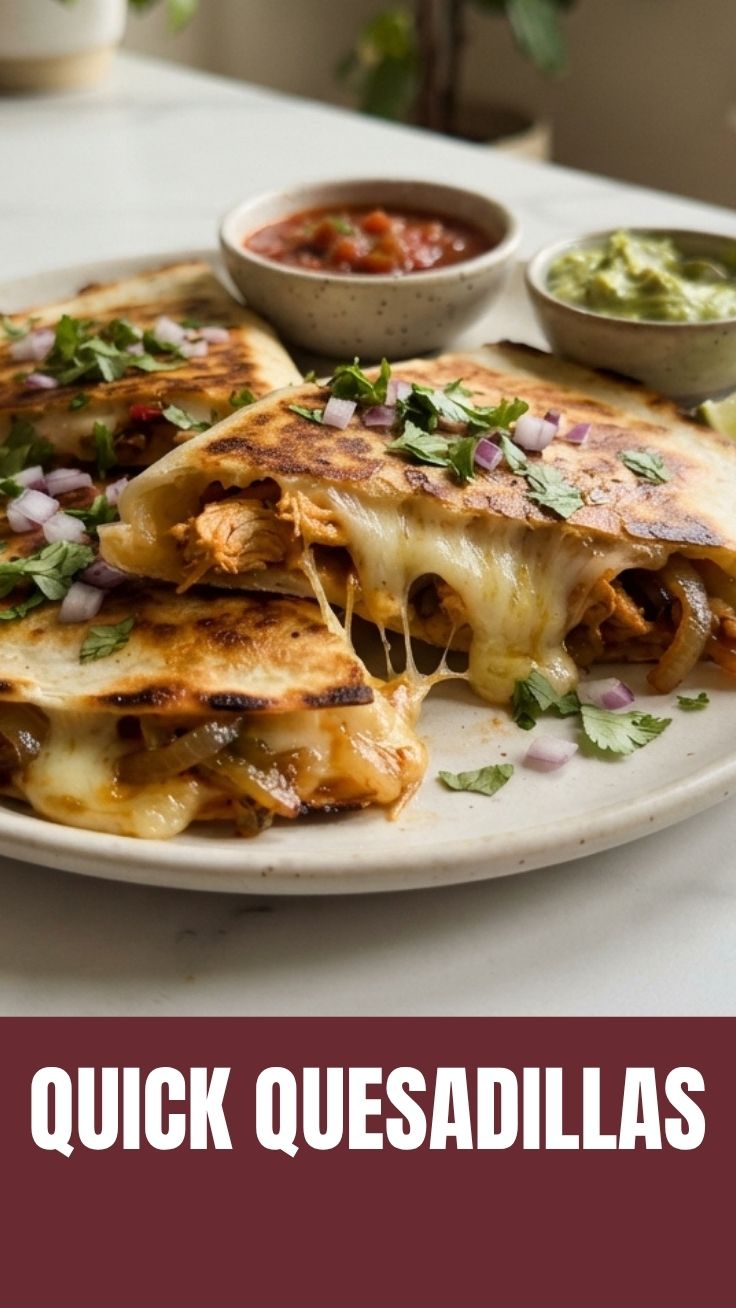
Texture Cue: The perfect quesadilla should have a “crackle” when you bite into it—the sound of a crisp shell giving way to molten cheese. This recipe captures the essence of authentic Quesadillas while allowing your creativity to shine. The balance of flavors also highlights the magic of Mexican food at home.
—
Nutritional Benefits & Advantages
This dish is more than tasty—it can be a balanced meal. Here’s why you should feel good about serving it:
– Calcium boost: Cheese provides 20% of your daily calcium per serving, supporting bone health.
– Protein power: Adding chicken or beans turns this into a complete protein source with 25–30g per serving.
– Customizable vegetables: Bell peppers deliver 150% of your daily Vitamin C; spinach adds iron and fiber.
– Healthy fats: Avocado or olive oil-based cooking methods provide monounsaturated fats for heart health.
Dietary advantage: By controlling ingredients, you reduce sodium by 40% compared to restaurant versions and eliminate preservatives.
—
Tips Variations & Cooking Advice
Endless possibilities await. Try these proven variations to keep your quesadillas exciting:
Flavor Variations:
– Southwest style: Add corn, black beans, and pepper jack cheese. Serve with smoked paprika sour cream.
– Breakfast quesadilla: Fill with scrambled eggs, bacon, and cheddar. Perfect for mornings.
– Mushroom & truffle: Sauté wild mushrooms with garlic, add Gruyère cheese, and finish with truffle oil drizzle.
Cooking Method Options:
– Air fryer: Cook at 375°F for 6–8 minutes, flipping halfway. Yields ultra-crispy results with less oil.
– Oven-baked: Place assembled quesadillas on a baking sheet. Bake at 400°F for 10 minutes, flipping once.
– Grill pan: Achieve beautiful char marks. Use medium-high heat and brush tortillas with oil.
Dietary Adaptations:
– Dairy-free version: Cashew cheese or vegan cheddar shreds melt surprisingly well.
– Low-carb option: Use large collard green leaves or low-carb tortillas seasoned with lime.
—
Common Mistakes to Avoid
Even experienced cooks make errors. Sidestep these pitfalls for consistent results:
| Mistake | Solution |
|———|———-|
| Burnt tortilla, unmelted cheese | Reduce heat to medium-low and cover pan for 1 minute |
| Soggy, greasy texture | Drain proteins and vegetables well before assembling; use minimal oil |
| Fillings spilling out | Leave 1-inch border when placing fillings; don’t overstuff |
| Tortilla sticks and tears | Use a non-stick pan and enough oil; let cook fully before flipping |
Expert Tip: Patience is your secret weapon. Don’t rush the first side—listen for the sizzle to calm down, indicating the tortilla has fully crisped.
—
Storage & Meal Prep Tips
Make large batches with confidence using these guidelines:
– Refrigeration: Cool completely, wrap individually in foil or wax paper, and store in an airtight container. Use within 4 days.
– Freezing: Flash-freeze assembled but uncooked quesadillas on a baking sheet for 1 hour. Wrap tightly in plastic wrap and foil. Freeze up to 3 months.
– Reheating: For best texture, reheat in a dry skillet over medium heat for 2–3 minutes per side. Avoid microwaves—they create soggy spots.
Meal prep hack: Batch-cook fillings like seasoned chicken or sautéed veggies on Sunday. Assemble fresh quesadillas nightly in under 5 minutes.
—
Conclusion
Mastering homemade Quesadillas elevates your cooking game while reducing processed food intake. With crispy exteriors, gooey centers, and endless customization, this recipe becomes a family favorite you’ll return to weekly. It also celebrates the vibrant traditions of Mexican food in your own kitchen. Now it’s your turn—fire up that skillet, experiment with fillings, and share your results. Tag your photos and let us know your winning combination!
—
FAQs
1. Can I use corn tortillas instead of flour?
Absolutely. Corn tortillas create a gluten-free version with a more rustic texture. Brush with oil and use medium-low heat to prevent cracking.
2. How do I keep quesadillas crispy for a crowd?
Cook them on a wire rack set over a baking sheet in a 250°F oven. This allows air circulation, preventing sogginess while keeping them warm.
3. My cheese isn’t melting fully. What’s wrong?
Most likely, your heat is too high. Lower the flame and cover the pan briefly to trap steam, which speeds up melting without burning.
4. Can I make vegetarian quesadillas with high protein?
Yes! Black beans, pinto beans, lentils, or plant-based crumbles all work. Season with cumin and smoked paprika for depth.
5. How do I fix oversalted quesadillas?
Serve with unsalted sour cream or plain yogurt to balance flavors. Next time, use low-sodium cheese and adjust salt last.
Best way to grow 5 amazing Quesadillas Quesadillas
Ingredients
Equipment
Method
- Gather all your ingredients and prepare any optional fillings you plan to use, such as shredding cooked chicken or dicing bell peppers.
- Heat a large skillet or griddle over medium heat and add about half a tablespoon of cooking oil, ensuring it coats the surface.
- Place one flour tortilla in the heated skillet, then sprinkle about a quarter cup of shredded cheese evenly over half of the tortilla.
- Add a small amount of your chosen optional fillings onto the cheesy half of the tortilla, if desired, then fold the other half of the tortilla over to create a crescent shape.
- Cook for 2-3 minutes per side, or until the tortilla is golden brown and crispy, and the cheese is melted and bubbly.
- Remove the cooked quesadilla from the skillet and repeat the process for the remaining tortillas, adding more oil as needed.
- Cut each quesadilla into wedges and serve immediately with your favorite toppings like salsa, guacamole, or sour cream.