Why Your Homemade Poke Bowl Will Never Be Boring Again
Have you ever stared at a $18 restaurant poke bowl and wondered if you could recreate that magic in your own kitchen? The truth is, crafting a restaurant-quality Poke Bowl at home isn’t just possible—it’s actually easier, cheaper, and healthier than most takeout options. When you control every ingredient, from the sushi-grade fish to the creamy avocado slices, you unlock a world of customization that even the best Hawaiian Poke shops can’t match. Let’s dive into the art and science behind building a protein-packed bowl that rivals any surfside spot in Honolulu.
—
Ingredients & Kitchen Tools
For the Bowl (Serves 2)
– Sushi-grade salmon or ahi tuna (8 oz) – Freshness is non-negotiable; look for bright color and no fishy odor
– Sushi rice (1 cup) – Short-grain for that sticky, authentic texture
– Rice vinegar (2 tbsp) – Balances sweetness and acidity
– Soy sauce (3 tbsp) – Low-sodium preferred for salt control
– Sesame oil (1 tsp) – Adds nutty depth
– Avocado (1 ripe) – Creamy contrast to the fish
– Cucumber (1/2) – Thinly sliced for crunch
– Edamame (1/2 cup, shelled) – Plant-based protein boost
– Seaweed salad (1/2 cup) – Umami bomb
– Pickled ginger, sesame seeds, and furikake – For garnish
– Optional toppings – Mango cubes, jalapeño slices, spicy mayo, or sriracha
Kitchen Essentials
| Tool | Purpose |
|——|———|
| Sharp chef’s knife | Clean fish cubes without tearing |
| Rice cooker or heavy-bottomed pot | Consistent rice texture |
| Bamboo mat (optional) | Rolling sushi if leftovers appear |
| Large mixing bowl | Marinating fish |
| Small prep bowls | Organizing toppings |
Substitutions Worth Knowing
– Fish swap: Cooked shrimp, crab sticks, or tofu (firm, pressed)
– Rice alternative: Cauliflower rice (low-carb) or quinoa (extra protein)
– Soy sauce replacement: Coconut aminos for gluten-free diets
—
Prep Time & Cooking Schedule
Total time: 35 minutes active prep + 20 minutes resting
| Phase | Time | Notes |
|——-|——|——-|
| Rice cooking + cooling | 25 min | Rinse rice until water runs clear; let rest 10 min after cooking |
| Fish marinating | 10 min | Cube fish, toss in soy + sesame oil, refrigerate while rice cools |
| Vegetable prep | 10 min | Slice avocado, cucumber; thaw edamame if frozen |
| Assembly | 2 min per bowl | Keep ingredients separate until serving |
Pro tip: The resting time is non-negotiable—warm rice will cook the fish edges. Spread cooked rice on a baking sheet for faster cooling.
—
Step-by-Step Instructions
1. Perfect the Rice (The Foundation)
Cook sushi rice according to package directions (usually 1:1.2 water-to-rice ratio). While still hot, fold in rice vinegar and a pinch of sugar. Fan the rice while mixing to achieve that glossy, slightly sweet base. Spread on a plate and let cool to room temperature—about 15 minutes. This step determines whether your Poke Bowl feels authentic or mushy.
2. Handle the Fish with Care
Cube the salmon or tuna into 1/2-inch pieces—too large and they’re awkward to eat, too small and they turn mushy. In a bowl, combine fish with 2 tbsp soy sauce, 1 tsp sesame oil, and 1 tsp rice vinegar. Gently toss. Marinate for exactly 10 minutes in the fridge. Over-marinating firms the fish; under-marinating leaves it bland.
3. Build the Bowl Architecture
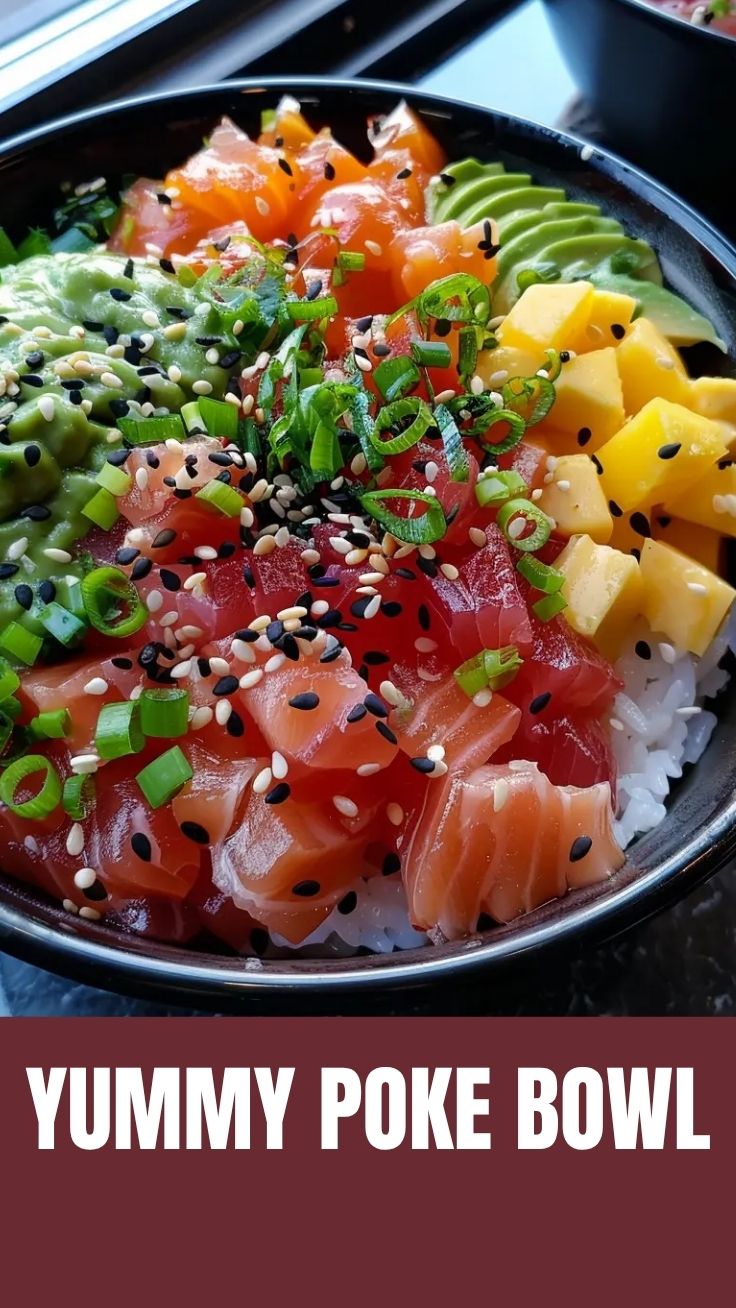
Start with a base of cooled rice (about 1 cup per bowl). Arrange fish in a neat pile at the center. Fan sliced avocado, cucumber, edamame, and seaweed salad around it. This isn’t random—each bite should hit a different flavor zone. The Hawaiiian Poke tradition emphasizes visual balance as much as taste.
4. Garnish for Impact
Sprinkle furikake (sesame-seaweed blend) over everything. Add pickled ginger on the side, not on top—it overpowers other flavors when mixed. Finish with sesame seeds and a drizzle of spicy mayo if desired. Temperature check: Serve immediately while the rice is still slightly above fridge-cold fish temperature (the sweet spot is around 60°F for the bowl).
—
Nutritional Benefits & Advantages
This isn’t just a meal; it’s a metabolic powerhouse. A single serving delivers:
– 35-40g protein from fish and edamame (supports muscle repair)
– Omega-3 fatty acids (salmon provides 2g per serving, reducing inflammation)
– Fiber (avocado + cucumber + seaweed = 8g total)
– Low glycemic impact (sushi rice has resistant starch when cooled)
– Vitamin B12, selenium, and iodine (critical for thyroid and nerve function)
Compared to takeout, you save approximately 200 calories (restaurants use heavier sauces) and control sodium levels (homemade versions average 600mg vs. 1200mg+ in restaurant bowls).
—
Tips, Variations & Cooking Advice
Flavor Twists That Work
– Spicy Tuna: Mix cubed tuna with sriracha + mayo (1:1 ratio)
– Mango Kick: Add diced mango and a squeeze of lime for tropical sweetness
– Tempura Crunch: Top with crushed tempura flakes (but add just before eating)
Dietary Adaptations
– Gluten-free: Use tamari or coconut aminos instead of soy sauce
– Dairy-free: Naturally dairy-free, but check spicy mayo ingredients
– Pescatarian: Already fits; boost with roe or cooked octopus
– Low-carb: Swap rice for zucchini noodles or mixed greens
Chef’s Secret
Salt the cucumber slices 10 minutes before assembly, then pat dry. This draws out excess water that would otherwise dilute the soy marinade.
—
Common Mistakes to Avoid
| Mistake | Consequence | Fix |
|———|————-|—–|
| Using warm rice | Cooks fish edges, creates gray color | Cool rice on a baking sheet |
| Over-marinating fish | Tough, rubbery texture | Set a 10-minute timer |
| Slicing avocado too early | Browned, mushy cubes | Cut avocado right before serving |
| Skipping rice vinegar | Bland, sticky rice base | Never skip; it’s the flavor backbone |
| Overloading wet toppings | Soggy rice within 5 minutes | Pat seaweed salad dry; drain pickled ginger |
—
Storage & Meal Prep Tips
Refrigeration: Store components separately in airtight containers. Fish lasts 1 day max (24 hours). Rice stays fresh 3 days, vegetables 2 days.
Freezing: Only freeze raw fish (vacuum-sealed, up to 3 months). Freezing assembled bowls destroys texture.
Reheating (avoid it): Poke is best eaten cold or at room temperature. If you prefer warm rice, microwave rice separately for 30 seconds, then add cold toppings.
Meal prep hack: Pre-cube fish and portion vegetables into separate bags. Assemble morning of serving. This keeps everything fresh without cross-contamination.
—
Conclusion
Building a stunning Poke Bowl at home unlocks a world of creativity, nutrition, and cost savings that no restaurant can fully replicate. By mastering the balance of fresh fish, properly cooled rice, and thoughtful toppings, you’re not just making dinner—you’re honoring the spirit of Hawaiian Poke, where simplicity meets perfection. Start with this recipe, then experiment with spicy mayo variations or unexpected add-ins like crispy shallots. Your taste buds will thank you, and your wallet will too. Share your creation on social media with #HomemadePoke—we’d love to see your masterpiece!
—
FAQs
Can I use frozen fish for poke bowls?
Yes, but only if it’s labeled “sushi-grade” or “sashimi-grade.” Freeze at -4°F for 7 days to kill parasites, then thaw slowly in the fridge overnight.
How do I know if my fish is fresh enough?
Check three things: bright color (not dull), firm texture (springs back when pressed), and clean ocean smell (no ammonia or sour notes). When in doubt, buy from a trusted fishmonger.
Can I make this dairy-free?
Absolutely—this recipe is naturally dairy-free. Just verify your spicy mayo (if using) doesn’t contain milk solids. Most brands are safe.
Why is my rice too sticky or too dry?
Measure water precisely (1:1.2 ratio for sushi rice). Too sticky = too much water. Too dry = not enough water or overcooked. Letting rice rest 10 minutes after cooking fixes minor issues.
How long can I keep leftover poke in the fridge?
Raw fish bowls: 24 hours max. Cooked seafood bowls: 48 hours. Always store fish and rice separately—combined bowls turn mushy within hours.
Quick Way to Grow a 5-Star Poke Bowl Garden
Ingredients
Equipment
Method
- Prepare your chosen containers with well-draining soil, ensuring each container is large enough to support the growth of your desired greens.
- Plant the lettuce, spinach, and arugula seeds according to package directions, spacing them appropriately to allow for healthy development.
- Water the newly planted seeds thoroughly, and place the containers in a location that receives ample sunlight.
- Once your greens have reached a desirable size, carefully harvest the outer leaves, allowing the inner leaves to continue growing for future use.
- Wash the harvested greens and use them as the fresh, vibrant base for your delicious homemade poke bowls.