The Ultimate Guide to Perfect Chocolate Lava Cake: A Molten Masterpiece
Have you ever wondered why restaurant Chocolate Lava Cake tastes impossibly rich and perfectly gooey, while homemade versions often end up as overcooked brownie pucks? The secret isn’t a professional kitchen—it’s precision, timing, and understanding the science behind the magic. Preparing this elegant dessert at home is more than a baking project; it’s a confidence-building achievement that impresses guests and satisfies the deepest chocolate cravings. In this data-driven guide, you’ll master the art of the molten chocolate cake with foolproof techniques that guarantee a lava-like center every time.
Ingredients & Kitchen Tools
For the Lava Cakes (serves 4)
– High-quality dark chocolate (70%+ cocoa): 4 oz (115g). Don’t skimp—cheap chocolate won’t melt smoothly or provide the intense flavor needed for a proper Chocolate Lava Cake.
– Unsalted butter: 1/2 cup (1 stick, 115g). Salted butter can work, but omit any added salt.
– Granulated sugar: 1/2 cup (100g) plus extra for ramekins.
– Large eggs: 2 whole eggs + 2 egg yolks. Yolks create richness; whites provide structure.
– All-purpose flour: 1/4 cup (30g). Gluten-free 1:1 blend works perfectly.
– Vanilla extract: 1 tsp.
– Pinch of sea salt: Balances bitterness and intensifies chocolate flavor.
Kitchen Tools
– 4 (6-ounce) ramekins or oven-safe custard cups
– Medium heatproof bowl (for double boiler or microwave)
– Whisk (essential for incorporating air)
– Rubber spatula
– Baking sheet (for easy handling)
– Pastry brush or paper towel for greasing
– Instant-read thermometer (optional but recommended for precision)
Prep Time & Cooking Schedule
| Stage | Time | Notes |
|——-|——|——-|
| Prep time | 15 minutes | Melt chocolate, whisk eggs, grease ramekins |
| Chill time | 30 minutes (minimum) | Critical for structure—don’t skip |
| Bake time | 12–14 minutes | Center should jiggle like loose pudding |
| Rest time | 1 minute | Allows cake to release from ramekin |
| Total | ~60 minutes | Plan ahead for chilling |
Pro planner: Prep the batter up to 24 hours in advance. Refrigerate in ramekins, then bake directly from cold—add 1-2 minutes to baking time.
Step-by-Step Instructions
1. Preheat and prepare: Set oven to 425°F (220°C). Generously butter four ramekins, then dust with sugar (not flour)—sugar caramelizes into a delicate crust while flour leaves a pasty film.
2. Melt the foundation: Combine chopped chocolate and butter in a heatproof bowl. Microwave in 30-second bursts at 50% power, stirring thoroughly between intervals. Alternatively, use a double boiler. Stop when about 80% is melted—residual heat will finish the job. Overheating seizes chocolate, ruining your Chocolate Lava Cake.
3. Whisk the structure: In a large bowl, whisk whole eggs, egg yolks, and sugar until thick, pale, and doubled in volume—about 3 minutes. This creates the foam that supports the liquid center while baking. Incorporate vanilla extract.
4. Combine with care: Slowly stream melted chocolate mixture into egg mixture, whisking constantly to avoid scrambling the eggs. The batter should look glossy and smooth.
5. Add the architecture: Sift flour and salt over batter. Fold gently with a spatula—10 to 15 strokes maximum. Over-mixing develops gluten, yielding a tough, bread-like texture instead of a tender molten chocolate cake.
6. Chill for stability: Divide batter among ramekins (fill 3/4 full). Refrigerate uncovered for at least 30 minutes. This solidifies the butter, creating a barrier between cooked exterior and liquid center.
7. Bake with precision: Place ramekins on a baking sheet. Bake 12–14 minutes. The edges should be firm and risen, while the center wobbles like Jell-O when gently shaken. The internal temperature should reach 160°F (71°C).
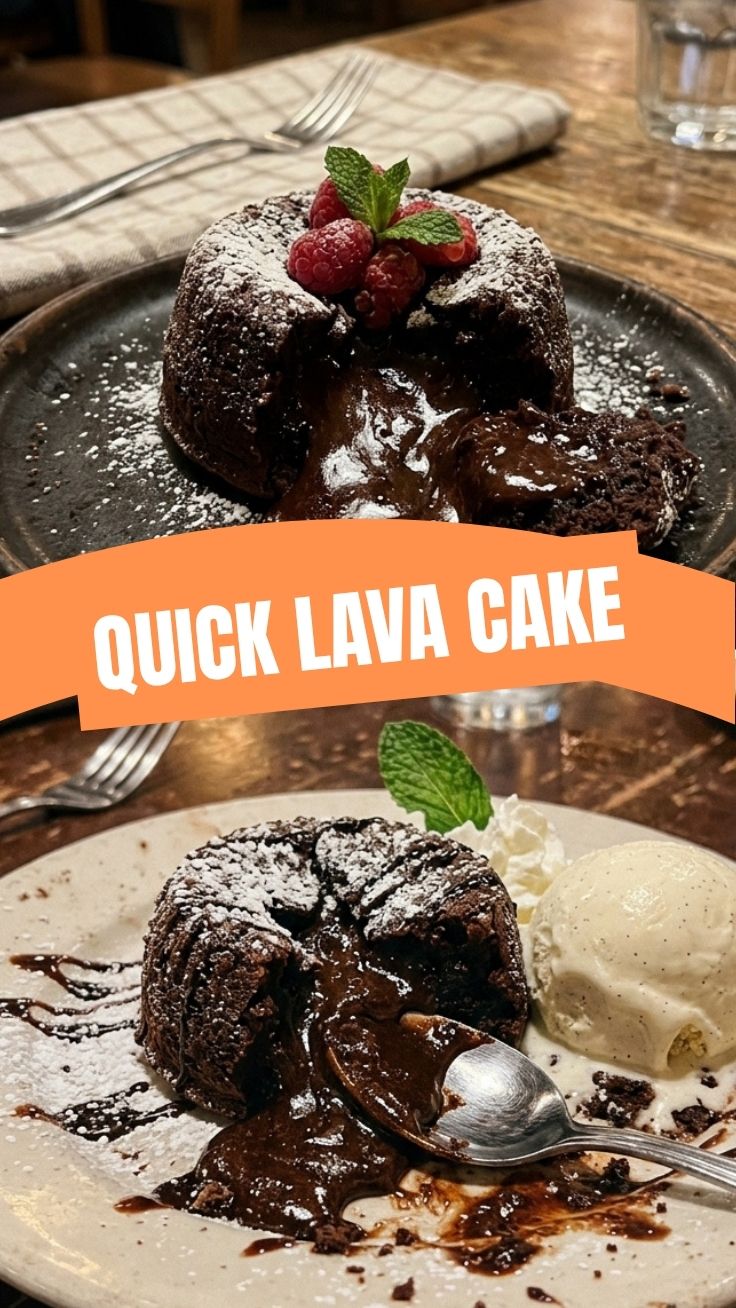
8. Rest and invert: Cool for 1 minute. Run a knife around the edge, place a plate on top, and flip. Lift ramekin gently—lava should flow naturally. Serve immediately with ice cream or whipped cream.
Nutritional Benefits & Advantages
A single Chocolate Lava Cake (no toppings) provides:
– Calories: ~320 kcal
– Protein: 7g (from eggs)
– Healthy fats: 20g (butter and dark chocolate provide saturated fat and stearic acid, which doesn’t raise LDL cholesterol)
– Antioxidants: Dark chocolate (70%+) contains flavanols that support heart health and reduce inflammation
Dietary advantage: This dessert is naturally gluten-free if you substitute the flour with almond flour or a 1:1 blend. For dairy-free versions, use plant-based butter and dairy-free dark chocolate. A single ramekin provides portion control—restaurant servings are often double.
Tips Variations & Cooking Advice
Flavor Variations
– Espresso Kick: Add 1 tsp instant espresso powder to melted chocolate for depth
– Orange Zest: Fold 1 tsp orange zest into batter—citrus brightens dark chocolate
– Peppermint: Add 1/4 tsp peppermint extract for holiday flair
Cooking Advice
– Microwave ramekin: For a single serving, microwave at 70% power for 60–75 seconds—center will be molten
– Air fryer: Bake at 375°F (190°C) for 8–10 minutes in silicone molds
– Vegan version: Replace eggs with 1 mashed banana + 3 tbsp aquafaba, use coconut oil instead of butter
Dietary Adaptations
– Keto-friendly: Omit sugar, use erythritol; replace flour with 2 tbsp coconut flour
– Egg-free: Impossible with traditional method; try “chocolate mug cake” with baking powder
Common Mistakes to Avoid
| Mistake | Solution |
|———|———-|
| Overbaking | Test at 12 minutes; look for a 1-inch jiggly center |
| Skipping chill time | Batter spreads instead of forming distinct crust and lava |
| Using cold eggs | Room-temperature eggs emulsify better—take them out 30 min early |
| Greasing with butter only | Butter + sugar prevents sticking better than butter alone |
| Overmixing flour | Fold just until no white streaks remain |
Thermometer trick: Insert probe through side of ramekin at 45° angle. Target 160°F for perfect doneness.
Storage & Meal Prep Tips
Refrigeration
– Unbaked batter (in ramekins): Cover tightly with plastic wrap. Store up to 3 days. Bake directly from fridge, adding 2 minutes.
– Baked cakes: Rarely recommended—the lava center sets. If you must, refrigerate for up to 24 hours, then microwave 20 seconds.
Freezing
– Unbaked batter: Freeze ramekins (wrapped in foil) for up to 3 months. Bake from frozen at 400°F for 16–18 minutes.
– Baked cakes: Flash-freeze on a baking sheet, then wrap individually. Reheat at 350°F for 8 minutes—the center won’t be liquid, but texture improves.
Reheating
– Microwave: 20–30 seconds at 50% power
– Oven: 350°F for 5 minutes (covered with foil to prevent drying)
Conclusion
Mastering a Chocolate Lava Cake at home transforms dessert from intimidating to attainable. The secret lies in precise chilling and careful timing—respect the 30-minute chill, trust the jiggle test, and you’ll consistently produce a molten chocolate cake that rivals any restaurant’s. This recipe is your starting point: experiment with flavors, adjust sugar levels, and make it your signature dessert. Whether you’re celebrating a date night or simply indulging after a long week, this decadent treat delivers joy in every spoonful. Try it this weekend, share your results, and explore our other chocolate-centric recipes for more inspiration.
FAQs
1. Can I make chocolate lava cake without ramekins?
Yes. Use muffin tins (greased well) or small oven-safe bowls. Adjust baking time: smaller vessels bake faster (8–10 minutes), larger ones take longer (14–16 minutes).
2. Why did my lava cake not have a liquid center?
Three culprits: overbaking, skipping the chill step, or using low-quality chocolate with stabilizers. Always chill 30 minutes and test at 12 minutes.
3. Can I substitute milk chocolate for dark chocolate?
Yes, but reduce sugar by 2 tablespoons and add 1 tablespoon cocoa powder—milk chocolate is sweeter and less stable, leading to a more batter-like center.
4. How do I make this recipe dairy-free?
Replace butter with coconut oil (refined for neutral flavor) and use dairy-free dark chocolate (at least 70% cocoa). Bake 1-2 minutes longer.
5. My cake stuck to the ramekin—what went wrong?
Insufficient greasing or using flour instead of sugar. Brush ramekins with melted butter, then add a generous coating of granulated sugar. Tap out excess.
—
Ready to bake? Pin this recipe for later, tag us in your lava cake photos, and subscribe for weekly dessert science guides.