The Ultimate Guide to Perfect Chicken Parmesan: A Restaurant-Quality Recipe for Home Cooks
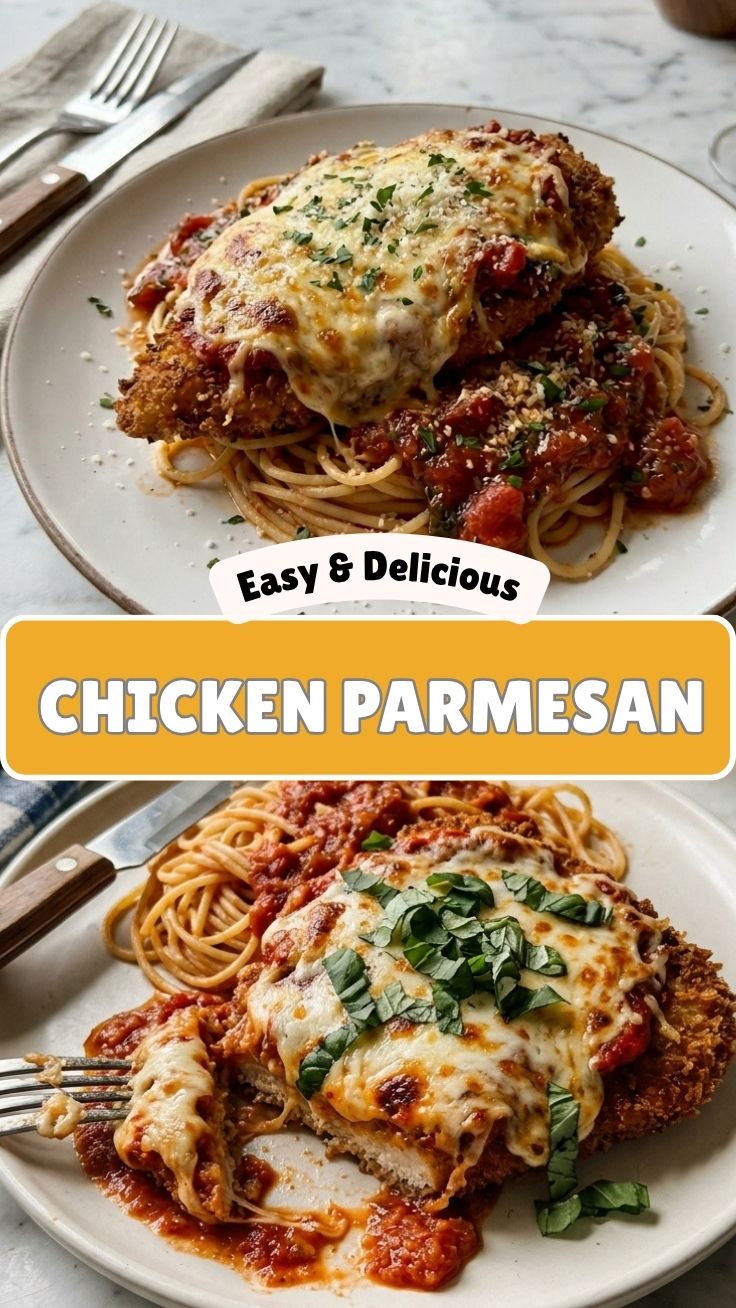
Have you ever wondered why your homemade Chicken Parmesan never quite reaches the crispy, cheesy perfection of your favorite Italian restaurant? You’re not alone. This beloved dish—crispy breaded chicken cutlets smothered in rich marinara and melted mozzarella—can be tricky to master at home. But here’s the truth: with the right technique and a few insider secrets, you can create a Chicken Parmesan that rivals any restaurant version. Beyond the incredible taste, preparing this iconic dish at home gives you complete control over ingredients, portion sizes, and cooking methods. You can adjust seasonings to your preference, use higher-quality cheese, and avoid unnecessary preservatives. Plus, with the countless Chicken Parmesan Recipes available today, you have options ranging from classic pan-fried versions to healthier baked adaptations.
—
Ingredients & Kitchen Tools
Essential Ingredients
– 4 boneless, skinless chicken breasts – Look for uniform thickness (about ½ inch) for even cooking. Pound to ¼-inch thickness if needed.
– 1 cup all-purpose flour – Creates the dry base layer for breading adhesion.
– 2 large eggs – Beaten with 1 tablespoon water to form the wash.
– 1½ cups Italian-seasoned breadcrumbs – Provides that signature golden crust. Panko creates extra crunch.
– ¾ cup grated Parmesan cheese – Use freshly grated for superior melting and flavor.
– 1 cup shredded mozzarella – Low-moisture whole milk mozzarella melts best without becoming watery.
– 1½ cups marinara sauce – Opt for good quality jarred sauce or make your own.
– ½ cup vegetable or olive oil – For pan-frying. Avocado oil works beautifully with its high smoke point.
– Salt, black pepper, garlic powder – Essential seasonings for each breading layer.
Optional Substitutions
– Gluten-free option: Substitute gluten-free flour blend and gluten-free breadcrumbs.
– Dairy-free option: Use vegan Parmesan and dairy-free mozzarella shreds.
– Protein swap: Try thinly pounded pork cutlets or even eggplant slices.
Kitchen Tools
– Large skillet (preferably cast iron or non-stick)
– 9×13 baking dish
– Three shallow bowls for breading station
– Meat mallet or rolling pin
– Tongs
– Wire rack set over baking sheet
– Instant-read thermometer
—
Prep Time & Cooking Schedule
Total Time: 50 minutes | Active Prep: 20 minutes | Cooking: 30 minutes | Resting: 5 minutes
– Prep chicken (10 minutes): Pound breasts to even thickness, season, and set up breading station.
– Breading (5 minutes): Dredge in flour, egg wash, then breadcrumb mixture.
– Pan-frying (10 minutes total): Cook cutlets 3–4 minutes per side until golden.
– Baking (15–18 minutes): Assemble with sauce and cheese, bake until bubbly.
– Resting (5 minutes): Critical step for cheese to set and prevent sogginess.
Pro-tip: You can prep the breading station and pound chicken up to 24 hours in advance. Store pounded chicken between parchment in the refrigerator.
—
Step-by-Step Instructions
1. Prepare the chicken: Place each breast between plastic wrap and pound to ¼-inch thickness using a meat mallet. Season both sides generously with salt, pepper, and garlic powder.
2. Set up breading station: In bowl one: flour mixed with salt and pepper. Bowl two: beaten eggs with 1 tablespoon water. Bowl three: breadcrumbs combined with half the grated Parmesan.
3. Bread the cutlets: Dredge each piece first in flour (shake off excess), then egg wash (let excess drip), then breadcrumb mixture (press firmly). Place on wire rack—this prevents the breading from becoming soggy.
4. Pan-fry to golden perfection: Heat oil in skillet over medium-high heat until shimmering (about 350°F). Cook 2–3 cutlets at a time (don’t crowd the pan!). Fry 3–4 minutes per side until deep golden brown. Transfer to a paper towel-lined plate.
5. Assemble and bake: Preheat oven to 400°F. Spread a thin layer of marinara in the baking dish. Arrange chicken cutlets in a single layer. Top each with remaining sauce, then shredded mozzarella, and finally the remaining Parmesan. Bake 15–18 minutes until cheese is bubbly and slightly browned.
6. Rest and serve: Remove from oven and let rest 5 minutes. This allows the cheese to set slightly, preventing it from sliding off when served. Garnish with fresh basil.
For the best Chicken Parmesan, always use an instant-read thermometer—the internal temperature should reach 165°F. When exploring Chicken Parmesan Recipes, you’ll find variations that skip the pan-frying step, but the extra texture from browning is truly irreplaceable.
Temperature tip: If the cheese finishes before the chicken reaches 165°F, tent loosely with foil to prevent burning.
—
Nutritional Benefits & Advantages
Chicken Parmesan offers a surprising nutritional profile when prepared thoughtfully. A single serving (one cutlet with sauce and cheese) provides approximately:
| Nutrient | Amount | Benefit |
|———-|——–|———|
| Protein | 38g | Supports muscle repair and satiety |
| Calcium | 320mg | Essential for bone health |
| Vitamin B6 | 0.6mg | Supports metabolism and brain function |
| Iron | 2.1mg | Crucial for oxygen transport |
The chicken breast serves as an excellent lean protein source, while the tomato-based marinara delivers lycopene—a powerful antioxidant linked to heart health. By pan-frying instead of deep-frying, you reduce overall fat content while maintaining that satisfying crunch. For an even lighter version, try our baked adaptation using an air fryer at 375°F for 12–14 minutes.
—
Tips, Variations & Cooking Advice
Flavor Variations
– Spicy Arrabbiata: Replace traditional marinara with spicy arrabbiata sauce and add red pepper flakes to the breadcrumbs.
– Pesto Chicken Parmesan: Swap marinara for basil pesto, use fresh mozzarella, and top with cherry tomatoes.
– Mushroom Marsala: Finish with sautéed mushrooms in Marsala wine for an earthy twist.
Alternative Cooking Methods
– Air Fryer: Cook breaded cutlets at 375°F for 10–12 minutes, shaking halfway. Add cheese during the last 3 minutes.
– Baked Only: Skip pan-frying and bake breaded cutlets at 425°F for 15 minutes, then top with sauce and cheese and bake 10 more minutes.
– Grilled: For a smoky summer version, grill breaded cutlets over medium heat for 4 minutes per side.
Dietary Adaptations
– Gluten-Free: Use almond flour for dredging and crushed pork rinds or gluten-free panko for breading.
– Low-Carb/Keto: Replace breadcrumbs with crushed pork rinds mixed with Parmesan—zero carbs, maximum crunch.
– Dairy-Free: Use cashew-based mozzarella and nutritional yeast in place of Parmesan.
—
Common Mistakes to Avoid
Soggy breading: This happens when chicken isn’t patted dry before breading, or when the oil temperature drops too low. Always start with thoroughly dried chicken and maintain oil at 350°F.
Dry, tough chicken: Overcooking is the primary culprit. Use a meat thermometer and remove from oven when internal temperature hits 160°F—carryover cooking will bring it to 165°F.
Cheese sliding off: This occurs when the chicken isn’t hot enough when cheese is added. Assemble immediately after frying while the cutlets are still hot.
Burnt cheese, undercooked chicken: Place chicken close to the top heating element if broiling, but watch carefully. Better yet, use lower oven temperature (375°F) for longer time.
Greasy final dish: Let fried cutlets drain on paper towels for at least 2 minutes before assembling. Also, avoid overcrowding the pan during frying.
—
Storage & Meal Prep Tips
Refrigeration
– Store leftovers in an airtight container for up to 4 days.
– Place parchment paper between layers to prevent sticking.
– Reheat in a 375°F oven for 10–12 minutes to restore crispiness. Avoid microwaving—it destroys the breading texture.
Freezing
– Freeze unbreaded pounded chicken: Layer between parchment in a freezer bag for up to 3 months. Thaw overnight before breading.
– Freeze breaded, uncooked cutlets: Arrange on a baking sheet, freeze solid (1 hour), then transfer to a freezer bag. Cook from frozen, adding 3–4 minutes to fry time.
– Freeze fully assembled dish: Prepare through Step 5, cool completely, wrap tightly with foil and plastic wrap. Freeze up to 2 months. Thaw overnight, then bake at 375°F for 25–30 minutes.
Meal Prep Strategy
– Sunday prep: Pound and season chicken for the entire week. Store between parchment sheets.
– Portion control: Use a kitchen scale to divide into 6-ounce servings before breading.
– Sauce separation: Store marinara separately until ready to assemble—prevents soggy breading during storage.
—
Conclusion
Mastering homemade Chicken Parmesan transforms a restaurant indulgence into a weeknight reality. By following these detailed steps—from proper pounding and breading technique to precise temperature control and resting—you’ll consistently produce crispy, juicy, and cheese-laden cutlets that impress. The key lies in understanding why each step matters: the wire rack prevents soggy bottoms, the double-cheese blend creates depth, and the resting period locks in moisture. Whether you stick with the classic version or explore creative Chicken Parmesan Recipes featuring pesto or spicy arrabbiata, this foundational technique will serve you well. I encourage you to try this recipe this week—serve it with spaghetti aglio e olio or a crisp Caesar salad for a complete Italian-inspired meal. Share your results in the comments, tag me on social media, and don’t forget to experiment with the variations to make this dish truly your own. Buon appetito!
—
FAQs
Can I use chicken thighs instead of breasts?
Absolutely! Boneless, skinless thighs work beautifully and tend to be more forgiving—they stay juicy even if slightly overcooked. Adjust cooking time by 2–3 minutes per side during frying.
Why does my breading fall off during frying?
This typically happens due to excess moisture. Ensure chicken is patted bone-dry before breading, tap off excess flour and egg wash, and press breadcrumbs firmly. Also, let breaded cutlets rest 5 minutes before frying—this helps the coating adhere.
Can I skip the pan-frying step entirely?
Yes, though you’ll sacrifice some texture. For a lighter version, spray breaded cutlets with olive oil spray and bake at 425°F for 15 minutes, flip, spray again, and bake 10 more minutes before adding sauce and cheese.
How do I prevent the cheese from becoming rubbery?
Use low-moisture mozzarella rather than fresh buffalo mozzarella, which releases too much water. Also, avoid overbaking—stop when cheese is bubbly and just beginning to brown.
Can I make this dish ahead of time for a dinner party?
Yes! Assemble completely (through Step 5) up to 24 hours in advance. Cover and refrigerate. When ready to serve, bake at 375°F for 20–25 minutes until hot and bubbly. The resting time is still crucial to prevent sliding cheese.