The Ultimate Guide to Perfect Beef Tacos at Home
Are you tired of bland, dry tacos that fall apart at the first bite? It’s time to bring the restaurant experience to your kitchen. Homemade Beef Tacos burst with fresh, customizable flavor, and the secret lies in perfectly seasoned Ground Beef. Not only do you control the spice level and fat content, but you also save money and reduce additives. This guide will walk you through every step—from sizzling pan to crunchy shell—ensuring your taco night is a hit.
Ingredients & Kitchen Tools
Ingredients
– 1 lb Ground Beef (80/20 ratio for moisture; substitute with ground turkey or plant-based crumbles)
– 1 tbsp olive oil (for browning)
– 1 small onion, diced (adds sweetness; use shallot or omit for milder flavor)
– 2 garlic cloves, minced (fresh preferred; ½ tsp powder works)
– 2 tbsp taco seasoning (store-bought or homemade: chili powder, cumin, paprika, oregano, garlic powder)
– ½ cup beef broth or water (for simmering)
– 8 taco shells (hard corn, soft flour, or lettuce wraps for keto)
– Toppings: shredded lettuce, diced tomatoes, shredded cheddar or Mexican blend, sour cream, salsa, cilantro, lime wedges
Kitchen Tools
– Large non-stick or cast-iron skillet
– Wooden spoon or spatula
– Cutting board and chef’s knife
– Measuring spoons and cups
– Small bowl for seasoning mix
– Taco holder or oven rack (for warming shells)
Optional Substitutions
– Use ground chicken or pork for a different protein profile
– Swap dairy toppings with vegan cheese and cashew sour cream for a dairy-free version
– For gluten-free, ensure taco shells are labeled gluten-free and use corn tortillas
Prep Time & Cooking Schedule
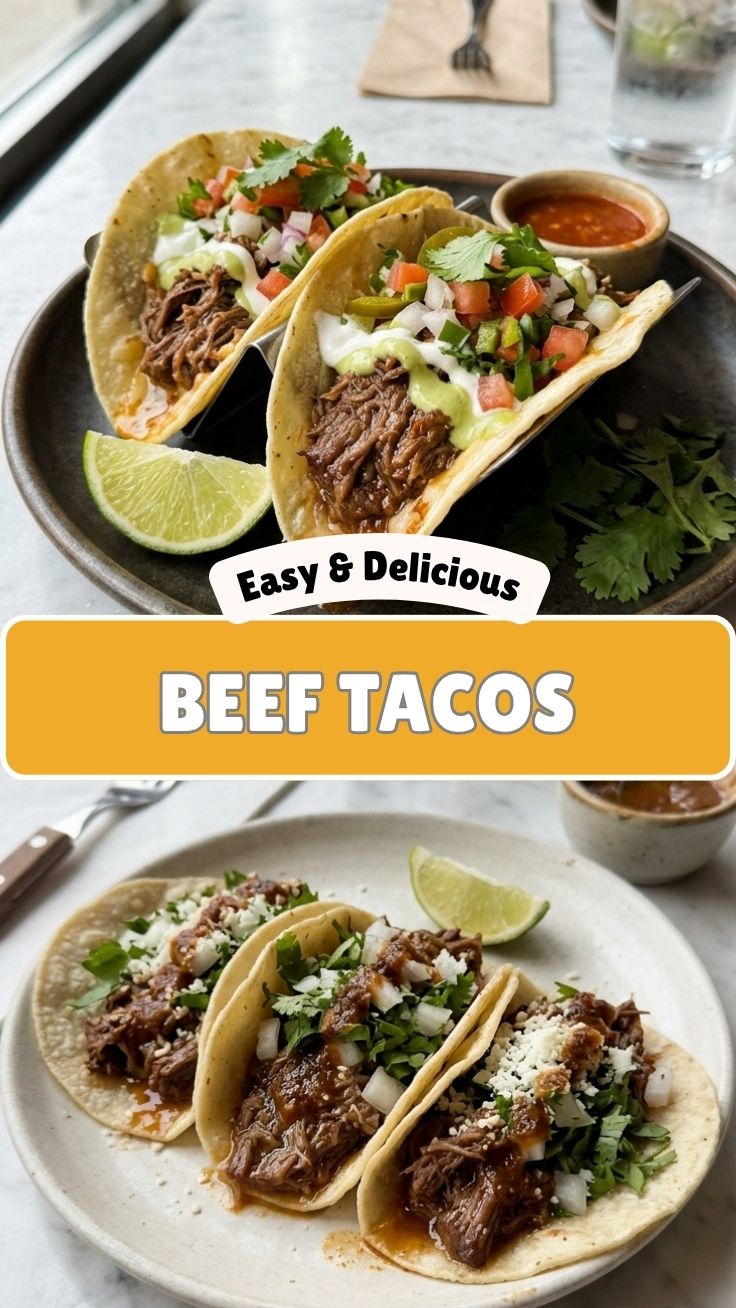
Total active time is approximately 25 minutes, making this a weeknight lifesaver. Here’s the breakdown:
– Prep Time: 10 minutes (dice onion, mince garlic, measure spices, prep toppings)
– Cook Time: 15 minutes (brown beef, sauté aromatics, simmer filling, warm shells)
– Resting Time: 2–3 minutes (let beef filling rest off heat to meld flavors)
Pro tip: While the beef simmers, use that time to shred lettuce and dice tomatoes. Warm hard shells in a 350°F oven for 5 minutes for extra crunch, or briefly char soft tortillas on a dry skillet.
Step-by-Step Instructions
1. Prepare the beef: Heat olive oil in a large skillet over medium-high heat. Add the Ground Beef and break it into crumbles with a wooden spoon. Cook for 5–7 minutes until fully browned, with no pink remaining. If there’s excess fat, drain all but 1 tablespoon—this prevents soggy tacos. Season immediately with a pinch of salt to lock in moisture.
2. Sauté aromatics: Reduce heat to medium. Push beef to one side of the skillet. Add onion and garlic to the empty space; cook for 2–3 minutes until translucent and fragrant. Stir everything together.
3. Season the filling: Sprinkle taco seasoning evenly over the beef mixture. Stir to coat for 30 seconds to bloom the spices. Pour in beef broth, scraping up any browned bits from the pan bottom. Simmer for 5–7 minutes, stirring occasionally, until liquid reduces to a thick, saucy consistency. Taste and adjust salt or heat (add cayenne or chipotle powder if desired).
4. Warm the shells: While filling simmers, warm taco shells according to package instructions. For hard shells, bake at 350°F for 5 minutes; for soft flour or corn, heat each side for 30 seconds in a dry skillet.
5. Assemble the Beef Tacos: Spoon about ¼ cup of filling into each shell. Top with lettuce, tomatoes, cheese, and a dollop of sour cream. Finish with fresh cilantro and a squeeze of lime. Serve immediately while shells are crunchy.
Texture cue: The filling should be moist but not watery—if it pools liquid at the bottom, cook 1–2 minutes longer. For extra smoky flavor, add a dash of smoked paprika or a minced chipotle pepper in adobo.
Nutritional Benefits & Advantages
This recipe is a powerhouse of balanced macros and micronutrients. Per serving (2 tacos with ¼ lb beef, standard toppings): approximately 450 calories, 28g protein, 20g fat, 30g carbs (varies with toppings). Lean ground beef (93/7) reduces fat to 15g while maintaining high protein. Key benefits include:
– Iron and B12: Supports red blood cell production and energy metabolism.
– Zinc: Essential for immune function and wound healing.
– Fiber from vegetables: Lettuce, tomato, and onion contribute 4–5g per serving, aiding digestion.
– Customizable macros: Swap sour cream for Greek yogurt to cut fat, or use lettuce wraps for a low-carb, keto-friendly version.
Compared to fast-food tacos, homemade versions have 30–40% less sodium and no artificial preservatives. Plus, you control the oil and cheese quantities, making this a healthier choice for regular meals.
Tips, Variations & Cooking Advice
Flavor Variations
– Spicy: Add 1 tsp cayenne or 2 chopped chipotle peppers to the simmering filling.
– Citrus twist: Stir in 2 tbsp fresh orange juice and 1 tsp orange zest after deglazing for a tangy, Caribbean-inspired flavor.
– Herb-forward: Mix in 2 tbsp chopped fresh cilantro and 1 tsp dried oregano just before serving.
Cooking Method Swaps
– Air fryer: Cook ground beef in a preheated air fryer at 375°F for 10–12 minutes, breaking once halfway. Combine with spices and broth, then air fry for another 3 minutes.
– Slow cooker: Brown beef first, then transfer with all ingredients to the slow cooker. Cook on low for 4 hours for ultra-tender, melded flavors.
Dietary Adaptations
– Gluten-free: Use certified gluten-free taco seasoning and corn tortillas.
– Dairy-free: Omit cheese and sour cream; use avocado crema (blended avocado, lime, salt).
– Low-carb: Serve filling in lettuce cups or over cauliflower rice with toppings.
Portion Changes
– For a crowd, double the beef and seasonings—cook in batches to avoid overcrowding.
– Make mini tacos using small tortillas for appetizers or kids’ portions.
Common Mistakes to Avoid
1. Overcrowding the pan: Cooking too much beef at once causes steaming instead of browning. Brown in batches of 1 lb max per large skillet.
2. Not draining fat: Excess grease makes filling soggy and bland. Drain all but 1 tbsp after browning for optimal texture.
3. Skipping resting time: Letting the filling rest off heat for 2 minutes allows seasonings to penetrate fully.
4. Using cold shells: Hard shells need warming to prevent breakage; soft shells need heat to become pliable.
5. Underseasoning: Taco seasoning alone may not be enough—always taste and add salt, acid (lime juice), or heat as needed.
Storage & Meal Prep Tips
Refrigeration: Store cooked beef filling in an airtight container for up to 4 days. Keep taco shells and toppings separate to prevent sogginess.
Freezing: Portion cooled filling into freezer-safe bags, press out air, and freeze for up to 3 months. Thaw overnight in the fridge before reheating.
Reheating: For best texture, reheat filling in a skillet over medium heat with 1 tbsp water or broth, stirring until hot (about 5 minutes). Avoid microwaving alone—it dries out the meat. For shells, reheat hard shells in the oven at 350°F for 3 minutes; soft shells in a dry skillet for 30 seconds.
Meal prep tip: Cook a double batch of filling on Sunday; use it for tacos, taco salads, burrito bowls, or nachos throughout the week. Chop toppings fresh daily for maximum crunch.
Conclusion
Mastering this recipe transforms your approach to taco night. From perfectly seasoned Ground Beef to vibrant toppings, these homemade Beef Tacos are sure to impress family and guests alike. The key takeaways: brown the meat properly, season generously, and assemble just before serving for peak freshness. Now it’s your turn—try this recipe tonight, tag us in your results, or explore our other quick dinner guides for more inspiration.
FAQs
1. Can I use ground turkey or chicken instead of beef?
Yes, substitute 1:1. Since lean poultry can dry out, add 1 tbsp olive oil when browning and simmer with an extra ¼ cup broth to retain moisture. Adjust taco seasoning as needed for flavor.
2. How do I prevent hard taco shells from breaking when filling?
Warm shells in a 350°F oven for 5 minutes to make them less brittle. Use a taco holder or fill gently by supporting the shell with your hand. For extra durability, double up with two shells per taco.
3. My tacos taste bland—what went wrong?
Most likely underseasoning. Ensure you use at least 2 tbsp taco seasoning for 1 lb of beef, and add ½ tsp salt during browning. A splash of lime juice or vinegar at the end brightens all flavors.
4. Can I freeze the assembled tacos?
It’s not recommended because shells become soggy and toppings lose texture. Instead, freeze the beef filling only, then thaw and assemble fresh tacos. For a quick fix, freeze filling in portioned bags.
5. What’s the best way to reheat leftover beef filling without drying it out?
Reheat in a covered skillet over medium-low heat with 2 tbsp water or broth. Stir occasionally for 5 minutes until steaming. Alternatively, microwave in a bowl covered with a damp paper towel for 1–2 minutes, stirring halfway.
Beef Tacos
Ingredients
Equipment
Method
- In a large skillet, brown the ground beef over medium heat until fully cooked. Drain any excess fat from the skillet.
- Stir in the taco seasoning mix and water. Bring the mixture to a simmer and cook for 5-7 minutes, or until the sauce has thickened.
- While the beef is simmering, warm your taco shells or tortillas according to the package instructions. This usually involves baking them in the oven or heating them in a microwave.
- Assemble your tacos by spooning the seasoned beef mixture into each warm taco shell or tortilla. Top with your favorite ingredients such as shredded lettuce, diced tomatoes, shredded cheese, sour cream, salsa, and diced onions.
Notes
1. **Spicy Tacos**: Add a pinch of cayenne pepper to the beef or use a spicy salsa.
2. **Healthier Tacos**: Use whole wheat tortillas, lean ground beef, and load up on fresh vegetables like bell peppers and corn.
3. **Cheesy Baked Tacos**: After assembling, sprinkle extra cheese on top and bake in the oven until melted and bubbly.
4. **Taco Salad Bowls**: Skip the shells and serve the beef mixture over a bed of crisp lettuce with all your favorite toppings for a deconstructed taco experience.