The Ultimate Guide to Baking Perfectly Tangy and Sweet Lemon Bars
Have you ever bitten into a store-bought lemon bar and felt a wave of disappointment at the artificial flavor or soggy crust? You are not alone. The quest for that perfect balance of buttery shortbread and bright, citrusy curd is a challenge many home bakers face. However, creating a truly exceptional Lemon Bars at home is not just rewarding—it allows you to control the quality of ingredients and tailor the sweetness to your palate. In this guide, we will unlock the secrets to a flawless recipe, transforming simple pantry staples into a bakery-worthy lemon dessert that will impress every guest.
Ingredients & Kitchen Tools
For the Crust:
– All-purpose flour (1 ¾ cups): Provides structure. Substitute: Use a 1:1 gluten-free baking blend for a gluten-free version.
– Powdered sugar (⅔ cup): Adds sweetness and tenderness. Avoid granulated sugar, as it will make the crust gritty.
– Cold unsalted butter (¾ cup or 1 ½ sticks): Creates a flaky, shortbread texture. Tip: Dice it and keep it chilled until use.
For the Lemon Filling:
– Fresh lemon juice (1 cup): The star ingredient. Use Meyer lemons for a milder flavor or standard lemons for a sharper tang.
– Granulated sugar (1 ½ cups): Balances the acidity.
– Eggs (4 large): These set the curd. Note: Room temperature eggs emulsify better.
– All-purpose flour (¼ cup): A stabilizer to prevent the curd from weeping.
– Zest of 2 lemons: Provides intense citrus aroma.
Essential Tools: 9×13-inch baking pan, parchment paper, electric mixer or whisk, microplane/zester, fine-mesh strainer (optional for silky texture), and a sharp knife.
Prep Time & Cooking Schedule
Total Time: 3 hours (including cooling)
– Prep Time: 20 minutes
– Bake Crust: 20 minutes
– Bake with Filling: 25 minutes
– Cooling & Resting: 2 hours (minimum)
Plan accordingly: these bars must cool completely to set. Bake them in the morning for a perfect afternoon treat, or prepare them the night before a gathering.
Step-by-Step Instructions
1. Prepare the Crust: Preheat your oven to 350°F (175°C). Line your baking pan with parchment paper, leaving overhang for easy removal. In a bowl, whisk together the flour and powdered sugar. Cut in the cold butter using a pastry cutter or your fingertips until the mixture resembles coarse meal. Press this mixture firmly and evenly into the bottom of the pan.
2. Bake the Crust: Bake for 18-20 minutes until the edges are lightly golden. Remove from the oven but do not turn it off. This ensures your crust is sturdy enough to hold the wet filling.
3. Make the Lemon Filling: While the crust bakes, whisk the eggs and granulated sugar together until thick and pale (about 2 minutes). Whisk in the flour, lemon juice, and zest. The mixture will be thin.
4. Assemble and Bake: Pour the filling over the hot crust. Bake for 22-25 minutes. The edges will be set, and the center should jiggle slightly when you shake the pan. A critical texture cue: do not overbake, or your Lemon Bars will crack. For the best lemon dessert texture, pull it when the center is just barely set.
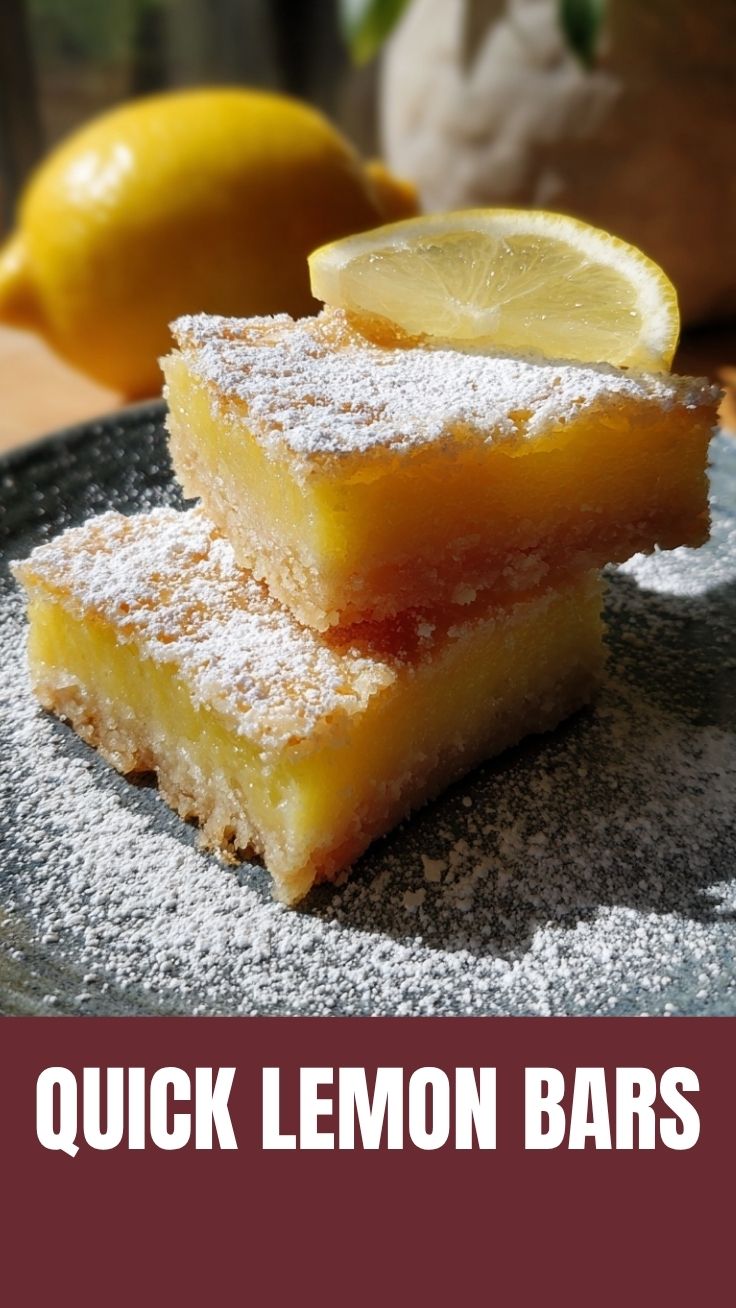
5. Cool: Place the pan on a wire rack. Cool to room temperature (about 1 hour), then refrigerate for at least 1 hour before slicing. Use the parchment to lift the slab out and dust with powdered sugar.
Nutritional Benefits & Advantages
This bright dessert isn’t just about flavor. Lemons are packed with Vitamin C, which supports immune health and collagen production. By making these at home, you avoid the high-fructose corn syrup and preservatives found in commercial baked goods. The eggs provide high-quality protein, and the butter offers fat-soluble vitamins A, D, and E. While it is a treat, it offers more nutritional transparency than any store-bought option.
Tips Variations & Cooking Advice
– Flavor Variations: Swap ¼ cup of lemon juice for lime or blood orange juice. Add a teaspoon of vanilla extract to the filling for depth.
– Dietary Adaptation: To make a dairy-free version, substitute the butter in the crust with coconut oil or a high-quality vegan butter stick.
– Baking Tip: Always zest your lemons before juicing them—it is much easier.
– Portion Changes: For thicker bars, use an 8×8-inch pan; increase baking time by 5 minutes.
Common Mistakes to Avoid
1. Soggy Crust: Failure to pre-bake the crust long enough. It must look slightly dry and golden on the edges.
2. Cracked Top: Overbaking the filling. Remember the jiggle test.
3. Cloudy Curd: Using bottled lemon juice. Fresh juice is non-negotiable for that bright, clear flavor.
4. Gummy Texture: Over-mixing the filling. Whisk until just combined after adding the flour.
Storage & Meal Prep Tips
Store leftover Lemon Bars in an airtight container in the refrigerator for up to 5 days. They actually taste better the next day as the flavors meld. For freezing: Wrap individual bars tightly in plastic wrap, then foil. Freeze for up to 3 months. To thaw, place them in the fridge overnight. Do not reheat in the microwave unless you want a runny curd—serve chilled or at room temperature.
Conclusion
Mastering this recipe is about more than just following steps; it is about understanding the chemistry of citrus and butter to create a truly memorable treat. Whether you serve them at a spring brunch or a summer barbecue, these Lemon Bars deliver a professional-grade finish with a home-baked heart. This specific lemon dessert proves that simple ingredients, handled with care, are always the most impressive. We encourage you to try this recipe and share your beautiful results—tag us and let us know how your citrus creations turned out!
FAQs
Q: Can I use a different citrus fruit?
A: Yes! Lime, grapefruit, or Meyer lemon hybrids work beautifully. Adjust the sugar slightly based on the fruit’s sweetness.
Q: Why is my lemon curd not setting?
A: This often happens if the bars are underbaked. Bake until the edges are firm and the center jiggles like gelatin, not liquid.
Q: Can I reduce the sugar?
A: You can reduce sugar by up to ¼ cup, but expect a sharper, more tart flavor. Do not reduce it further, as sugar aids in setting the curd.
Q: How do I get clean, straight slices?
A: Use a sharp, thin-bladed knife. Wipe the blade clean between each cut with a damp paper towel.
Q: Do I have to use parchment paper?
A: While you can grease the pan, parchment paper with overhang makes lifting the entire slab out effortless and ensures no broken edges.
Quick way to grow Lemon Bars
Ingredients
Equipment
Method
- Preheat your oven to 350°F (175°C) and line a 9x13 inch baking pan with parchment paper, leaving an overhang on the sides.
- In a medium bowl, combine the flour and sugar, then cut in the cold butter until the mixture resembles coarse crumbs.
- Press the crumb mixture evenly into the bottom of the prepared baking pan, ensuring it's compact.
- Bake the crust for 15-20 minutes, or until it's lightly golden brown, then remove it from the oven and set it aside to cool slightly while you prepare the filling.
- In a large bowl, whisk together the granulated sugar and eggs until the mixture is well combined and slightly frothy.
- Gradually whisk in the fresh lemon juice, then slowly add the all-purpose flour and lemon zest, mixing until the batter is smooth.
- Pour the lemon filling evenly over the warm, pre-baked crust in the baking pan.
- Return the pan to the oven and bake for an additional 20-25 minutes, or until the filling is set and the edges are lightly golden.
- Allow the lemon bars to cool completely in the pan on a wire rack before refrigerating them for at least 2 hours to chill thoroughly.
- Once chilled, use the parchment paper overhang to lift the lemon bars out of the pan, then slice them into squares.
- Dust with confectioners' sugar before serving, if desired.