The Ultimate Guide to Making Perfect Chia Pudding at Home: A Creamy, Nutritious Breakfast You’ll Love
Have you ever wondered why some people seem to have boundless energy all morning while you’re reaching for your third cup of coffee by 10 AM? The secret might just be sitting in your refrigerator. Think about it—what if one simple, make-ahead breakfast could transform your mornings, stabilize your blood sugar, and keep you full until lunch without any cooking skills required? That’s exactly what happens when you master homemade Chia Pudding. I remember the first time I discovered this magical combination of tiny seeds and liquid; I was skeptical about its texture and simplicity, but after one spoonful of a perfectly set, creamy pudding, I was hooked forever. Preparing it at home isn’t just about saving money—it’s about controlling every ingredient, customizing flavors to your palate, and ensuring you get a wholesome, additive-free meal that boosts your morning routine. Whether you’re a busy professional, a health-conscious parent, or someone simply looking for an easy yet impressive breakfast option, this guide will walk you through everything you need to know, from the basic recipe to pro-level tips that guarantee success every time. Let’s dive into the world of Chia Pudding Recipes and discover how a handful of tiny seeds can revolutionize your eating habits.
Ingredients & Kitchen Tools
Before you begin your culinary journey, gathering the right ingredients and tools ensures a smooth, frustration-free experience. Here’s everything you’ll need:
Ingredients:
– 3 tablespoons chia seeds (white or black; black seeds are slightly crunchier when set)
– 1 cup milk of choice (dairy milk, unsweetened almond milk, coconut milk, or oat milk all work well)
– 1-2 tablespoons sweetener (maple syrup, honey, agave nectar, or monk fruit for sugar-free)
– ½ teaspoon vanilla extract (pure extract yields better flavor than imitation)
– Pinch of sea salt (enhances sweetness and balances flavors)
– Optional toppings: fresh berries, sliced banana, chopped nuts, shredded coconut, cacao nibs
Kitchen Tools:
– Mason jar or small bowl with lid (16-ounce capacity works perfectly)
– Whisk or fork (for combining ingredients thoroughly)
– Measuring spoons (accuracy matters with chia seeds)
– Spatula or spoon (for scraping sides)
– Refrigerator (obviously, but patience is key)
Optional substitutions: For a lower-calorie version, replace full-fat milk with unsweetened almond milk. For thicker pudding, add an extra tablespoon of chia seeds. Those avoiding nuts can use oat milk or coconut milk without worry.
Prep Time & Cooking Schedule
One of the most beautiful aspects of this dish is its flexibility and hands-off nature. Here’s your time breakdown:
– Active prep time: 5 minutes (yes, really—just whisk and pour)
– Chilling/setting time: Minimum 4 hours, ideally overnight (8-10 hours)
– Total time from start to finish: 4-8 hours (mostly passive)
This recipe works perfectly on a busy schedule because it requires virtually no cooking. I recommend preparing it the night before you plan to eat it. Simply mix everything in your jar before you go to bed, pop it in the refrigerator, and wake up to a perfectly set, creamy breakfast ready to top and enjoy. If you’re in a pinch, you can get acceptable results in 2-3 hours, but the texture won’t be as uniformly creamy, and the seeds may still have a slightly gritty center.
Step-by-Step Instructions
Follow these straightforward steps for consistently perfect results every time:
Step 1: Combine dry ingredients
Start by adding your chia seeds, sweetener, and salt directly into your mason jar or bowl. This ensures even distribution before adding liquid.
Step 2: Add wet ingredients
Pour in your milk of choice and vanilla extract. Don’t worry if the seeds float initially—that’s normal.
Step 3: Whisk thoroughly
Using a whisk or fork, beat the mixture vigorously for about 30-45 seconds. This is the most critical step! Chia seeds tend to clump together when they first hit liquid, so aggressive whisking breaks up any lumps. You should see the seeds starting to swell and distribute evenly throughout the liquid.
Step 4: Initial rest and second whisk
Let the mixture sit for 5 minutes, then whisk again for another 15-20 seconds. This second whisking prevents clumps from forming as the gel begins to develop. Whether you’re exploring Chia Pudding or a more adventurous chocolate version, this technique applies universally.
Step 5: Refrigerate and set
Cover your jar or bowl with a lid or plastic wrap and place it in the refrigerator for at least 4 hours. For best results, give it one more stir after about 30 minutes of chilling to redistribute any seeds that settled at the bottom.
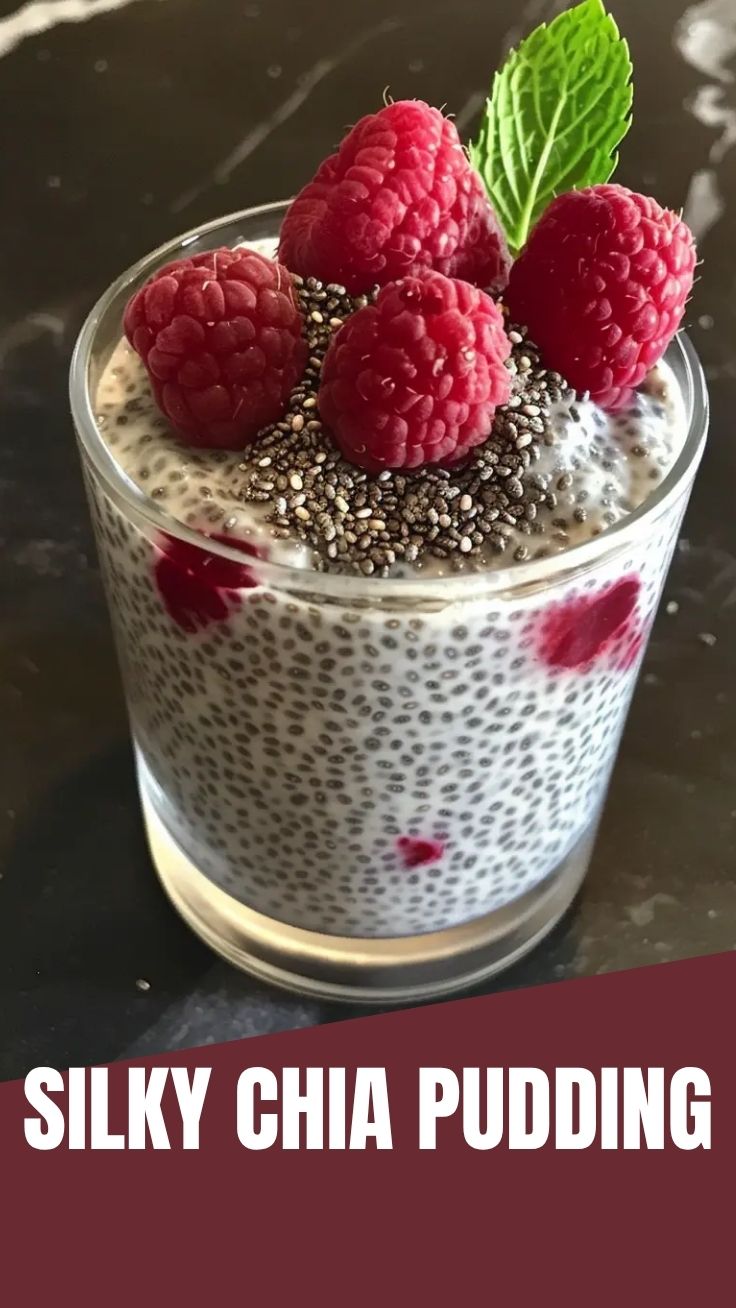
Step 6: Serve and garnish
Once set (the mixture should be spoonable, like a thick custard), remove from the fridge. Stir gently, taste for sweetness, and adjust if needed. Top with your favorite fruits, nuts, seeds, or a drizzle of nut butter. Enjoy cold or let it sit at room temperature for 10 minutes to take off the chill. For those who love experimenting with Chia Pudding Recipes, try adding cocoa powder, matcha, or pumpkin puree during the initial mixing phase for exciting flavor variations.
Temperature tip: If the pudding seems too thin after 4 hours, don’t panic. Simply stir it again, add a tablespoon of extra chia seeds, and return to the fridge for another hour. Conversely, if it’s too thick for your liking, stir in 2-3 tablespoons of additional milk until it reaches your desired consistency.
Nutritional Benefits & Advantages
Chia seeds are nutritional powerhouses packed into tiny packages. Here’s what you’re getting with each serving of this pudding:
– Omega-3 fatty acids: Chia seeds are one of the best plant-based sources of alpha-linolenic acid (ALA), which supports heart and brain health
– Fiber: Just one serving contains about 10 grams of fiber, promoting digestive health and sustained fullness
– Protein: Approximately 4-5 grams per serving, helping stabilize blood sugar and build muscle
– Calcium, magnesium, and phosphorus: Essential minerals for bone health and energy metabolism
– Antioxidants: These help combat oxidative stress and inflammation in the body
Because chia seeds absorb 10-12 times their weight in liquid, they create a satisfying, pudding-like texture that keeps you feeling full for hours. This makes it an excellent choice for weight management, blood sugar regulation, or simply avoiding mid-morning snack cravings. The combination of protein, healthy fats, and fiber provides steady energy without the crash associated with sugary breakfast cereals.
Tips Variations & Cooking Advice
Unlock endless possibilities with these creative variations and pro-level tips:
Flavor variations:
– Chocolate: Add 1-2 tablespoons of unsweetened cocoa powder with your dry ingredients
– Tropical: Use coconut milk and top with mango, pineapple, and toasted coconut flakes
– Matcha green tea: Whisk in 1 teaspoon matcha powder for an antioxidant boost
– Pumpkin spice: Mix in 2 tablespoons pumpkin puree, ½ teaspoon cinnamon, and a pinch of nutmeg
– Berry burst: Blend ¼ cup berries before adding to the base for a naturally sweet pink pudding
Ingredient swaps:
– Replace vanilla with almond or peppermint extract for different flavor profiles
– Use yogurt instead of milk for a thicker, tangier consistency (reduce liquid slightly)
– Sweeten with mashed banana or date syrup for natural sugar alternatives
Dietary adaptations:
– Gluten-free: All ingredients are naturally gluten-free, but check packaging to avoid cross-contamination
– Dairy-free: Use almond, oat, coconut, or soy milk—each imparts a unique flavor
– Low-carb/keto: Use unsweetened almond milk and a keto-friendly sweetener like stevia or monk fruit
– Nut-free: Opt for oat milk, coconut milk, or hemp milk as your base
Serving suggestions: Layer the pudding with granola and fresh fruit for a parfait effect, swirl in nut butter before serving, or blend the entire pudding with a frozen banana for a thicker, smoothie-like breakfast.
Common Mistakes to Avoid
Even simple recipes have pitfalls. Here are the most frequent errors and how to sidestep them:
1. Not whisking enough initially
This is the number one mistake. Skipping the initial 30-second whisk leads to clumpy, uneven pudding. The outer layer of the seed hydrates first, and if not dispersed, they stick together in gelatinous lumps.
2. Skimping on setting time
Patience is non-negotiable. Opening the fridge after just 1-2 hours and expecting a fully set pudding will only disappoint. The seeds need at least 4 hours to fully absorb liquid and expand. Overnight is ideal.
3. Using too much or too little liquid
The ratio of 3 tablespoons chia seeds to 1 cup liquid is a trusted starting point. Too much liquid yields soup; too little creates a glue-like paste. Measure accurately, especially if you’re new to this.
4. Forgetting to stir after 30 minutes
Chia seeds settle at the bottom if left undisturbed. A quick stir after 30 minutes ensures they’re suspended throughout the liquid, resulting in a more uniform texture.
5. Over-sweetening initially
The pudding’s flavor intensifies as it sits, and sweeteners can become cloying if added heavily upfront. Start with less, then adjust before serving.
Storage & Meal Prep Tips
Maximize convenience with these storage strategies:
Refrigeration: Store your prepared pudding in an airtight container (mason jars work perfectly) for up to 5-7 days. The texture remains best for the first 4 days, but it’s still safe to eat up to a week after preparation.
Freezing: While possible, freezing is not recommended. The thawing process can alter the pudding’s texture, making it watery and separated. If you must freeze, do so in individual portions and consume within 1 month.
Meal prep preparation:
– Make 4-5 jars at once on Sunday night for grab-and-go breakfasts all week
– Keep toppings separate until ready to serve to maintain freshness (wet fruits like berries can release moisture into the pudding)
– Layer pudding with dry granola only when eating to prevent sogginess
Reheating: This pudding is traditionally eaten cold, but if you prefer a warm breakfast, microwave individual portions for 20-30 seconds. Stir well and note that the texture becomes slightly looser when warm.
Conclusion
Mastering homemade Chia Pudding is truly one of the most rewarding kitchen skills you can develop—it’s quick, customizable, and nutritionally spectacular. The beauty lies in its simplicity: five minutes of active work, a little patience, and you’re rewarded with a creamy, satisfying breakfast that fuels your body and mind. Whether you stick with the classic vanilla version or explore creative Chia Pudding Recipes, the fundamental principles remain the same. I encourage you to make your first batch tonight. Experiment with flavors, adjust sweetness to your taste, and discover why this humble seed-based dish has become a global staple for health enthusiasts. Share your creations with friends, leave a comment below with your favorite variation, and don’t forget to check out our linked recipes for even more inspiration. Your mornings will never be the same!
FAQs
Q: Can I use regular chia seeds instead of white chia seeds?
A: Absolutely. White and black chia seeds are nutritionally identical. The color difference is purely cosmetic, so use whatever you have available.
Q: My pudding turned out too runny after 4 hours—what went wrong?
A: This usually happens when you add too much liquid or haven’t whisked enough. Simply stir in 1-2 additional tablespoons of chia seeds, whisk again, and refrigerate for another 30-60 minutes until it thickens.
Q: Can I skip the sweetener entirely?
A: Yes, but the pudding will taste very mild and slightly earthy. I recommend at least a small amount of vanilla extract for flavor. Alternatively, top with very ripe, sweet fruits like mango or banana to compensate.
Q: How can I make this pudding higher in protein?
A: Two easy strategies: use milk with higher protein content like dairy milk or soy milk, or stir in 1 scoop of your favorite unflavored or vanilla protein powder during the mixing stage. You may need to adjust liquid slightly to avoid a paste-like consistency.
Q: Is it safe to eat chia pudding every day?
A: For most people, yes. However, chia seeds are high in fiber, so if you’re not accustomed to a high-fiber diet, start with smaller portions to avoid digestive discomfort. Drink plenty of water throughout the day to help your body process the fiber effectively.
Quick way to grow your Chia Pudding in 5 minutes
Ingredients
Equipment
Method
- Combine chia seeds and milk in a glass or jar.
- Stir the mixture well to prevent clumping.
- Let it sit for 5 minutes, stirring once more after 2-3 minutes, until it reaches a pudding consistency.
- Serve immediately or chill for a thicker consistency.