The Ultimate Guide to Fluffy, Flavorful Rice Pilaf: A Simple Recipe That Elevates Any Meal
Have you ever wondered why restaurant rice always tastes so much better than the plain, sticky version you make at home? The secret often lies in a classic technique called Rice Pilaf—where grains are first toasted in butter or oil before simmering in broth. This simple step transforms ordinary rice into a nutty, aromatic, and perfectly fluffy side dish. Preparing this dish from scratch not only saves money but also lets you control the ingredients, avoiding preservatives and excess sodium. Whether you’re a busy parent or a cooking enthusiast, mastering a reliable Rice Pilaf is a game-changer. And if you’re looking for a complete meal idea, this rice pilaf recipe pairs beautifully with cranberry orange chicken for a crowd-pleasing dinner.
Ingredients & Kitchen Tools
Essential Ingredients
– 1 cup long-grain white rice (basmati or jasmine work best) – The key to fluffy grains.
– 2 tablespoons unsalted butter (or olive oil for dairy-free) – Toasting the rice in fat adds depth.
– 1 small onion, finely diced – Adds savory sweetness.
– 2 cloves garlic, minced – Enhances aroma.
– 2 cups low-sodium chicken or vegetable broth – Infuses flavor; water can be used but yields less richness.
– ½ teaspoon salt – Adjust to taste if broth is salted.
– ¼ teaspoon black pepper – Optional, for subtle heat.
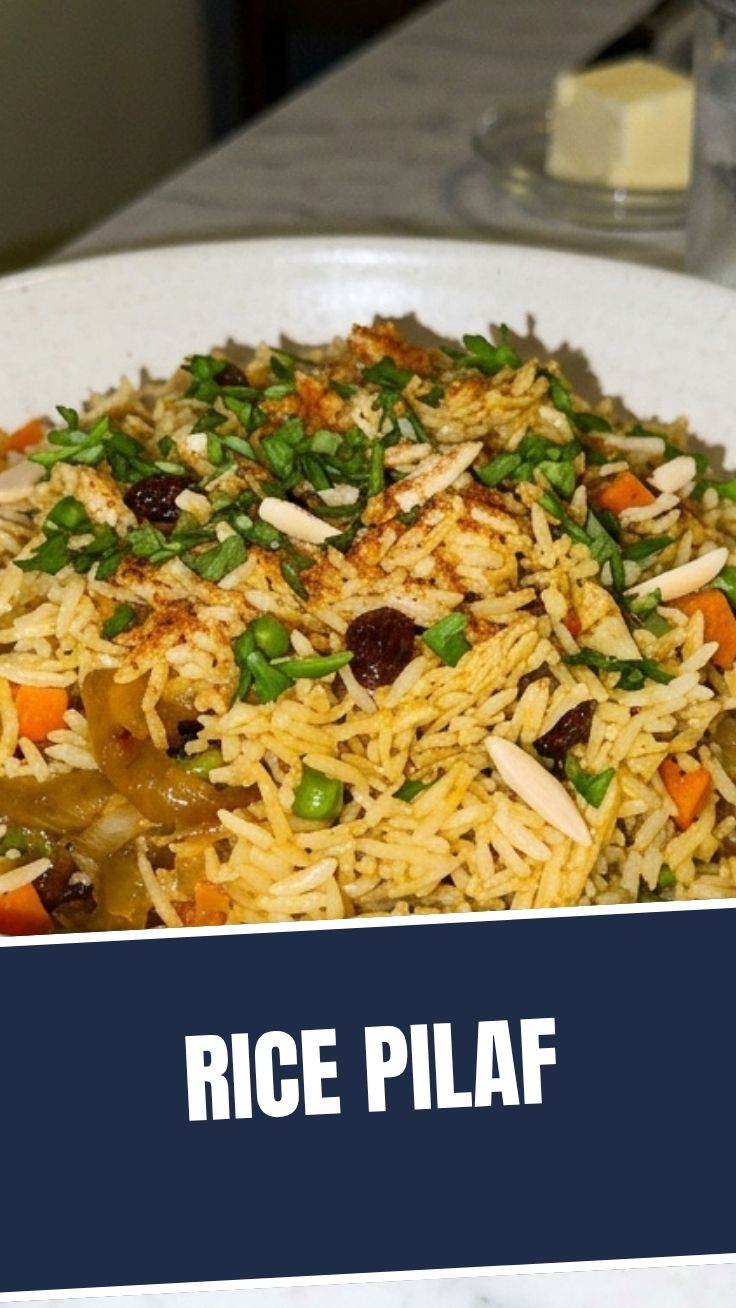
– Optional add-ins: ¼ cup slivered almonds, ¼ cup dried cranberries, or fresh parsley for garnish.
Kitchen Tools
– Medium saucepan with a tight-fitting lid (essential for steam retention)
– Wooden spoon or spatula
– Sharp knife and cutting board
– Measuring cups and spoons
– Fine-mesh strainer (if rinsing rice)
Prep Time & Cooking Schedule
– Prep time: 10 minutes
– Cook time: 20 minutes (plus 10 minutes resting off heat)
– Total time: 40 minutes
Plan ahead: This dish is best served fresh, but you can prep the onion and garlic up to a day in advance. The resting step is critical—do not skip it, as it allows the steam to finish cooking the grains evenly.
Step-by-Step Instructions
1. Rinse the rice (optional but recommended) under cold water until the water runs clear. This removes excess starch and prevents clumping. Drain well.
2. Melt butter in the saucepan over medium heat. Add the diced onion and cook until softened, about 3–4 minutes. Stir in the garlic for 30 seconds until fragrant.
3. Add the rice and stir constantly for 2–3 minutes until the grains become translucent at the edges and emit a nutty aroma. This toasting step is the heart of any authentic Rice Pilaf.
4. Pour in the broth, add salt and pepper, and bring to a boil. Once boiling, reduce heat to low, cover tightly, and simmer for 15–18 minutes (do not lift the lid!).
5. Remove from heat and let it rest, covered, for 10 minutes. This allows the steam to redistribute.
6. Fluff with a fork, then gently fold in any optional add-ins like almonds or parsley. For a complete meal, serve alongside this rice pilaf recipe adaptation with cranberry orange chicken.
Nutritional Benefits & Advantages
Rice pilaf is more than a tasty side—it’s a nutrient-dense option. Brown rice can be substituted for more fiber and B vitamins, but even white rice provides energy in the form of complex carbohydrates. The butter and onions add flavor without excessive calories, while the broth introduces minerals like calcium and magnesium. If you use vegetable broth, the dish becomes vegan-friendly. Compared to plain steamed rice, pilaf offers a lower glycemic impact when paired with healthy fats and protein, making it a smart choice for balanced meals.
Tips, Variations & Cooking Advice
– Flavor variations: Swap broth for mushroom stock for an earthy note, or add a pinch of turmeric and cumin for a Middle Eastern twist.
– Ingredient swaps: Use quinoa or orzo for a different texture; for gluten-free, ensure your broth is certified gluten-free.
– Cooking method: Try baking at 350°F (covered) for 25 minutes instead of stovetop—perfect for large batches.
– Dietary adaptations: For dairy-free, replace butter with coconut oil or avocado oil. For low-sodium, use unsalted broth and adjust seasoning.
Common Mistakes to Avoid
– Lifting the lid during cooking releases steam and leads to undercooked, gummy rice. Trust the timer.
– Skipping the toasting step results in bland, sticky rice. The nutty flavor comes from sautéing the grains.
– Using too much liquid makes mushy pilaf. Stick to a 2:1 liquid-to-rice ratio for long-grain varieties.
– Over-stirring after cooking breaks the grains. Use a fork to fluff gently.
Storage & Meal Prep Tips
– Refrigeration: Store leftovers in an airtight container for up to 4 days. Allow to cool completely before sealing.
– Freezing: Portion into freezer-safe bags and freeze for up to 3 months. Thaw overnight in the fridge.
– Reheating: Add a splash of broth or water, cover, and microwave in 30-second bursts, or reheat in a skillet over low heat with a tablespoon of butter. Avoid high heat, which dries out the grains.
Conclusion
Perfecting a fluffy, aromatic Rice Pilaf at home is simpler than you think—and the payoff is huge. By toasting the grains and using flavorful broth, you elevate a humble side dish into a star accompaniment. Whether you follow this classic method or experiment with add-ins, the key is patience and attention to detail. Remember, this rice pilaf recipe works beautifully alongside proteins like chicken, fish, or tofu. Try it this week, and share your results in the comments—I’d love to hear how you made it your own!
FAQs
1. Can I use brown rice instead of white?
Yes, but increase the cooking time to 40–45 minutes and add ½ cup more liquid. Toast the rice first for best results.
2. Why did my rice turn out mushy?
Likely too much liquid or the lid was lifted during cooking. Stick to a 2:1 ratio and avoid peeking.
3. Can I make rice pilaf in an Instant Pot?
Absolutely. Sauté the onion, garlic, and rice using the “Sauté” function, then add broth, seal, and cook on high pressure for 5 minutes. Allow natural release for 10 minutes.
4. How do I add more flavor without sodium?
Use unsalted broth, add fresh herbs like thyme or rosemary, and toast the rice in a mix of butter and olive oil.
5. Can I freeze cooked rice pilaf?
Yes. Let it cool completely, portion into freezer bags, and reheat with a splash of broth. The texture remains excellent for up to 3 months.
Proven way to grow tasty Rice Pilaf in 4 steps Rice Pilaf
Ingredients
Equipment
Method
- In a medium saucepan, melt butter or heat olive oil over medium heat, then add the finely chopped onion and sauté until softened, about 3-5 minutes.
- Stir in the minced garlic and long-grain rice, cooking for another 2-3 minutes until the rice is lightly toasted.
- Pour in the chicken or vegetable broth, add salt and pepper, bring to a boil, then reduce heat to low, cover, and simmer for 15-18 minutes until the liquid is absorbed and the rice is tender.
- Remove from heat and let it rest, covered, for 5 minutes before fluffing with a fork and serving.