The Ultimate Tuna Salad: A Protein-Packed Classic Worth Making at Home
Have you ever opened a can of tuna and wondered why your homemade version never quite matches the deli counter’s creamy, flavorful perfection? You’re not alone. Many home cooks struggle with bland, dry, or overly fishy results. The secret lies not just in the ingredients, but in the technique and balance of flavors. Preparing a truly exceptional Tuna Salad at home is not only more economical and healthier—it allows you to control every element, from the quality of the tuna to the crunch of the celery. This guide will show you how to build a consistently delicious dish, perfect for a quick lunch or a light dinner. Whether you enjoy it on crackers, over a bed of greens, or as the star of a classic Tuna Sandwich, mastering this recipe is a kitchen essential.
Ingredients & Kitchen Tools (H2)
Before you begin, gather your components and equipment. Quality ingredients lead to a superior final dish.
Ingredients:
– Canned Tuna (2 cans, 5 oz each): Use solid white albacore in water (for a milder flavor) or chunk light in oil (for a richer taste). Drain well.
– Mayonnaise (1/3 cup): Full-fat creates the creamiest base. For a lighter version, use half mayo and half Greek yogurt.
– Celery (1-2 ribs, finely diced): Provides essential crunch and freshness. Substitute with diced apple or jicama for a sweet-crunchy twist.
– Red Onion (2 tablespoons, minced): Adds a sharp bite. Soak minced onion in cold water for 10 minutes to mellow the flavor. Use shallots or chives as alternatives.
– Fresh Lemon Juice (1 tablespoon): Brightens all the flavors. Bottled lemon juice is acceptable in a pinch but less vibrant.
– Fresh Parsley (2 tablespoons, chopped): Adds color and fresh herb notes. Dill or chives are excellent substitutes.
– Salt & Black Pepper (to taste): Essential for seasoning. Start with ¼ teaspoon each.
– Optional Mix-ins: Dijon mustard (1 teaspoon), capers (1 tablespoon), hot sauce, or pickle relish.
Kitchen Tools:
– Mixing Bowl: Medium-sized bowl for combining ingredients.
– Fork or Potato Masher: To flake the tuna to your preferred consistency.
– Cutting Board & Knife: For dicing vegetables.
– Can Opener: A reliable one is non-negotiable.
– Fine-mesh Strainer: To drain tuna thoroughly.
Prep Time & Cooking Schedule (H2)
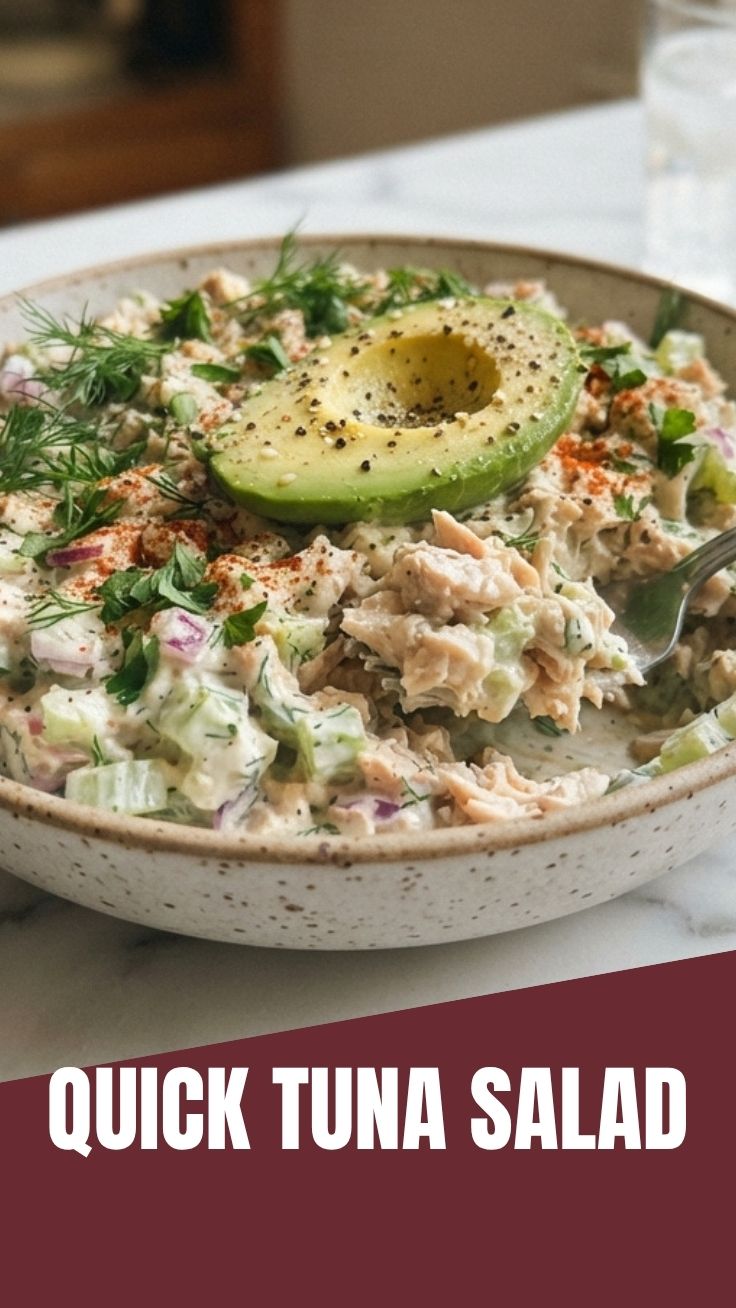
This recipe is about assembly, not cooking time. The key is resting time for flavors to meld.
– Prep Time: 10 minutes. This includes draining tuna, chopping vegetables, and measuring ingredients.
– Resting Time: 30 minutes (minimum). Chilling allows the flavors to marry, making the salad more cohesive and flavorful. You can prepare it a day ahead for deeper flavor.
– Total Active Time: 10 minutes.
– Total Time: 40 minutes (including rest).
Planning Tip: Make this while you prepare your morning coffee, then refrigerate it for lunch. The timing is perfect for a no-fuss, make-ahead meal.
Step-by-Step Instructions (H2)
Follow these steps for a foolproof, creamy, and balanced Tuna Salad. For a satisfying lunch, pile it onto toasted bread for a classic Tuna Sandwich.
1. Prepare the Tuna:
Open the cans and drain the tuna in a fine-mesh strainer. Press gently with a spoon to remove excess liquid—this is crucial to avoid a watery salad. Transfer to your mixing bowl. Use a fork to flake the tuna into small, uniform pieces. For a smoother texture, use a potato masher; for chunkier, keep flakes slightly larger.
2. Build the Aromatics:
Add the finely diced celery, minced red onion, and fresh parsley. These ingredients provide the structural crunch and fresh flavor that balance the richness. Adjust the amount of onion based on your preference for pungency.
3. Create the Binding Mixture:
In a small bowl, whisk together the mayonnaise, lemon juice, and optional Dijon mustard (for tang). Season with salt and pepper. Temperature Control Tip: Use room-temperature mayonnaise for easier mixing.
4. Combine and Season:
Pour the dressing over the tuna mixture. Fold gently with a spatula or fork until everything is evenly coated, but avoid overmixing—it can turn mushy. Texture Cue: The salad should hold together when pressed but still show distinct pieces of tuna and celery. Taste and adjust seasoning. If it tastes flat, add a pinch more salt or a squeeze of lemon.
5. Rest for Best Results:
Cover the bowl with plastic wrap and refrigerate for at least 30 minutes. This is the most important step. Flavor Development: Cold temperature allows the fat in the mayo to solidify slightly, creating a creamy texture, and lets the onion and lemon penetrate the tuna.
Nutritional Benefits & Advantages (H2)
This tuna salad is a powerhouse of lean protein and healthy fats. A single serving (approximately ½ cup) provides:
– High-Quality Protein (approx. 25g): Supports muscle repair and keeps you full for hours.
– Omega-3 Fatty Acids: From tuna, these support heart and brain health.
– Vitamin D & B12: Tuna is an excellent source of these often-deficient vitamins.
– Low Carbohydrates: Naturally gluten-free and perfect for low-carb or keto diets.
Choosing homemade over store-bought drastically reduces sodium (you control the salt) and eliminates preservatives and added sugars often found in pre-made salads.
Tips Variations & Cooking Advice (H2)
– Flavor Variations:
– Mediterranean: Add chopped kalamata olives, sun-dried tomatoes, and crumbled feta.
– Curry: Stir in 1 teaspoon curry powder and a handful of golden raisins.
– Avocado: Replace half the mayo with mashed avocado for a creamy, nutrient-dense twist.
– Ingredient Swaps: Use Greek yogurt (½ cup) for a tangy, higher-protein dressing. Substitute salmon or sardines for tuna.
– Dietary Adaptations:
– Dairy-Free: The base recipe is dairy-free.
– Gluten-Free: Serve over salad greens, in lettuce wraps, or gluten-free crackers.
– Low-Fat: Use drained, low-fat plain Greek yogurt and increase the celery and onion for volume.
Common Mistakes to Avoid (H2)
– Mistake #1: Not Draining Tuna Well Enough.
– Solution: Press the tuna in a fine-mesh strainer with a spoon. Excess liquid dilutes flavor and makes the salad runny.
– Mistake #2: Overmixing.
– Solution: Fold ingredients together gently. Overmixing breaks down the tuna and celery, resulting in a paste-like texture.
– Mistake #3: Skipping the Resting Time.
– Solution: Refrigerate for at least 30 minutes. The flavor is significantly inferior if served immediately.
– Mistake #4: Underseasoning.
– Solution: Taste and adjust after resting. Cold dulls saltiness, so you might need a little more salt after chilling.
Storage & Meal Prep Tips (H2)
– Refrigeration: Store in an airtight container for up to 3 days. The celery will soften slightly over time, but the flavor will deepen.
– Freezing: Not recommended. The mayonnaise-based dressing will separate upon thawing, creating a watery, grainy texture.
– Reheating: Serve cold. If you prefer it at room temperature, let it sit out for 10-15 minutes after chilling.
– Meal Prep Idea: Prepare a double batch on Sunday. Use it for quick lunches on crackers, in lettuce wraps, or stuffed into bell peppers for a no-cook meal.
Conclusion (H2)
Creating a perfect batch of Tuna Salad at home is a skill that pays dividends in taste and nutrition. By following this guide—emphasizing proper draining, gentle mixing, and a crucial resting period—you’ll consistently produce a salad that is creamy, savory, and satisfying. Whether you enjoy it as a dip, a lettuce wrap, or the core of a hearty Tuna Sandwich, this recipe is a versatile and healthy cornerstone of any meal prep routine. We encourage you to try it, tweak it with your favorite add-ins, and share your delicious results in the comments below. Happy cooking!
FAQs (H2)
1. Can I use oil-packed tuna instead of water-packed?
Yes. Oil-packed tuna is richer and more flavorful. Drain it well (reserving the oil for dressings) and reduce the mayonnaise slightly to avoid an overly greasy salad.
2. How can I make this recipe dairy-free?
The base recipe is dairy-free. Simply use a vegan mayonnaise alternative or substitute with mashed avocado. Always check that your mayo is dairy-free if you have an allergy.
3. My tuna salad tastes bland. What went wrong?
The most common cause is insufficient seasoning. After resting, taste again. Add a pinch more salt, a dash of black pepper, or a second squeeze of lemon juice. The salt and acid work together to amplify all flavors.
4. Can I add hard-boiled eggs?
Absolutely! Chopped hard-boiled eggs add creaminess and extra protein. Add one or two finely chopped eggs after the tuna is flaked. This is a classic “tuna and egg salad” variation.
5. How long will it keep in the refrigerator?
Stored in an airtight container, it remains fresh for up to 3 days. The celery will soften, so consider adding fresh diced celery when serving leftovers if you prefer maximum crunch.
Quick way to grow Tuna Salad in 15 minutes.
Ingredients
Equipment
Method
- Drain the canned tuna thoroughly and place it in a medium-sized mixing bowl. Use a fork to flake the tuna until it is broken into small pieces.
- Add the mayonnaise, finely chopped celery, finely chopped red onion, Dijon mustard, and lemon juice to the bowl with the flaked tuna.
- Stir all the ingredients together until they are well combined. Ensure that the mayonnaise evenly coats the tuna and vegetables.
- Season the tuna salad with salt and black pepper to taste. Mix again to distribute the seasonings evenly.
- Serve the tuna salad immediately on bread, crackers, or lettuce wraps, or cover and refrigerate for later enjoyment.