The Ultimate Guide to Perfect Roasted Chicken: A Foolproof Recipe for Beginners and Pros
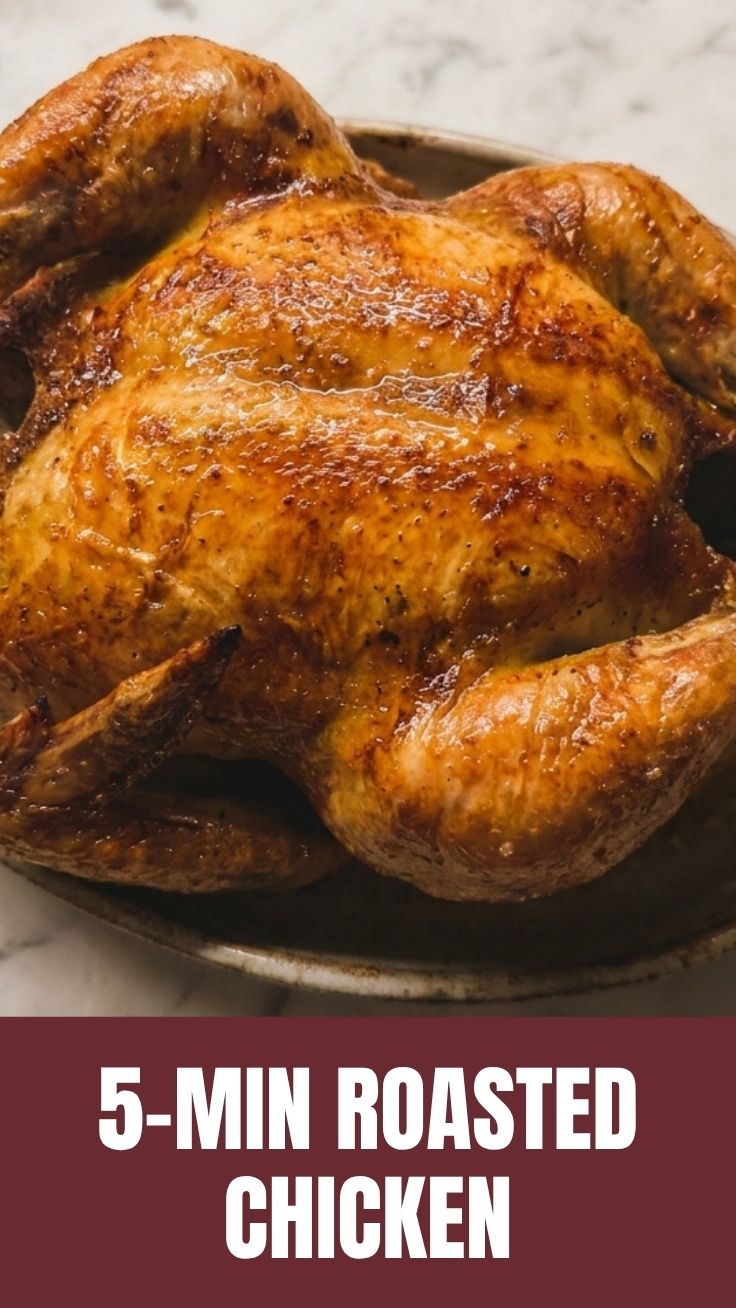
Is there anything more comforting than the aroma of a golden, crispy Roasted Chicken filling your kitchen on a Sunday afternoon? I’ve spent years perfecting this technique, and I’m here to share exactly how to achieve that restaurant-quality result at home. Whether you’re looking for a show-stopping centerpiece or simply want to master one of the most versatile Easy Chicken Recipes, this guide walks you through every detail. The beauty of a perfectly roasted chicken lies in its simplicity—when done right, it delivers juicy meat, crisp skin, and deep, savory flavor without requiring complicated techniques. And if you’re looking for easy chicken recipes that consistently deliver, this method is your new go-to. Let’s make your next roast unforgettable.
—
Ingredients & Kitchen Tools
Required Ingredients
– 1 whole chicken (4–5 lbs) – Fresh or fully thawed; organic yields better flavor
– 2 tablespoons olive oil – Helps crisp the skin and locks in moisture
– 1 lemon, halved – Adds citrus brightness and tenderizes the meat
– 4–5 garlic cloves, smashed – Infuses deep, savory aroma
– Fresh herbs (rosemary, thyme, parsley) – Use 3–4 sprigs each
– Salt and freshly ground black pepper – Essential for flavor penetration
– 1 onion, quartered – For cavity stuffing and pan flavor
Kitchen Tools
– Roasting pan with rack – Elevates chicken for even heat circulation
– Meat thermometer – Guarantees doneness without guesswork
– Kitchen twine – For trussing (optional but recommended)
– Basting brush – For even oil application
– Aluminum foil – For tenting if skin browns too quickly
Optional Substitutions
– Butter instead of olive oil for richer flavor | Lime instead of lemon | Dried herbs (1 tsp each) if fresh unavailable | Chicken thighs if cooking for smaller portions
—
Prep Time & Cooking Schedule
| Stage | Time |
|——-|——|
| Prep time | 15 minutes |
| Resting before cooking (optional) | 30 minutes (brings chicken to room temp) |
| Cooking time | 1 hour 15 minutes – 1 hour 30 minutes |
| Resting after cooking | 15 minutes (critical for juiciness) |
Total time: Approximately 2 hours. Plan your meal accordingly: start roasting 2 hours before serving. The resting time is non-negotiable—it allows juices to redistribute, preventing dry meat.
—
Step-by-Step Instructions
1. Preheat oven to 425°F (220°C) – High heat is essential for crispy skin.
2. Pat chicken dry with paper towels (inside and out). This is the single most important step for crispy skin.
3. Season generously – Rub chicken with olive oil, then sprinkle salt and pepper all over. Don’t forget the cavity.
4. Stuff the cavity – Place lemon halves, garlic cloves, herbs, and onion quarters inside.
5. Truss the chicken – Tie legs together with kitchen twine; tuck wing tips under the body.
6. Place on rack in roasting pan – Breast side up. This ensures even cooking.
7. Roast for 1 hour 15 minutes – Check internal temperature at thickest part of thigh (not touching bone): target 165°F (74°C).
8. Baste once halfway – Spoon pan juices over bird for extra moisture and shine.
9. Rest before carving – Tent loosely with foil and let sit 15 minutes.
Temperature tip: If skin browns too quickly, tent with foil during last 20 minutes. For extra crispiness, increase oven to 450°F for final 5 minutes.
This roasted chicken method works beautifully with other easy chicken recipes too—simply adjust cooking time for smaller cuts like thighs or breasts.
—
Nutritional Benefits & Advantages
– High-quality protein (about 35g per serving) supports muscle repair and satiety
– Rich in B vitamins (B6, B12) for energy metabolism and brain function
– Selenium and phosphorus – Support immune health and bone strength
– Moderate fat content – Especially if skin is removed (about 7g fat per 3oz serving)
– Low carbohydrate – Naturally keto-friendly and gluten-free
– Versatile meal prep – Provides multiple meals (sandwiches, salads, soups)
—
Tips Variations & Cooking Advice
Flavor Variations
– Mediterranean – Add oregano, lemon zest, and olives
– Asian-inspired – Rub with ginger, soy sauce, and five-spice powder
– Spicy – Add paprika, cayenne, and chili flakes to rub
Alternative Cooking Methods
– Air fryer – Cook at 360°F for 45–50 minutes for extra crispiness
– Slow cooker – Cook on low 6–8 hours (skin won’t crisp; finish under broiler)
– Grill – Indirect heat at 350°F for 1–1.5 hours with lid closed
Dietary Adaptations
– Dairy-free – Already dairy-free; use olive oil instead of butter
– Gluten-free – Naturally gluten-free; check seasoning blends
– Low sodium – Reduce salt; use herbs and citrus for flavor
Portion Adjustments
– Smaller bird (3 lbs) – Reduce cooking time to 50–60 minutes
– Larger bird (6–7 lbs) – Increase to 1 hour 45 minutes – 2 hours
—
Common Mistakes to Avoid
Mistake #1: Not Drying the Skin
Solution: Pat thoroughly with paper towels, then air-dry uncovered in fridge for 1–2 hours if possible.
Mistake #2: Overcrowding the Pan
Solution: Use a rack; vegetables should be in a single layer underneath, not piled around the bird.
Mistake #3: Guessing Doneness
Solution: Always use a meat thermometer. The thigh should read 165°F, breast 160°F (carryover cooking brings it to 165°F).
Mistake #4: Skipping the Rest
Solution: Never carve immediately. The 15-minute rest is when juices redistribute, preventing dry meat.
Mistake #5: Opening the Oven Too Often
Solution: Resist peeking. Each opening drops oven temperature by 25°F, extending cooking time and drying out the bird.
—
Storage & Meal Prep Tips
Refrigeration
– Store leftovers in airtight container for up to 4 days
– Shred or slice before storing for easier reheating
Freezing
– Freeze cooked meat (without bones) for up to 3 months
– Wrap tightly in plastic wrap then foil or use freezer-safe bags
– Label with date and portion size
Reheating (to maintain texture)
– Oven method – 350°F for 10–15 minutes, covered with foil (add splash of broth)
– Air fryer – 350°F for 5–7 minutes for crispy skin
– Avoid microwave – It makes meat rubbery and dry
Meal Prep Ideas
– Use leftover chicken in salads, wraps, tacos, or soups
– Make chicken stock from bones (simmer with veggies for 2–3 hours)
– Shred and freeze in portions for quick weeknight dinners
—
Conclusion
Mastering roasted chicken transforms your home cooking from ordinary to extraordinary. This method delivers consistently juicy meat, crispy skin, and deep, savory flavor every time. Whether you’re preparing a Sunday dinner or stocking your freezer with easy chicken recipes for busy weeknights, this foundational technique is worth perfecting. The beauty is that once you understand the basic principles—proper drying, high heat, accurate temperature, and adequate resting—you can adapt it to any flavor profile or cooking method. I encourage you to try this recipe this weekend, experiment with your favorite herbs and spices, and discover how satisfying homemade roast chicken can be. Share your results in the comments below, and don’t forget to explore more of our foolproof recipes for everyday cooking success.
—
FAQs
Can I use chicken parts instead of a whole bird?
Absolutely. Adjust cooking time: bone-in thighs and drumsticks take 40–45 minutes at 425°F; breasts take 25–30 minutes. Always check internal temperature.
How do I prevent the chicken from sticking to the pan?
Use a roasting rack or line the pan with parchment paper. Alternatively, add a thin layer of oil to the pan bottom before placing the chicken.
My chicken is browning too quickly. What should I do?
Cover loosely with aluminum foil for the remaining cooking time. Reduce oven temperature by 25°F if it’s happening very early in the process.
Can I stuff the chicken with vegetables?
Yes, but avoid dense vegetables like potatoes (they won’t cook through). Use onion, lemon, garlic, and herbs. Cook vegetables separately for best results.
How do I know when the chicken is done without a thermometer?
The juices should run clear when you pierce the thigh, and the leg should move easily in the joint. However, a thermometer is far more reliable.
Proven way to grow the perfect Roasted Chicken
Ingredients
Equipment
Method
- Preheat your oven to 425°F (220°C) and ensure the oven rack is in the middle position.
- Remove the chicken from its packaging, pat it dry thoroughly with paper towels, and remove any giblets from the cavity.
- In a small bowl, combine the softened butter with chopped rosemary, thyme, minced garlic, salt, and pepper to create a flavorful herb butter.
- Carefully loosen the skin over the chicken breasts and thighs, then spread the herb butter evenly under the skin and all over the chicken’s exterior.
- Place the lemon halves and onion quarters inside the chicken cavity for added flavor.
- Place the chicken in a roasting pan, pour the chicken broth into the bottom of the pan, and roast for 20-25 minutes until the skin is golden.
- Reduce the oven temperature to 375°F (190°C) and continue roasting for another 60-70 minutes, or until a meat thermometer inserted into the thickest part of the thigh reads 165°F (74°C).
- Once cooked, remove the chicken from the oven, tent it with foil, and let it rest for 10-15 minutes before carving to allow the juices to redistribute.