The Ultimate Guide to Perfectly Shredded Brussels Sprouts at Home
Have you ever struggled to make Brussels sprouts taste irresistible? You’re not alone. For years, these mini cabbages have suffered a bad reputation—often boiled into bitterness or roasted until limp. But when shredded and cooked with the right technique, they transform into something magical: crispy edges, tender centers, and a nutty, caramelized flavor that even skeptics love. Preparing this dish at home not only saves money but also puts you in control of seasoning, texture, and quality. When it comes to incorporating more Brussels Sprouts into your diet, nothing beats a home-cooked recipe that turns these healthy vegetables into a savory delight. Whether you’re a seasoned cook or a beginner, this step-by-step guide will help you nail shredded Brussels sprouts every time.
Ingredients & Kitchen Tools
For the Shredded Brussels Sprouts:
– 1 pound fresh Brussels sprouts – Look for firm, bright green heads with tightly packed leaves. Avoid any with yellowing or wilting.
– 2 tablespoons olive oil – Extra virgin adds richer flavor; avocado oil works as a neutral substitute.
– 2 cloves garlic, minced – For aromatic depth. Garlic powder (½ teaspoon) can replace fresh in a pinch.
– ½ teaspoon salt – Fine sea salt or kosher salt preferred; adjust to taste.
– ¼ teaspoon black pepper – Freshly ground gives brighter kick.
– 1 tablespoon balsamic vinegar – Adds tangy sweetness. Substitute with lemon juice or apple cider vinegar.
– ¼ cup grated Parmesan cheese – Optional for umami richness. Omit or use nutritional yeast for dairy-free.
– Optional add-ins – Red pepper flakes for heat, toasted pine nuts for crunch, or crispy bacon bits.
Kitchen Tools:
– Chef’s knife or mandoline slicer – Mandoline ensures even, thin shreds; a sharp chef’s knife works manually.
– Cutting board
– Large skillet or cast-iron pan – Cast iron gives the best sear.
– Spatula or wooden spoon
– Mixing bowl
– Measuring spoons
Prep Time & Cooking Schedule
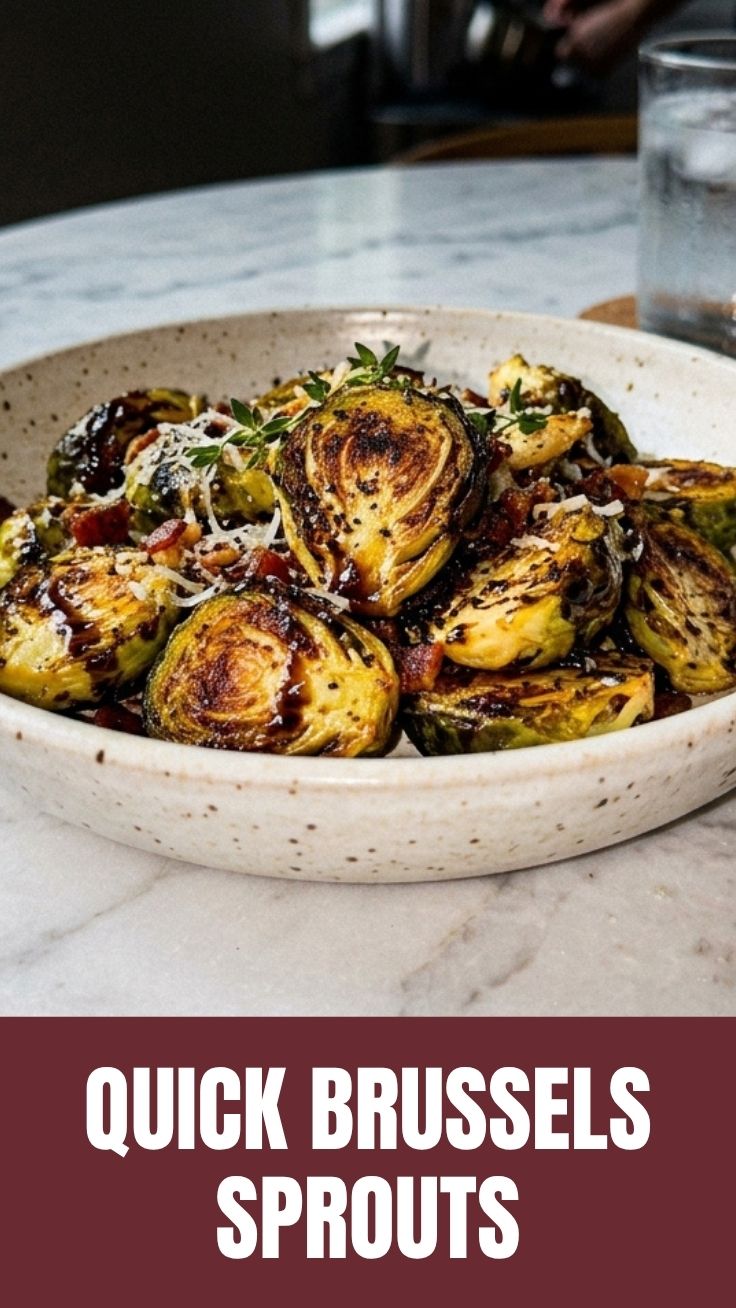
– Prep Time: 10 minutes – Trim the stem ends, remove any outer discolored leaves, and shred the sprouts.
– Cook Time: 8–10 minutes – High-heat searing in a skillet.
– Resting Time: 2 minutes – Let the sprouts rest off heat to allow flavors to meld.
– Total Time: 20 minutes – Quick enough for a weeknight side, yet impressive for guests.
Plan this dish last when coordinating a full meal, as it’s best served fresh. The entire process moves fast, so have all ingredients measured and tools ready before you start.
Step-by-Step Instructions
1. Prepare the Brussels sprouts – Rinse the sprouts under cold water and pat completely dry. Any moisture will steam instead of sear, preventing crispiness. Trim the tough stem end by about ⅛ inch, then peel off any loose or yellow outer leaves. Using a mandoline slicer or a sharp chef’s knife, slice each sprout crosswise into thin ribbons (about ⅛ inch thick). Place all shreds in a mixing bowl.
2. Preheat your pan – Place a large skillet or cast-iron pan over medium-high heat for 2 minutes. A hot pan is essential for creating those coveted crispy edges. Drizzle in the olive oil and swirl to coat.
3. Sear the sprouts – Carefully add the shredded Brussels Sprouts to the hot oil in a single, even layer. Avoid crowding—work in batches if necessary. Let them cook undisturbed for 3 minutes to develop a deep golden crust. If you stir too early, they’ll steam.
4. Add aromatics and season – After the first 3 minutes, toss in the minced garlic, salt, and pepper. Stir quickly and spread the sprouts back into an even layer. Cook for another 3–4 minutes, stirring occasionally, until the shreds are tender but still bright green with plenty of browned bits. For extra color, increase heat to high in the final minute.
5. Finish with acid and cheese – Remove the pan from heat. Drizzle the balsamic vinegar over the hot sprouts and toss to coat. If using Parmesan, sprinkle it on top and stir until melted and slightly clumpy. Taste and adjust seasoning. The acidity brightens the dish and balances the bitterness naturally found in these healthy vegetables.
6. Rest and serve – Let the sprouts rest in the pan for 2 minutes. This short rest allows the flavors to marry and the texture to settle. Transfer to a serving dish immediately.
Nutritional Benefits & Advantages
Shredded Brussels sprouts are a nutritional powerhouse. One cup (cooked) provides over 100% of the daily recommended intake of vitamin K, essential for bone health and blood clotting. They’re also loaded with vitamin C (more than an orange by weight), fiber for digestive health, and antioxidants like kaempferol that reduce inflammation. Compared to whole roasted sprouts, the shredded version cooks faster, retains more moisture, and allows for better caramelization without burning. This method also reduces the need for excessive oil, making it ideal for heart-healthy diets. Pair them with lean protein or whole grains for a balanced, low-calorie meal.
Tips Variations & Cooking Advice
– Flavor variations: Swap balsamic vinegar for soy sauce and sesame oil for an Asian twist. Add red pepper flakes for heat or a squeeze of lemon for brightness.
– Ingredient swaps: Replace Parmesan with feta or goat cheese for tang. Use coconut oil instead of olive oil for a subtle sweetness.
– Cooking methods: For oven-roasted shreds, spread on a baking sheet at 425°F (220°C) for 12–15 minutes, flipping halfway. An air fryer works well too—cook at 375°F (190°C) for 8 minutes with a shake at the 4-minute mark.
– Dietary adaptations: For dairy-free, omit cheese or use nutritional yeast. For gluten-free, the recipe is naturally gluten-free—just double-check your vinegar and seasoning labels.
– Portion changes: This recipe serves 2–3 as a side. Double all quantities for a crowd, but cook in batches to avoid overcrowding.
Common Mistakes to Avoid
1. Wet sprouts – Moisture is the enemy of crispiness. Always dry the shreds thoroughly with a clean kitchen towel.
2. Overcrowding the pan – Too many shreds trap steam, leading to limp, soggy results. Cook in batches if needed.
3. Stirring too early – Let the sprouts sear undisturbed for the first 3 minutes to build a crust. Constant stirring prevents browning.
4. Underseasoning – Brussels sprouts need adequate salt to draw out moisture and enhance flavor. Taste and adjust before serving.
5. Skipping the acid – A splash of vinegar or lemon juice at the end cuts bitterness and brightens the entire dish. Don’t omit it.
Storage & Meal Prep Tips
– Refrigeration: Store leftover sprouts in an airtight container for up to 4 days. The texture softens slightly, but the flavor remains delicious.
– Freezing: Not recommended—shredded Brussels sprouts become mushy when thawed. If you must freeze, blanch fresh shreds for 1 minute first, then freeze in a sealed bag for up to 2 months.
– Reheating: For best texture, reheat in a dry skillet over medium-high heat for 2–3 minutes, stirring occasionally. Avoid microwaving, which turns them rubbery. Add a tiny splash of water or vinegar if they seem dry.
– Meal prep: Shred the Brussels sprouts up to 2 days in advance. Store the shreds in a zip-top bag with a paper towel to absorb moisture.
Conclusion
Mastering shredded Brussels sprouts opens the door to a quick, versatile, and nutrient-dense side dish that pairs with almost any main course. The key lies in high heat, proper drying, and patience—let the pan do the work. By following this method, you’ll turn humble Brussels Sprouts into a crispy, caramelized star on your dinner table, proving that healthy vegetables can be every bit as indulgent as their comfort-food cousins. Try this recipe tonight, and share your results in the comments—or experiment with one of the variations listed above. For more vegetable-forward recipes, explore our collection of quick skillet sides and roasted favorites.
FAQs
1. Can I use frozen Brussels sprouts for shredding?
Frozen sprouts have a high water content and will steam rather than sear, leading to a mushy texture. Fresh sprouts are strongly recommended for crisp results.
2. What’s the best way to shred Brussels sprouts without a mandoline?
Use a sharp chef’s knife. Cut each sprout in half lengthwise, place the flat side down, then slice thinly crosswise. It takes a little longer but works perfectly.
3. How do I fix overly bitter Brussels sprouts?
Bitterness usually comes from overcooking or using older sprouts. To salvage, toss with a tablespoon of honey or maple syrup and a squeeze of lemon juice. The sweetness balances the bitterness.
4. Can I make this recipe nut-free?
Yes—skip any nut-based add-ins like pine nuts or almonds. The base recipe is naturally nut-free. For extra crunch, add toasted pumpkin seeds or sunflower seeds instead.
5. Why did my shredded sprouts turn out soggy?
The most common cause is overcrowding the pan or adding wet sprouts. Always dry thoroughly, use a large enough pan, and cook in batches if necessary. Also, ensure your pan is properly preheated before adding oil.
How to grow Brussels Sprouts in 7 easy steps
Ingredients
Equipment
Method
- Start Brussels sprout seeds indoors 4-6 weeks before the last frost date in your area; plant them 1/4 to 1/2 inch deep in seed-starting mix in trays or small pots.
- Choose a sunny location with well-draining soil, amend it with compost or aged manure, and adjust the soil pH to 6.0-7.0, adding garden lime if necessary.
- Once seedlings are 4-6 inches tall and after the last frost, transplant them outdoors, spacing them 18-24 inches apart in rows 2-3 feet apart.
- Maintain consistent moisture by watering regularly, especially during dry spells, and fertilize every 3-4 weeks with a balanced fertilizer.
- Monitor plants for common pests like aphids and cabbage worms, removing them manually or using organic pest control methods like insecticidal soap or row covers.
- About 3-4 weeks before harvest, cut off the top 2-3 inches of the plant to encourage the sprouts to mature uniformly.
- Begin harvesting sprouts from the bottom of the stalk when they are firm, about 1 inch in diameter, and continue upwards as they mature.