Celebrate Sweet Freedom: Mastering the Perfect Juneteenth Red Velvet Cake
What if you could bake a dessert that embodies history, celebration, and irresistible flavor all in one go? This Juneteenth, imagine delighting your loved ones with a stunning Juneteenth Red Velvet Cake, a treat that’s as rich in tradition as it is in taste. This timeless classic, with its vibrant crimson hue and velvety texture, offers more than just a sweet ending to a meal; it’s a culinary nod to a momentous occasion. Crafting this iconic cake from scratch allows you to infuse every crumb with your own personal touch, making it a truly special addition to any table. And for those looking to explore more delicious Juneteenth celebration desserts, this recipe is a fantastic starting point for your festive baking adventures.
Ingredients & Kitchen Tools
To embark on this delightful baking journey, gather the following:
Dry Ingredients:
2 ½ cups All-Purpose Flour: Provides structure. (Sifted for a lighter cake.*)
- 1 ½ cups Granulated Sugar: Sweetness and tenderness.
- 1 tsp Baking Soda: Leavening agent for rise.
- 1 tsp Salt: Enhances other flavors.
- 1 cup Unsweetened Cocoa Powder: For that signature red velvet depth.
Wet Ingredients:
1 cup Buttermilk: Adds tanginess and moisture. (Can be substituted with milk + 1 tbsp lemon juice/vinegar, rested for 5-10 mins.*)
½ cup Vegetable Oil: Keeps the cake moist. (Or melted unsalted butter for richer flavor.*)
- 2 Large Eggs: Binds ingredients and adds richness.
- 2 tsp White Vinegar: Reacts with baking soda for lift and tender crumb.
- 1 tsp Vanilla Extract: Essential flavor enhancer.
2 tbsp Red Food Coloring (Liquid or Gel): For the iconic red hue. (Use gel for a more intense color.*)
Cream Cheese Frosting:
- 16 oz Cream Cheese: Softened, main flavor.
- 1 cup (2 sticks) Unsalted Butter: Softened, for richness and structure.
- 4-5 cups Powdered Sugar: Sweetens and thickens.
- 1 tsp Vanilla Extract: Flavor.
- Pinch of Salt: Balances sweetness.
Kitchen Tools:
Two 9-inch Round Cake Pans: For even baking. (Greased and floured.*)
- Electric Mixer (Stand or Handheld): For creaming and mixing.
- Large Mixing Bowls: For wet and dry ingredients.
- Spatula: For folding and scraping.
- Whisk: To combine dry ingredients.
- Measuring Cups and Spoons: For accurate measurements.
- Wire Rack: For cooling cakes.
- Offset Spatula or Butter Knife: For frosting.
Prep Time & Cooking Schedule
- Prep Time: 30 minutes
- Cook Time: 25-30 minutes
- Cooling Time: 1-2 hours (crucial for frosting)
- Total Time: Approximately 2.5 – 3 hours
To plan your baking efficiently, start by gathering and measuring all your ingredients. This mise en place approach will save you time and stress. The cooling time is non-negotiable; attempting to frost warm cakes will result in a messy, sliding disaster. For the best flavor, allow the cake to sit at room temperature for an hour before serving, letting the flavors meld beautifully.
Step-by-Step Instructions
1. Preheat & Prepare: Preheat your oven to 350°F (175°C). Grease and lightly flour two 9-inch round cake pans. This ensures easy release.
2. Combine Dry Ingredients: In a large bowl, whisk together the flour, sugar, baking soda, salt, and cocoa powder. Make sure there are no lumps.
3. Mix Wet Ingredients: In another bowl, whisk the buttermilk, vegetable oil, eggs, vanilla extract, and red food coloring until well combined. In a separate small bowl, mix the vinegar and baking soda until it fizzes slightly – this reaction is key to the cake’s tender crumb.
4. Combine Wet and Dry: Gradually add the wet ingredients to the dry ingredients, mixing on low speed with an electric mixer until just combined. Do not overmix! Gently fold in the vinegar mixture. For a truly authentic Juneteenth Red Velvet Cake, ensure the batter is smooth and a consistent rich red.
5. Bake: Divide the batter evenly between the prepared cake pans. Bake for 25-30 minutes, or until a wooden skewer inserted into the center comes out clean.
6. Cool: Let the cakes cool in the pans on a wire rack for 10-15 minutes, then invert them onto the wire rack to cool completely. This is vital before frosting.
7. Prepare Frosting: While the cakes cool, make the cream cheese frosting. In a large bowl, beat the softened cream cheese and butter with an electric mixer until smooth and creamy. Gradually add the powdered sugar, one cup at a time, beating until light and fluffy. Stir in the vanilla extract and salt. This velvety topping is what truly elevates Juneteenth celebration desserts.
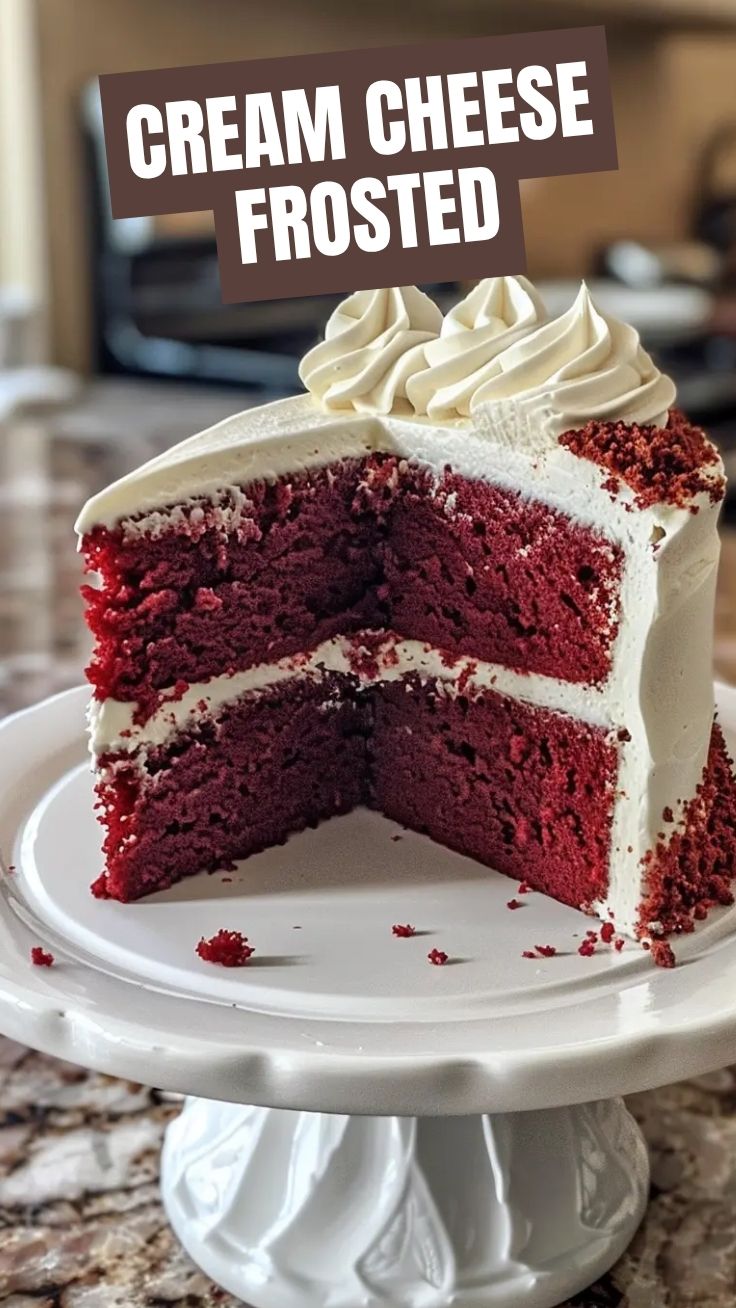
8. Assemble & Frost: Once the cakes are completely cool, place one layer on a serving plate or cake stand. Spread about a third of the frosting evenly over the top. Carefully place the second cake layer on top and spread the remaining frosting over the top and sides of the cake. Garnish as desired (e.g., cake crumbs, fresh berries).
Nutritional Benefits & Advantages
Red velvet cake, while a dessert, can offer some surprisingly beneficial aspects. The cocoa powder in the cake contains antioxidants, which can help combat free radicals in the body. Buttermilk adds calcium and probiotics, aiding in digestion. While clearly an indulgence, making it from scratch allows you to control the quality of ingredients, opting for organic and whole options where possible, providing a more wholesome treat than store-bought alternatives.
Tips, Variations & Cooking Advice
- For a Deeper Red: Use gel food coloring, as it provides a more concentrated color without adding extra liquid.
- Flavor Boost: Add a pinch of espresso powder to the dry ingredients to subtly enhance the chocolate flavor.
- Dairy-Free: Substitute buttermilk with a dairy-free milk alternative (like almond or soy milk) mixed with a tablespoon of apple cider vinegar. Use a dairy-free butter substitute and cream cheese alternative for the frosting.
- Gluten-Free: Swap all-purpose flour for a good quality gluten-free all-purpose flour blend (ensure it contains xanthan gum).
- Cupcakes: This recipe can easily be adapted for cupcakes. Bake for 18-22 minutes.
- Zest it Up: Add a teaspoon of lemon zest to the frosting for a bright counterpoint to the sweetness.
Common Mistakes to Avoid
- Overmixing the Batter: This can develop the gluten in the flour too much, leading to a tough, dense cake. Mix until just combined.
- Warm Cakes for Frosting: Frosting a warm cake will cause the frosting to melt and slide right off. Impatience is your enemy here!
- Not Greasing and Flourishing Pans Properly: Leads to cakes sticking and breaking when trying to remove them.
- Too Much Food Coloring: While you want a vibrant red, excessive food coloring can impart a slight chemical taste. Follow the recipe guidelines.
- Forgetting the Vinegar: The vinegar reacts with the baking soda, creating the signature tender crumb and helping the cake rise. Don’t skip it!
Storage & Meal Prep Tips
Leftover Juneteenth Red Velvet Cake should be stored in an airtight container in the refrigerator for up to 3-4 days due to the cream cheese frosting. For longer storage, slices of unfrosted cake layers can be wrapped tightly in plastic wrap and then foil, and frozen for up to 2-3 months. Thaw frozen cake layers in the refrigerator overnight before frosting. The frosted cake can also be frozen for about a month; wrap tightly to prevent freezer burn. To maintain optimum texture, bring refrigerated cake to room temperature for about 30 minutes before serving.
Conclusion
Baking your own Juneteenth Red Velvet Cake is more than just following a recipe; it’s about connecting with a rich cultural heritage and creating a memorable experience. This detailed guide equips you with everything you need to craft a show-stopping dessert that will undoubtedly be the highlight of your celebration. Whether you’re new to baking or a seasoned pro, the joy of presenting such a beautiful and delicious cake is unparalleled. So, go ahead, gather your ingredients, and immerse yourself in the sweet art of preparing Juneteenth celebration desserts. We encourage you to try this recipe, share your creations, and spread the joy of this iconic historical holiday!
FAQs
Q1: Can I use butter instead of vegetable oil?
A1: Yes, you can substitute melted unsalted butter for vegetable oil. It will give the cake a richer, buttery flavor, but vegetable oil tends to keep the cake slightly moister.
Q2: What can I do if I don’t have buttermilk?
A2: You can make a homemade buttermilk substitute by adding 1 tablespoon of white vinegar or lemon juice to a liquid measuring cup, then filling the rest of the cup with regular milk (dairy or non-dairy) until you reach 1 cup. Let it sit for 5-10 minutes until it slightly curdles.
Q3: My cake came out dry. What went wrong?
A3: A dry cake is often a result of overmixing the batter (which develops too much gluten) or overbaking. Ensure you mix just until combined and check for doneness at the earliest recommended time.
Q4: How can I make my cream cheese frosting less sweet?
A4: You can reduce the amount of powdered sugar slightly, or add an extra pinch of salt to balance the sweetness. A teaspoon of lemon zest can also cut through the richness.
Q5: Can I prepare the cake layers in advance?
A5: Absolutely! Baked and completely cooled cake layers can be wrapped tightly in plastic wrap and stored at room temperature for up to 2 days, or frozen for up to 2 months. Thaw before frosting.
Juneteenth Red Velvet Cake
Ingredients
Equipment
Method
- Preheat your oven to 350°F (175°C) and prepare two 9-inch round baking pans by greasing and flouring them.
- In a medium bowl, whisk together the flour, sugar, cocoa powder, baking soda, and salt.
- In a large bowl, beat the eggs, then whisk in the buttermilk, oil, red food coloring, vinegar, and vanilla extract.
- Gradually add the dry ingredients to the wet ingredients, mixing until just combined and smooth.
- Divide the batter evenly between the prepared pans and bake for 25-30 minutes, or until a wooden skewer inserted into the center comes out clean.
- Let the cakes cool in the pans for 10 minutes, then transfer them to a wire rack to cool completely.
- In a large bowl, beat the softened cream cheese and butter with an electric mixer until smooth and creamy.
- Gradually add the confectioners' sugar, beating until fully incorporated and smooth.
- Stir in the vanilla extract until combined.
- Once the cakes are completely cool, spread a thick layer of cream cheese frosting over the top of one cake layer.
- Place the second cake layer on top and then frost the top and sides of the entire cake with the remaining frosting.