The Ultimate Guide to Making Perfect Homemade Blackberry Jam
Have you ever tasted a jam so vibrant and bursting with real fruit flavor that store-bought versions suddenly seem dull and artificial? That’s the magic of making your own Blackberry Jam (Homemade) at home. Not only do you control the sweetness and texture, but you also capture the peak summer essence of fresh blackberries in every jar. Whether you’re a seasoned canner or a complete beginner, this guide will walk you through every step to create a luscious, spreadable preserve. And if you’re looking for a slightly different consistency, check out this detailed Blackberry preserves recipe for a chunkier, more rustic alternative. By the end of this post, you’ll have the confidence to create a batch of homemade Blackberry Jam (Homemade) that rivals any artisanal brand—and a solid Blackberry preserves recipe for those who prefer whole berries in their spread.
Ingredients & Kitchen Tools
Ingredients
– Fresh or frozen blackberries (4 cups): If using frozen, thaw and drain excess liquid to prevent a runny jam.
– Granulated sugar (3 cups): Balances tartness and acts as a natural preservative. Reduce to 2 cups for a less sweet jam.
– Fresh lemon juice (2 tablespoons): Adds acidity to help the jam set and brighten the berry flavor.
– Pectin (1 package, preferably low-sugar or no-sugar-needed): Ensures proper gelling.
– Butter (½ teaspoon, optional): Reduces foaming during cooking for a clearer jam.
Kitchen Tools & Utensils
– Large, heavy-bottomed pot (6–8 quarts): Prevents scorching and allows for even heat distribution.
– Wooden spoon or silicone spatula: For stirring without scratching the pot.
– Canning jars with lids (4–5 half-pint jars): Sterilized and hot for safe preservation.
– Jar lifter and canning funnel: For safe handling and mess-free filling.
– Magnetic lid wand: Optional but helpful for lifting hot lids.
– Water bath canner or large stockpot with rack: For processing sealed jars.
Optional Substitutions
– Honey (1.5 cups) instead of sugar: Adjust pectin type (use honey-specific pectin) and reduce liquid slightly.
– Chia seeds (3 tablespoons) as a natural thickener: Creates a lower-sugar, no-pectin jam that sets in the fridge.
– Vanilla extract (1 teaspoon): Adds warmth and depth to the berry flavor.
Prep Time & Cooking Schedule
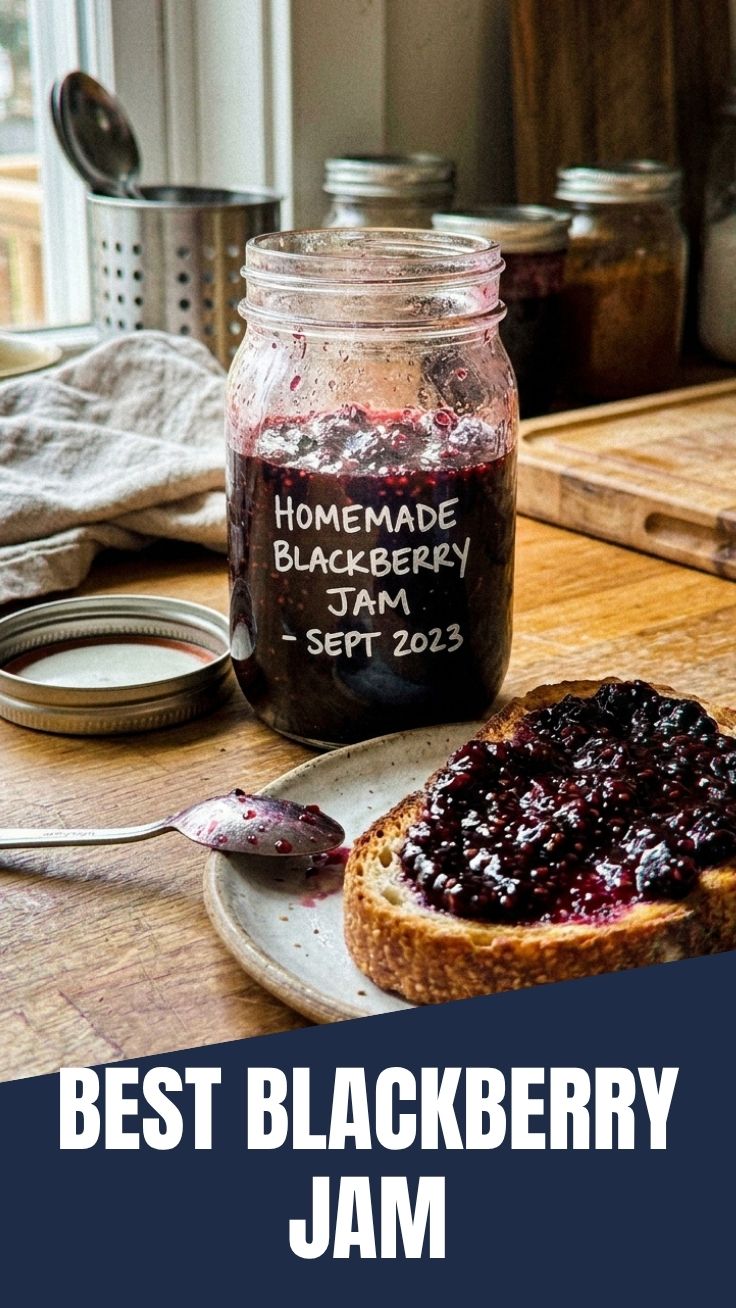
– Prep time: 15 minutes (washing berries, measuring ingredients, sterilizing jars)
– Cook time: 25–30 minutes (active stirring and monitoring)
– Resting time: 10–15 minutes (after removing from heat, before filling jars)
– Total time (including canning): Approximately 1 hour 15 minutes
Planning tip: Start early in the morning when it’s cool, or time your cooking for a day when you can let jars process undisturbed. The jam will thicken further as it cools, so don’t panic if it seems runny at first.
Step-by-Step Instructions
1. Prepare the berries: Rinse fresh blackberries and gently pat dry. Mash them lightly with a potato masher or fork if you prefer a smoother jam. Transfer to your large pot.
2. Combine and heat: Stir in the sugar, lemon juice, and pectin. Let the mixture sit for 5 minutes to macerate (berries release juice). Place over medium-high heat, stirring constantly, until the mixture reaches a rolling boil (a boil that doesn’t stop when stirred).
3. Boil and thicken: Once boiling, add butter if using (to reduce foam). Boil hard for exactly 4 minutes while stirring constantly. Skim off any foam with a spoon.
4. Test for doneness: Place a small spoonful on a chilled plate. If it wrinkles when pushed with your finger, it’s ready. If not, boil for another 1–2 minutes and test again.
5. Fill the jars: Remove pot from heat. Using your canning funnel, ladle hot jam into sterilized jars, leaving ¼-inch headspace. Wipe rims clean, apply lids, and screw bands fingertip-tight.
6. Process in water bath: Place jars in canner, cover with water by 1 inch, and bring to a full boil. Process for 10 minutes (adjust for altitude if needed). Turn off heat and let jars rest in water for 5 minutes before removing.
7. Cool and check seals: Set jars on a towel away from drafts. After 12–24 hours, press the center of each lid – it should not flex. Refrigerate any unsealed jars.
Temperature control tip: Use a candy thermometer to keep jam between 220°F–222°F (104°C–106°C) at sea level for perfect set. This precise temperature is critical for achieving the right consistency in your Blackberry Jam (Homemade). For a chunkier texture, follow a Blackberry preserves recipe that skips the mashing step and uses less cooking time.
Nutritional Benefits & Advantages
Blackberries are nutritional powerhouses. One cup of raw blackberries provides nearly 8 grams of fiber, 30% of your daily vitamin C, and high levels of vitamin K and manganese. They’re loaded with anthocyanins—antioxidants that reduce inflammation and support brain health. When you make homemade jam, you preserve these benefits without the high-fructose corn syrup or artificial preservatives found in commercial brands. Plus, controlling sugar content means you can create a jam that fits your dietary needs, whether low-sugar, no-sugar, or keto-friendly.
Tips Variations & Cooking Advice
– Flavor variations: Add 1 teaspoon of balsamic vinegar, ½ teaspoon of cinnamon, or a sprig of fresh thyme during cooking (remove before jarring). For a spicy kick, stir in ¼ teaspoon of black pepper.
– Ingredient swaps: Use blackberries and raspberries in equal parts for a mixed berry jam. Replace 1 cup of blackberries with diced apples for natural pectin and a firmer set.
– Alternative cooking methods: Try a slow cooker jam (cook on low for 3–4 hours, then thicken with pectin) or an oven-roasted version (bake at 350°F for 45 minutes, stirring halfway).
– Dietary adaptations: For a sugar-free version, use a sugar substitute like allulose or erythritol and a low-sugar pectin. The texture will be slightly softer but still delicious.
Common Mistakes to Avoid
– Not using enough acid: Lemon juice is essential for activating pectin and preventing spoilage. Never skip it, even if your berries taste sweet.
– Overcooking: Boiling too long breaks down pectin and produces a tough, rubbery jam. Use a timer and watch for the “wrinkle test” closely.
– Skipping the chilling plate test: Temperature alone isn’t always reliable. Always do the plate test before declaring the jam done.
– Filling jars while too hot: Wait until the jam has cooled slightly (but is still pourable) to prevent condensation inside the jars, which can lead to mold.
Storage & Meal Prep Tips
– Refrigeration: Once opened, store jam in the fridge for up to 3 weeks. Always use clean, dry utensils to avoid contamination.
– Freezing: Pour cooled jam into freezer-safe containers, leaving ½-inch headspace for expansion. Freeze for up to 12 months. Thaw in the fridge overnight.
– Canning (for long-term storage): Processed, sealed jars keep in a cool, dark pantry for 12–18 months. After opening, refrigerate and use within 3 weeks.
– Reheating/topping: For a glaze-like consistency on pancakes or ice cream, warm the jam gently in a saucepan or microwave for 15 seconds. This restores pourability without burning.
Conclusion
Mastering the art of homemade preserves is deeply satisfying, and this Blackberry Jam (Homemade) is the perfect project to start with. You’ve learned how to harness the natural sweetness of fresh berries, control the pectin process for a perfect set, and preserve that summer flavor all year long. Whether you stick with this classic method or explore a chunkier Blackberry preserves recipe, the key is using quality ingredients and following the temperature and texture cues we’ve covered. Now it’s your turn—grab some blackberries, fire up the stove, and taste the difference homemade makes. Share your results in the comments, or try our cobbler recipe linked above for another fruity adventure!
FAQs
1. Can I use frozen blackberries instead of fresh?
Yes, absolutely. Frozen blackberries work perfectly. Thaw them first, drain any excess liquid (or simmer it down), and proceed with the recipe as written. You may need to cook 2–3 minutes longer to evaporate extra moisture.
2. Why didn’t my jam set?
This is usually due to undercooking (not reaching the gel point), too little pectin or sugar, or overripe berries (low in natural pectin). To fix, re-cook the jam with additional pectin (2 tablespoons powdered) and re-process jars.
3. Can I reduce the sugar?
Yes, but you must use a low-sugar or no-sugar-needed pectin. Regular pectin requires a specific sugar ratio to gel. Alternatively, use chia seeds as a natural thickener—they work well with less sugar.
4. How long do I process jars for high altitude?
Add 5 minutes for every 1,000 feet above sea level (e.g., at 5,000 feet, process for 25 minutes). This ensures safe preservation.
5. My jam is too thick—can I thin it?
Yes. If it’s already canned, simply reheat the opened jar with a splash of water or lemon juice. For unprocessed jam, add ¼ cup of water and gently reheat until pourable.
Quick way to grow Blackberry Jam (Homemade)Blackberry Jam (Homemade)
Ingredients
Equipment
Method
- Wash and gently clean the fresh blackberries, ensuring any stems or leaves are removed.
- Combine the cleaned blackberries, granulated sugar, and lemon juice in a large, heavy-bottomed pot.
- Stir the mixture well to ensure the sugar is evenly distributed, and let it sit for about 15 minutes to allow juices to release.
- Bring the berry mixture to a rolling boil over medium-high heat, stirring constantly to prevent sticking.
- Reduce the heat to medium-low and simmer the jam for 20-25 minutes, continuing to stir occasionally until it thickens.
- To test for doneness, place a small amount of jam on a chilled plate and if it wrinkles when pushed, it's ready.
- Carefully ladle the hot jam into sterilized jars, leaving about 1/4 inch of headspace.
- Seal the jars tightly and process them in a boiling water bath for 10 minutes to ensure proper sealing.