Why This Bold Texas Beef Chili Will Become Your Cold-Weather Obsession
What if one pot could warm your soul, feed a crowd, and taste even better the next day? That’s the magic of a properly made bowl of Texas Beef Chili. Unlike its bean-heavy cousins or timid weeknight approximations, this version is a deep, meaty, spice-forward masterpiece that demands attention. Preparing this dish at home isn’t just about saving money—it’s about controlling the heat, selecting the best beef, and building layers of flavor that no jarred mix can replicate. Whether you call it chili or refer to its Southwestern roots as Chili con carne, mastering this recipe gives you a versatile staple for game days, family dinners, or meal prep. Let’s break down every detail so you can achieve that perfect, restaurant-quality bowl in your own kitchen.
Ingredients & Kitchen Tools
For the Chili Base:
– 3 lbs beef chuck, trimmed and cut into ½-inch cubes (renders tender, fork-friendly pieces)
– 2 tbsp vegetable oil (neutral, high smoke point for searing)
– 1 large yellow onion, diced (adds sweetness and body)
– 6 cloves garlic, minced (fresh, not jarred, for pungency)
– 2 tbsp tomato paste (deepens umami and color)
The Chili Paste (Crucial for Depth):
– 3 dried ancho chiles, stemmed and seeded (earthy, mild heat)
– 2 dried guajillo chiles, stemmed and seeded (tangy, medium heat)
– 1 dried chipotle chile, stemmed and seeded (smoky, spicy)
– 2 cups beef broth, divided (low-sodium preferred)
Dry Spices and Seasonings:
– 2 tsp ground cumin (toasted is best)
– 1 tsp smoked paprika (adds campfire note)
– 1 tsp dried oregano (Mexican oregano if available)
– 1 tsp kosher salt (more to taste)
– ½ tsp black pepper
– 2 bay leaves
Thickener and Finish:
– 1 tbsp masa harina (corn flour) mixed with 2 tbsp water (authentic thickener)
– Fresh cilantro and lime wedges for garnish
Kitchen Tools: Dutch oven (5-6 quart), chef’s knife, cutting board, tongs, wooden spoon, blender or immersion blender for chiles, measuring spoons.
Optional Substitutions: Use 2 lbs ground beef and 1 lb cubed chuck if short on time. Replace dried chiles with 3 tbsp chili powder mix (though reduced complexity). For a leaner option, substitute bison or turkey meat.
Prep Time & Cooking Schedule
– Prep Time: 25 minutes (trimming beef, chopping veggies, hydrating chiles)
– Cook Time: 2 hours to 2 hours 30 minutes (low and slow for tenderness)
– Resting Time: 15 minutes off heat (allows flavors to meld)
– Total Time: Approximately 3 hours
Plan this for a weekend afternoon. The active cooking time (searing, sautéing) is about 30 minutes; the rest is hands-off simmering. This schedule gives you enough time to prepare cornbread or toppings while the chili develops. Pro tip: make a double batch—the flavor actually deepens overnight.
Step-by-Step Instructions
1. Prepare the dried chiles. Tear stemmed, seeded chiles into flat pieces. Toast them in a dry skillet over medium heat for 30–60 seconds per side until fragrant. Transfer to a bowl, cover with 1 cup hot beef broth, and soak for 20 minutes. This rehydrates and softens them for blending.
2. Blend the chili paste. Transfer soaked chiles and liquid to a blender. Add a pinch of salt and blend until completely smooth. Scrape down sides as needed. Set aside. This paste is the soul of your Texas Beef Chili—it delivers complexity without grittiness.
3. Sear the beef. Pat beef cubes completely dry (moisture prevents browning). Heat oil in your Dutch oven over medium-high heat. Working in batches to avoid crowding, sear cubes on all sides (about 5 minutes per batch). Look for a deep mahogany crust—this is flavor. Transfer seared beef to a plate.
4. Build the aromatic base. Reduce heat to medium. Add onion and cook 5 minutes until translucent. Stir in garlic and tomato paste, cooking 1 minute until paste darkens. This step caramelizes sugars and removes raw paste taste.
5. Combine and simmer. Return beef to the pot. Pour in chili paste and remaining 1 cup broth. Add cumin, smoked paprika, oregano, salt, pepper, and bay leaves. Stir thoroughly. Bring to a gentle boil, then reduce to a low simmer. Cover with lid slightly ajar and cook for 1.5 to 2 hours, stirring occasionally. The liquid should barely bubble—too high a heat toughens meat. This robust version of Chili con carne rewards patience with deep, layered heat that hits the back of the throat.
6. Thicken and adjust. After 1.5 hours, check beef tenderness—it should shred when pressed. Stir masa slurry (masa + water) into pot. Simmer uncovered for 15 more minutes until slightly thickened. Taste and adjust salt or heat (add cayenne if needed). Remove bay leaves and let rest for 15 minutes.
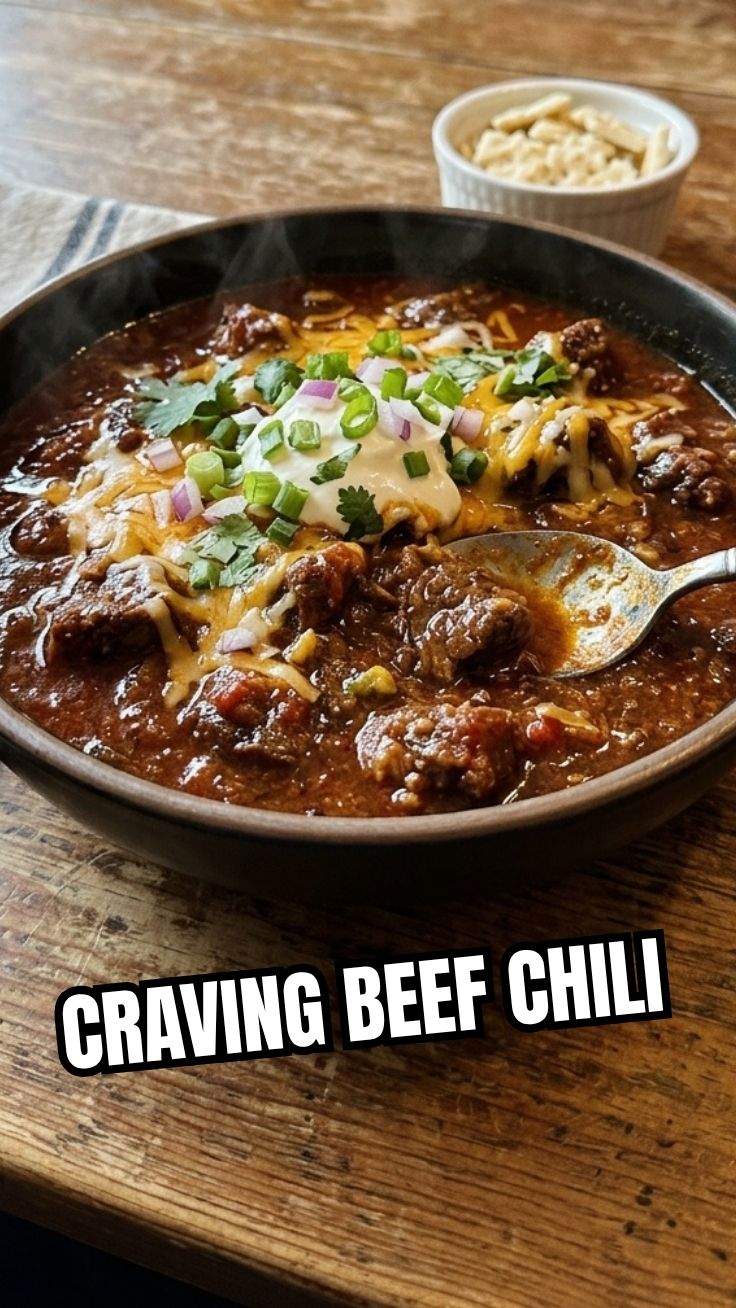
7. Serve. Ladle into bowls and garnish with fresh cilantro and lime. Classic toppings: shredded cheddar, diced onion, sour cream, or pickled jalapeños.
Nutritional Benefits & Advantages
This chili is a protein powerhouse—approximately 35 grams per serving from beef, supporting muscle repair and satiety. Beef chuck provides iron (essential for blood health) and zinc (immune support). The chiles deliver capsaicin, which can boost metabolism and reduce inflammation. Ancho chiles are rich in vitamin A and fiber. By skipping beans, this recipe reduces carbohydrates, making it suitable for low-carb and keto diets. Compared to fast-food chili (often loaded with fillers and sodium), homemade version cuts processed ingredients by 100 percent. One 1.5-cup serving provides balanced macros: 350 calories, 22g fat, 8g carbs, 35g protein. Serve with a side salad for complete meal.
Tips Variations & Cooking Advice
Flavor Variations:
– Smoky chipotle lovers: Add 1 chipotle in adobo sauce (minced) with the broth.
– Mild heat: Use all ancho chiles, omit guajillo and chipotle.
– Texas red style: Strain chili paste for ultraliquid texture; serve over Fritos.
Dietary Adaptations:
– Gluten-free: No changes needed—all ingredients are naturally gluten-free. Check broth label.
– Dairy-free: Omit cheese toppings; use avocado for creaminess.
– Low-fat: Use 90% lean ground beef instead of chuck; reduce oil to 1 tbsp.
Cooking Methods:
– Slow cooker: Complete steps 1-3, then transfer all to slow cooker. Cook on low 6-8 hours.
– Pressure cooker (Instant Pot): Sear using sauté mode. Cook on high pressure for 25 minutes, natural release 10 minutes. Add masa slurry then sauté to thicken.
Portion Changes: This recipe serves 6-8. Halve easily, but note that leftovers are glorious.
Common Mistakes to Avoid
– Skipping the sear. Wet beef turned into pot leads to gray, flavorless meat. Patting dry and achieving brown crust is essential for deep flavor.
– Using pre-ground chili powder for entire chili paste. Dried whole chiles provide complexity far beyond powder—bitterness and flatness result.
– Overcrowding pot when searing. Steam replaces browning. Work in batches even if it takes longer.
– Simmering too vigorously. Bubbling liquid toughens beef. Keep at gentle simmer (small bubbles) for meltingly tender meat.
– Adding masa too early. If added start, it can burn. Always add last 15 minutes for proper thickening.
– Skipping rest time. Chili needs 15 minutes off heat to allow flavors to meld and fat to redistribute. Serving immediately is less cohesive.
Storage & Meal Prep Tips
Refrigeration: Cool chili completely, then transfer to airtight containers. Will keep 4-5 days. Lay paper towel on top before sealing to absorb condensation.
Freezing: Divide into portion sizes (2-cup or 4-cup containers). Leave 1-inch headspace for expansion. Freeze for up to 3 months. Thaw overnight in refrigerator.
Reheating: Gently reheat on stovetop over medium-low heat, stirring occasionally. Add splash of broth or water if too thick. For microwave, cover and heat in 60-second bursts, stirring between.
Meal Prep Strategy: Cook on Sunday, separate into 3-day portions. Reheat for lunch or quick dinner. Chili improves in flavor within 2 days after cooking. For “baked potato” style, serve over sweet potatoes or rice.
Conclusion
Mastering a pot of Texas Beef Chili transforms your cooking repertoire—it’s forgiving, endlessly customizable, and deeply satisfying. The slow simmering melds chiles, seared beef, and spices into a rich, hearty bowl that defines comfort food. Whether you serve it straight up or over Fritos for a Frito Pie, this version honors the tradition of authentic Chili con carne. Remember: good chili isn’t hurried—it’s built in layers, one step at a time. Give this recipe a try this weekend. Let it bubble, let it rest, and then serve it to the people you love. Share your results in the comments or tag us in your photos—we’d love to see your take on this classic.
FAQs
Q: Can I substitute ground beef for cubed chuck?
A: Yes—use 2.5 lbs ground beef (80/20 blend). Brown it in batches, breaking into large chunks. The texture differs but remains delicious. Simmering time reduces to about 45 minutes.
Q: My chili tastes too bitter. How do I fix it?
A: Bitterness often comes from burned chiles or over-toasted spices. Counterbalance with 1 tbsp honey or brown sugar, plus extra lime juice. Alternatively, add 1 tbsp butter for richness.
Q: How do I make chili thicker without masa?
A: Puree 2 cans of fire-roasted tomatoes into chili base. Alternatively, mash a portion of beans (if using) or let chili simmer uncovered for 20-30 minutes longer to reduce.
Q: Can I freeze chili with masa in it?
A: Yes—masa holds up well to freezing. If separating, you can omit masa until reheating for thicker consistency. Thaw completely before thickening.
Q: What’s the ideal beef cut beyond chuck?
A: Brisket (trimmed), short rib (bone-in removes), or round steak. Any tough cut with marbling works. Avoid lean cuts like sirloin which become dry.