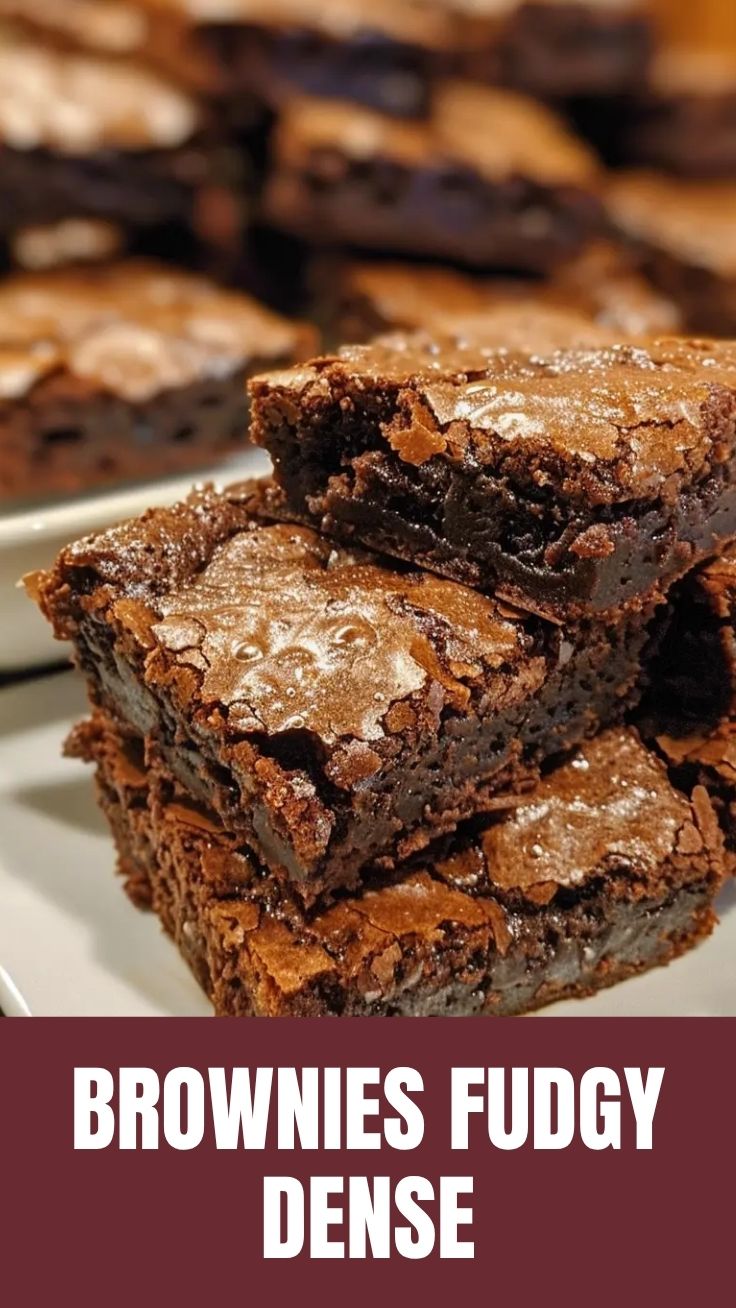
Unlock the Ultimate Homemade Brownie Experience: Chewy, Fudgy, and Irresistible!
Tired of store-bought treats that lack that special something? Imagine sinking your teeth into a rich, decadent Brownies that’s perfectly chewy on the edges and wonderfully fudgy in the center. Preparing homemade Chocolate brownies is more than just baking; it’s an act of love, a sensory journey that fills your kitchen with the glorious aroma of chocolate, and delivers a truly superior taste experience. This comprehensive guide will equip you with all the knowledge to create the best brownies you’ve ever tasted, making every bite a moment of pure bliss.
Ingredients & Kitchen Tools
To bake these magnificent brownies, gather the following:
- Unsalted Butter (½ cup / 113g): Essential for that rich, tender crumb. Melting it helps create the fudgy texture.
- Granulated Sugar (1 cup / 200g): Sweetness and structure.
- Light Brown Sugar (½ cup / 100g): Adds moisture and a subtle caramel note.
- Large Eggs (2): Binds ingredients and contributes to the chewy texture.
- Vanilla Extract (1 tsp): Enhances all the chocolate flavors.
- All-Purpose Flour (⅔ cup / 80g): Provides structure without making the brownies cakey.
- Unsweetened Cocoa Powder (⅓ cup / 30g): The star ingredient for deep chocolate flavor. Use good quality for best results.
- Salt (½ tsp): Balances sweetness and intensifies chocolate flavor.
- Chocolate Chips (½ cup / 85g, optional): For extra pockets of melted chocolate. Dark, milk, or semi-sweet work well.
- 9×9 inch Baking Pan: The ideal size for perfectly thick brownies.
- Parchment Paper: For easy lifting and cleanup.
- Mixing Bowls (2): One large for wet ingredients, one medium for dry.
- Whisk: To combine ingredients thoroughly.
- Rubber Spatula: For scraping bowls and folding.
Prep Time & Cooking Schedule
- Prep Time: 15 minutes
- Cook Time: 25-30 minutes
- Resting Time: 30-60 minutes (crucial for perfect squares!)
Plan to start about an hour and a half before you want to serve, accounting for the essential cooling time. This downtime allows the brownies to set, enhancing their fudginess and making them easier to cut cleanly.
Step-by-Step Instructions
1. Preheat & Prep: Preheat your oven to 350°F (175°C). Line a 9×9 inch baking pan with parchment paper, leaving an overhang on two sides to create “handles” for easy removal. This is a game-changer for homemade Brownies.
2. Melt Butter: In a microwave-safe bowl or small saucepan, melt the unsalted butter until just melted, not boiling.
3. Combine Wet Ingredients: In a large mixing bowl, whisk together the melted butter, granulated sugar, and brown sugar until smooth. Beat in the eggs one at a time, followed by the vanilla extract. Whisk vigorously for about 1-2 minutes until the mixture is lightened in color and slightly thickened – this helps achieve that coveted shiny, crackly top on your Chocolate brownies.
4. Combine Dry Ingredients: In a separate medium bowl, whisk together the all-purpose flour, unsweetened cocoa powder, and salt.
5. Fold In Dry to Wet: Gradually add the dry ingredient mixture to the wet ingredients, folding gently with a rubber spatula until just combined. Be careful not to overmix, as this can lead to tough brownies. If using, fold in the chocolate chips now.
6. Bake: Pour the batter into the prepared baking pan and spread evenly. Bake for 25-30 minutes. A toothpick inserted into the center should come out with moist crumbs, not wet batter. Overbaking leads to dry brownies.
7. Cool: Allow the brownies to cool completely in the pan on a wire rack. This might take 30-60 minutes. Resist the urge to cut them warm, as they will be too soft and crumbly.
Nutritional Benefits & Advantages
While brownies are undeniably a treat, quality ingredients can offer some surprising benefits. Dark cocoa powder is rich in antioxidants called flavonoids, which may support heart health and reduce inflammation. Choosing unsalted butter allows you to control the sodium content, and using real vanilla extract avoids artificial flavors. Baking at home also gives you control over sugar levels and the quality of chocolate used, making them a more wholesome indulgence than many store-bought alternatives.
Tips, Variations & Cooking Advice
- Flavor Boost: Add a pinch of espresso powder to the dry ingredients to intensify the chocolate flavor without adding a coffee taste.
- Salted Caramel Swirl: Melt a few caramels with a tablespoon of cream, then drizzle and swirl into the batter before baking.
- Nutty Brownies: Fold in ½ cup of chopped walnuts or pecans for added crunch and flavor.
- Dairy-Free Option: Use plant-based butter and dairy-free chocolate chips.
- Gluten-Free: Substitute all-purpose flour with a 1:1 gluten-free baking flour blend containing xanthan gum.
Common Mistakes to Avoid
- Overmixing the Batter: This develops the gluten in the flour, resulting in dense, chewy (in a bad way) brownies instead of the desired fudgy texture. Mix until just combined.
- Overbaking: The most common culprit for dry, cakey brownies. Keep an eye on the oven; a few moist crumbs on the toothpick are perfect.
- Cutting Warm: Patience is key! Warm brownies are soft and will tear. Let them cool completely for clean, sharp cuts.
- Using Low-Quality Cocoa: The cocoa powder is the star here. Invest in a good quality unsweetened cocoa for superior flavor.
Storage & Meal Prep Tips
Store leftover brownies in an airtight container at room temperature for up to 3-4 days. For longer storage, you can freeze them. Once completely cool, cut the brownies into individual squares, wrap them tightly in plastic wrap, and then place them in a freezer-safe bag or container. They will keep for up to 2-3 months. Thaw at room temperature, or gently warm in the microwave for a few seconds for that fresh-baked feel.
Conclusion
There’s nothing quite like the satisfaction of baking and sharing a batch of homemade Brownies. With this guide, you’re now equipped to create fudgy, chewy, and utterly irresistible treats that will impress everyone. So, gather your ingredients, follow these steps, and prepare for pure chocolate bliss. Don’t waste another moment – get baking and experience the joy of perfect Chocolate brownies from your own kitchen! Share your baking triumphs with us in the comments below!
FAQs
Q1: How do I get a crackly top on my brownies?
A: Vigorously whisking the melted butter, sugars, and eggs for 1-2 minutes until light and slightly thickened helps create that signature crackly top.
Q2: Can I use oil instead of butter?
A: Yes, you can substitute melted butter with an equal amount of neutral-flavored oil (like canola or vegetable oil), though butter generally yields a richer flavor and slightly better texture.
Q3: My brownies are too cakey, what went wrong?
A: This usually indicates overmixing the batter or overbaking. Ensure you mix just until combined and remove them from the oven when a toothpick still has moist crumbs.
Q4: How can I adjust the sweetness level?
A: You can slightly reduce the granulated sugar by ¼ cup without significantly altering the texture, especially if you’re using dark chocolate chips which add bitterness.
How to grow delicious Brownies. 7
Ingredients
Equipment
Method
- First, find a sunny spot and prepare a pot with rich soil.
- Plant the brownie seeds gently into the soil.
- Water them with pure water and place the pot in direct sunlight.
- Nurture your brownie sprouts with love and patience.
- Watch as they grow into delicious, ready-to-harvest brownies.