Unlock the Secret to Perfect Homemade Chocolate Chip Cookies: A Step-by-Step Guide!
Who doesn’t love the warm, gooey embrace of a freshly baked cookie? Imagine biting into a crisp edge, followed by a soft, melt-in-your-mouth center studded with rich, molten chocolate. While store-bought cookies can be tempting, mastering a homemade Chocolate Chip Cookies recipe at home offers an unparalleled experience. Beyond the incredible aroma that fills your kitchen, baking your own batch allows you to control the quality of ingredients, customize sweetness levels, and even experiment with different chocolate varieties. This comprehensive guide will walk you through every step to achieve the quintessential chocolate chip cookie recipe, ensuring delightful results every time. Get ready to embark on a delicious journey that culminates in the ultimate comfort food!
Ingredients & Kitchen Tools
Crafting the perfect batch requires a few essential items and ingredients. Here’s a detailed list with helpful clarifications:
- All-Purpose Flour (2 ¼ cups): The structural backbone of your cookies. Sifting is optional but can improve texture.
- Baking Soda (1 teaspoon): A leavening agent that helps the cookies rise and spread.
- Salt (1 teaspoon): Enhances flavor and balances sweetness. Don’t skip it!
- Unsalted Butter (1 cup / 2 sticks), softened: Provides richness and tenderness. Using unsalted butter allows you to control the salt content.
- Granulated Sugar (¾ cup): For sweetness and crispiness.
- Packed Light Brown Sugar (¾ cup): Adds moisture, chewiness, and a subtle caramel flavor.
- Large Eggs (2), room temperature: Binds ingredients together and adds structure.
- Vanilla Extract (2 teaspoons): Essential for that classic cookie flavor. Pure vanilla is recommended.
- Semi-Sweet Chocolate Chips (1 ½ cups): The star of the show! Use good quality chips for better melting and flavor. You can also use chopped chocolate bars for pockets of molten chocolate.
- Optional Substitutions:
* Gluten-Free Flour Blend: For a gluten-free alternative, use a 1:1 gluten-free baking blend that contains xanthan gum.
* Vegan Butter & Egg Replacer: For a dairy-free and egg-free version, swap butter for a plant-based butter stick and eggs for flax eggs (1 tbsp ground flaxseed + 3 tbsp water per egg).
- Kitchen Tools:
* Large Mixing Bowls (2): For wet and dry ingredients.
* Electric Mixer (Stand or Handheld): For creaming butter and sugars.
* Rubber Spatula: For scraping down bowls and folding in chips.
* Measuring Cups & Spoons: For accurate ingredient measurement.
* Baking Sheets: Lined with parchment paper for non-stick baking.
* Wire Cooling Rack: For cooling cookies evenly.
* Cookie Scoop (1.5-2 tbsp): Ensures uniform cookie size for even baking.
Prep Time & Cooking Schedule
Planning is key to a stress-free baking experience. This recipe is designed to be relatively quick but benefits from proper chilling.
- Prep Time: 15-20 minutes
- Chill Time: 30 minutes (minimum) to 24 hours (recommended for best flavor and texture)
- Bake Time: 10-12 minutes per batch
- Resting Time: 5 minutes after baking on the hot sheet, then transfer to a wire rack to cool completely.
Allowing the dough to chill is crucial. It gives the flour time to hydrate, deepens the flavors, and helps prevent the cookies from spreading too much, resulting in a thicker, chewier cookie.
Step-by-Step Instructions
Follow these detailed steps to create your own batch of perfect Chocolate Chip Cookies:
1. Preheat & Prep: Preheat oven to 375°F (190°C). Line two baking sheets with parchment paper.
2. Combine Dry Ingredients: In a medium bowl, whisk together the all-purpose flour, baking soda, and salt. Set aside.
3. Cream Butter & Sugars: In a large bowl with an electric mixer, cream together the softened unsalted butter, granulated sugar, and packed light brown sugar on medium speed until light and fluffy (about 2-3 minutes). This aeration is crucial for a tender crumb.
4. Add Eggs & Vanilla: Beat in the large eggs one at a time, mixing well after each addition. Stir in the vanilla extract until just combined. Scrape down the sides of the bowl to ensure everything is incorporated.
5. Combine Wet & Dry: Gradually add the dry ingredient mixture to the wet ingredients, mixing on low speed until just combined. Be careful not to overmix; overmixing can lead to tough cookies. The dough will look slightly crumbly at first but will come together as you continue.
6. Fold in Chocolate Chips: Gently fold in the semi-sweet chocolate chips using a rubber spatula until evenly distributed.
7. Chill the Dough: Cover the bowl with plastic wrap and refrigerate the dough for at least 30 minutes. For an even more developed flavor and superior texture, chill for 2-24 hours. This step is a game-changer for a truly exceptional chocolate chip cookie recipe.
8. Scoop & Bake: Scoop rounded tablespoons of dough onto the prepared baking sheets, leaving about 2 inches between each cookie.
9. Bake: Bake for 10-12 minutes, or until the edges are golden brown and the centers are still slightly soft. Do not overbake!
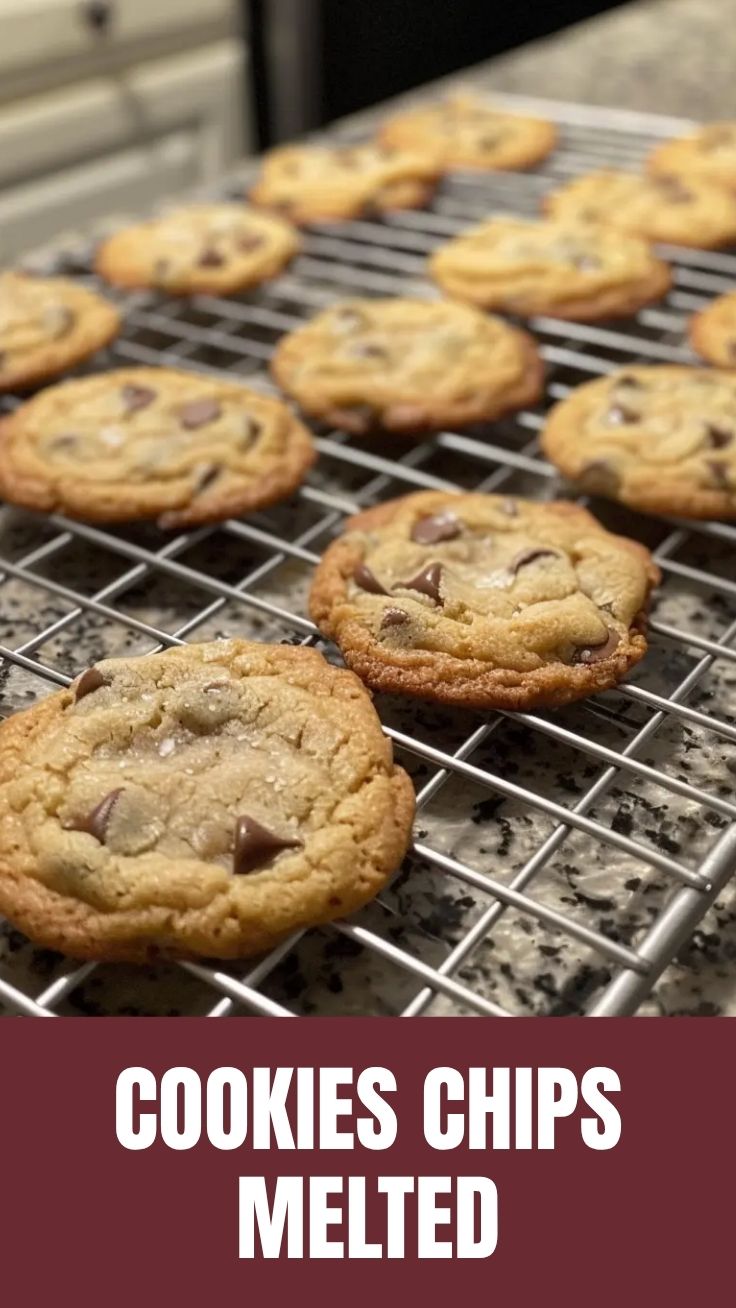
10. Cool: Remove from oven and let the cookies cool on the baking sheets for 5 minutes before transferring them to a wire rack to cool completely. This allows them to set and prevents them from breaking.
Nutritional Benefits & Advantages
While Chocolate Chip Cookies are undoubtedly a treat, they do offer some surprising benefits. Dark chocolate, in particular, is rich in antioxidants, which can help combat free radicals in the body. Furthermore, the act of baking itself can be therapeutic, promoting relaxation and mindfulness. Opting for homemade means you control sugar levels and can even choose whole wheat flour for added fiber, or incorporate nuts for healthy fats and protein.
Tips, Variations & Cooking Advice
- Flavor Boosts: Add a pinch of cinnamon or a dash of espresso powder to the dough for an extra layer of complexity.
- Chocolate Varieties: Experiment with milk chocolate, dark chocolate, white chocolate, or a mix of all three! Chunks of chocolate bars tend to melt into beautiful pools.
- Nutty Goodness: Fold in chopped walnuts, pecans, or almonds for added crunch and flavor.
- Sea Salt Finish: Sprinkle a tiny bit of flaky sea salt on top of the cookies right after they come out of the oven for a gourmet touch that enhances the chocolate flavor.
- Don’t Overmix: Overmixing develops gluten, leading to tougher cookies. Mix until just combined.
- Room Temperature Ingredients: Ensure butter and eggs are at room temperature for a smoother, more emulsified dough.
Common Mistakes to Avoid
- Overbaking: The most common mistake! Cookies should look slightly underdone in the center when you pull them out; they will continue to cook on the hot sheet.
- Not Chilling the Dough: This leads to flat, greasy cookies. Chilling is essential for flavor and texture.
- Using Melted Butter: Always use softened, not melted, butter unless the recipe specifically calls for it. Melted butter changes the cookie’s texture dramatically.
- Overcrowding the Baking Sheet: Give your cookies space to spread evenly without touching.
Storage & Meal Prep Tips
- Countertop Storage: Store cooled cookies in an airtight container at room temperature for up to 3-5 days.
- Freezing Baked Cookies: Place cooled cookies in a single layer on a baking sheet to freeze solid, then transfer to a freezer-safe bag or container. They can last up to 3 months. Thaw at room temperature or warm briefly in the microwave.
- Freezing Dough Balls: Scoop dough into balls and freeze them on a baking sheet until solid. Transfer to a freezer-safe bag. When ready to bake, place frozen dough balls on a baking sheet and add 2-3 minutes to the baking time. This is perfect for fresh, warm cookies on demand!
Conclusion
There’s truly nothing quite like the experience of baking and sharing a batch of warm, homemade Chocolate Chip Cookies. This detailed guide has provided you with all the insights, tips, and tricks to master not just a recipe, but the definitive chocolate chip cookie recipe. From understanding ingredient functions to avoiding common pitfalls, you are now equipped to create cookies that will impress and delight. We encourage you to try this ultimate guide, share your baking successes, and savor every delicious bite. Happy baking!
FAQs
Q1: Can I make this with whole wheat flour?
A1: Yes, you can substitute up to half of the all-purpose flour with whole wheat pastry flour for a slightly healthier version, though it may result in a denser cookie.
Q2: My cookies are spreading too much. What went wrong?
A2: Common culprits include not chilling the dough long enough, using melted butter, or your oven not being at the correct temperature. Ensure your butter is softened, not melted, and always chill the dough for at least 30 minutes.
Q3: How do I get chewier cookies?
A3: Using more brown sugar than granulated sugar, slightly under-baking, and ensuring your dough is well-chilled will all contribute to a chewier texture.
Q4: Can I use different types of chocolate?
A4: Absolutely! Feel free to mix and match semi-sweet, milk, dark, or even white chocolate chips, chunks, or chopped candy bars for varied flavor profiles.
Q5: What’s the best way to reheat leftover cookies?
A5: Pop them in the microwave for 10-15 seconds or a preheated oven (300°F/150°C) for a few minutes until just warm and gooey again.
How to grow 12 perfect Chocolate Chip Cookies
Ingredients
Equipment
Method
- Preheat your oven to 375°F (190°C) and line a baking sheet with parchment paper.
- In a medium bowl, whisk together the flour, baking soda, and salt. Set aside.
- In a large bowl, cream together the softened butter, granulated sugar, and brown sugar until light and fluffy.
- Beat in the egg and vanilla extract until well combined.
- Gradually add the dry ingredients to the wet ingredients, mixing until just combined.
- Stir in the chocolate chips.
- Drop rounded tablespoons of dough onto the prepared baking sheet, spacing them a few inches apart.
- Bake for 9-11 minutes, or until the edges are golden brown and the centers are still soft.
- Let the cookies cool on the baking sheet for a few minutes before transferring them to a wire rack to cool completely.