Key Lime Pie: A Zesty Southern Classic You Can Master at Home
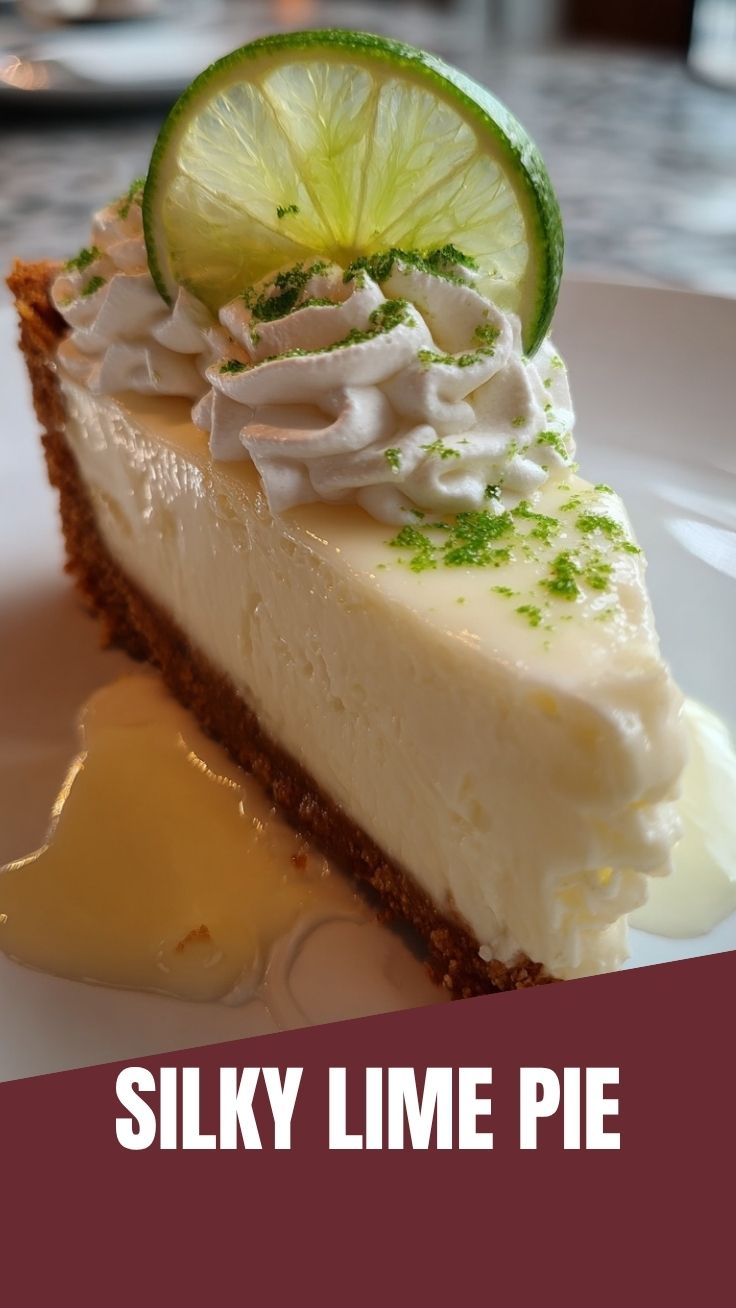
Have you ever bitten into a slice of Key Lime Pie and wondered why it tastes so much better at a beachside café than anything you’ve attempted in your own kitchen? The answer often lies in the freshness of the citrus and the balance between tangy and sweet. Making this iconic dessert at home is not only surprisingly simple, but it also rewards you with a silky, custard-like filling that no store-bought version can match. The secret weapon? Using real key lime juice—its aromatic intensity transforms a humble pie into a tropical masterpiece. In this guide, we’ll walk you through every step to ensure your homemade Key Lime Pie turns out perfectly creamy, perfectly tart, and absolutely unforgettable.
Ingredients & Kitchen Tools
For the Crust:
– 1½ cups graham cracker crumbs – Creates a buttery, sandy base. Substitute with crushed digestive biscuits or vanilla wafers.
– ⅓ cup granulated sugar – Adds sweetness to balance the sour filling.
– 6 tablespoons unsalted butter, melted – Binds the crumbs; use coconut oil for a dairy-free version.
For the Filling:
– 1 can (14 oz) sweetened condensed milk – Provides richness and sweetness; no substitute that yields the same texture.
– ¾ cup fresh key lime juice – The star ingredient; bottle juice works but lacks floral notes. Use regular lime juice if key limes are unavailable.
– 3 large egg yolks – Thicken the custard; room temperature helps emulsify.
– 1 tablespoon key lime zest – Intensifies aroma; add more if you love a strong citrus punch.
Kitchen Tools:
– 9-inch pie dish – Glass or ceramic preferred for even heat distribution.
– Electric mixer or whisk – For aerating the filling.
– Fine-mesh strainer – Removes any cooked egg bits for a silky texture.
– Zester or microplane – Essential for grating zest without bitterness.
Prep Time & Cooking Schedule
– Prep Time: 20 minutes (grinding crumbs, juicing limes, mixing filling)
– Bake Time: 15–17 minutes (filling sets quickly)
– Chill Time: Minimum 4 hours, ideally overnight – Crucial for the filling to firm up and flavors to meld.
– Total Active Time: ~35 minutes, plus passive chilling.
Plan ahead: The pie must be fully cold before slicing. If you’re in a hurry, pop it in the freezer for 2 hours, but the texture won’t be as silky as a refrigerator chill.
Step-by-Step Instructions
1. Preheat the oven to 350°F (175°C). Position a rack in the middle.
2. Make the crust: Combine graham cracker crumbs, sugar, and melted butter. Press firmly into the bottom and up the sides of the dish. Bake for 8–10 minutes until lightly golden and fragrant. Let cool completely.
3. Prepare the filling: In a large bowl, whisk the egg yolks until thick and pale. Add the sweetened condensed milk and mix well. Slowly pour in the fresh key lime juice while whisking constantly. The mixture will thicken immediately as the acid reacts with the milk. Fold in the zest.
4. Assemble and bake: Pour filling into the cooled crust. Bake for 15 minutes. The center should jiggle slightly when shaken—it will set as it chills. Overbaking causes cracks.
5. Cool and chill: Transfer to a wire rack for 30 minutes, then refrigerate uncovered for 1 hour. Cover with plastic wrap and chill at least 3 more hours.
6. Serve: Top with whipped cream or meringue. For the best texture, slice with a sharp knife dipped in hot water, wiping between cuts.
Key temperature & texture cue: When you pour the filling, it should be glossy and thick like pudding. If it’s too runny, you may have under-whisked the yolks. The baking time for this Key Lime Pie is short because the condensed milk sets easily. The vibrant key lime flavor is best when you use freshly squeezed juice—bottled can taste flat and overly acidic.
Nutritional Benefits & Advantages
Key lime juice is packed with vitamin C—one serving provides about 20% of your daily needs, boosting immunity and collagen production. The egg yolks supply choline for brain health, while the graham cracker crust offers a moderate dose of whole grains (if using whole-wheat varieties). This dessert is naturally gluten-free if you use certified gluten-free graham crackers, and it contains no artificial additives. For a lighter option, substitute part of the condensed milk with Greek yogurt (though texture will be less traditional). The high citrus content also aids digestion when consumed after a heavy meal.
Tips, Variations & Cooking Advice
– Flavor twists: Add a pinch of cayenne or cinnamon to the crust for a spicy kick. Swirl in passion fruit purée for a tropical fusion.
– Dairy-free adaptation: Use full-fat coconut milk condensed version and vegan butter. The texture is slightly less dense but still delicious.
– Meringue topping: Beat 3 egg whites with ¼ cup sugar until stiff peaks form, spread over the baked pie, and broil 2 minutes.
– Portion changes: Mini tartlets work wonderfully—bake in a muffin tin for 10 minutes, then fill and bake 8 minutes.
– Ingredient swap: If key limes are out of season, use a 3:1 ratio of regular lime to lemon juice—add a splash of yuzu for extra zip.
Common Mistakes to Avoid
– Under-chilling: Slicing too early leads to a soupy mess. Patience is non-negotiable.
– Using bottled lime juice: Most are pasteurized and lack the bright, floral essence of fresh key lime.
– Overbaking the filling: The custard will curdle and weep. Pull it out when the center still wobbles.
– Skipping the zest: Without it, the pie tastes one-dimensional. Zest is where most of the aromatic oils live.
– Pressing the crust too thinly: Edges should be about ¼ inch thick—a thin crust breaks apart.
Storage & Meal Prep Tips
– Refrigeration: Wrap tightly with plastic wrap or store in an airtight container. The pie stays fresh for up to 5 days.
– Freezing: After chilling fully, wrap the entire pie (still in dish) in foil and then a freezer bag. Freeze for up to 2 months. Thaw in the fridge overnight before serving. Do not freeze whipped cream toppings—add them fresh.
– Reheating: This pie is served cold. If you prefer room temperature, let it sit out for 15 minutes before slicing. Never microwave—it will turn into soup.
– Meal prep: You can make the crust and filling separately up to 2 days ahead. Assemble and bake the morning of serving.
Conclusion
Mastering this Key Lime Pie at home is a rewarding way to bring the flavors of the Florida Keys to your own table. The tartness of the key lime combined with the creamy sweetness of condensed milk creates a perfect balance that pleases every palate. By following the precise steps—especially the chill time—you’ll never go back to store-bought. We’d love to hear how yours turns out! Share your results in the comments or tag us in your photos. And if you loved this recipe, explore our other citrus desserts like lemon bars or orange cream tart.
FAQs
1. Can I use bottled key lime juice instead of fresh?
Yes, but the flavor will be milder. Bottled juice often lacks the complex floral notes of fresh. For best results, use Nellie & Joe’s brand or squeeze your own.
2. Why did my pie crack?
Cracking means the filling was overbaked or the oven was too hot. Always bake until the center jiggles slightly; residual heat will finish setting it during cooling.
3. Can I make this without eggs?
Egg yolks provide richness and structure. For an eggless version, use ½ cup full-fat coconut cream plus 2 tablespoons cornstarch whisked with the condensed milk—bake 20 minutes.
4. How long can I store leftover pie?
Refrigerated, it’s good for up to 5 days. Freeze for 2 months; refrigerate before serving.
5. What’s the best way to zest key limes?
Use a microplane and avoid the white pith—it’s bitter. Gently roll the lime on the counter before zesting to release more oils.
Quick way to grow Key Lime Pie in 3 StepsKey Lime Pie
Ingredients
Equipment
Method
- First, preheat your oven to 350°F (175°C). Then, combine the graham cracker crumbs, sugar, and melted butter in a bowl and press the mixture into a 9-inch pie dish.
- Next, whisk together the sweetened condensed milk, key lime juice, and lime zest in a separate bowl. Pour this filling into the prepared crust and bake for 15-20 minutes, or until the edges are set.
- Finally, let the pie cool completely, then chill it in the refrigerator for at least 2 hours before serving. Garnish with whipped cream and fresh lime slices.