From Scratch to Perfection: Mastering the Essential Homemade White Bread
Have you ever experienced the comforting aroma of freshly baked bread wafting through your home? There’s something undeniably magical and deeply satisfying about creating a simple loaf of Homemade White Bread from scratch. Beyond the intoxicating smell, baking your own bread offers unparalleled control over ingredients, allowing you to avoid preservatives and unhealthy additives often found in store-bought varieties. This guide aims to demystify the process, empowering you to bake a perfectly soft, fluffy loaf every time. Get ready to transform basic flour, water, yeast, and salt into a culinary masterpiece with our Easy White Bread Recipe.
Ingredients & Kitchen Tools
Crafting the perfect loaf requires a few essential items. Here’s what you’ll need:
- All-Purpose Flour (500g): The backbone of our bread, providing structure and chewiness.
- Active Dry Yeast (7g or 2 ¼ teaspoons): The leavening agent responsible for that delightful rise.
- Warm Water (320ml, 105-115°F / 40-46°C): Activates the yeast; crucial for a good rise.
- Granulated Sugar (25g or 2 tablespoons): Feeds the yeast, contributing to flavor and browning.
- Salt (10g or 1 ½ teaspoons): Enhances flavor and controls yeast activity.
- Unsalted Butter (25g, softened): Adds richness, tenderness, and a lovely golden crust.
- Large Mixing Bowl: For combining ingredients and allowing the dough to rise.
- Measuring Cups & Spoons: For accurate ingredient portions.
- Kitchen Scale: Highly recommended for precise flour and water measurements.
- Dough Scraper: Useful for handling and portioning dough.
- Loaf Pan (8.5 x 4.5 inches or 9 x 5 inches): To give your bread its classic shape.
- Wire Rack: For cooling the bread evenly and preventing a soggy bottom.
- Optional Substitutions: Olive oil can replace butter for a slightly different flavor profile; bread flour can be used for a chewier texture.
Prep Time & Cooking Schedule
Planning is key for a successful baking session.
- Prep Time: 20-30 minutes (Active mixing and kneading)
- First Rise (Bulk Fermentation): 60-90 minutes (Dough doubles in size)
- Shaping & Second Rise (Proofing): 45-60 minutes (Dough nearly doubles again)
- Bake Time: 30-35 minutes
- Resting Time (Cooling): At least 30-60 minutes before slicing
Allocate approximately 3-4 hours from start to finish. Most of this is inactive waiting time, allowing you to attend to other tasks while your dough works its magic.
Step-by-Step Instructions
Follow these steps carefully for a perfectly baked loaf:
1. Activate the Yeast: In your large mixing bowl, combine the warm water, sugar, and yeast. Stir gently and let it sit for 5-10 minutes until foamy. This indicates the yeast is active.
2. Combine Wet & Dry: Add the softened butter and salt to the yeast mixture. Gradually add the flour, mixing with a wooden spoon or your hands until a shaggy dough forms.
3. Knead the Dough: Turn the dough out onto a lightly floured surface. Knead for 8-10 minutes until smooth, elastic, and no longer sticky. The dough should spring back when gently poked. This crucial step develops the gluten for a light, airy texture foundational to any Homemade White Bread.
4. First Rise: Lightly grease the mixing bowl with oil. Place the dough in the bowl, turning once to coat. Cover with plastic wrap or a damp towel and let it rise in a warm place for 60-90 minutes, or until doubled in size.
5. Punch Down & Shape: Gently punch down the risen dough to release air. Turn it out onto a lightly floured surface. Shape it into a rectangular log by gently pressing and rolling, then tucking the ends under to create a smooth top. This technique ensures a perfect loaf for an Easy White Bread Recipe.
6. Second Rise: Place the shaped dough seam-side down in a greased loaf pan. Cover loosely and let it rise again for 45-60 minutes, or until it has nearly doubled and crowns above the rim of the pan.
7. Preheat & Bake: Preheat your oven to 375°F (190°C) during the second rise. Bake for 30-35 minutes, or until the crust is golden brown and the internal temperature reaches 200-210°F (93-99°C).
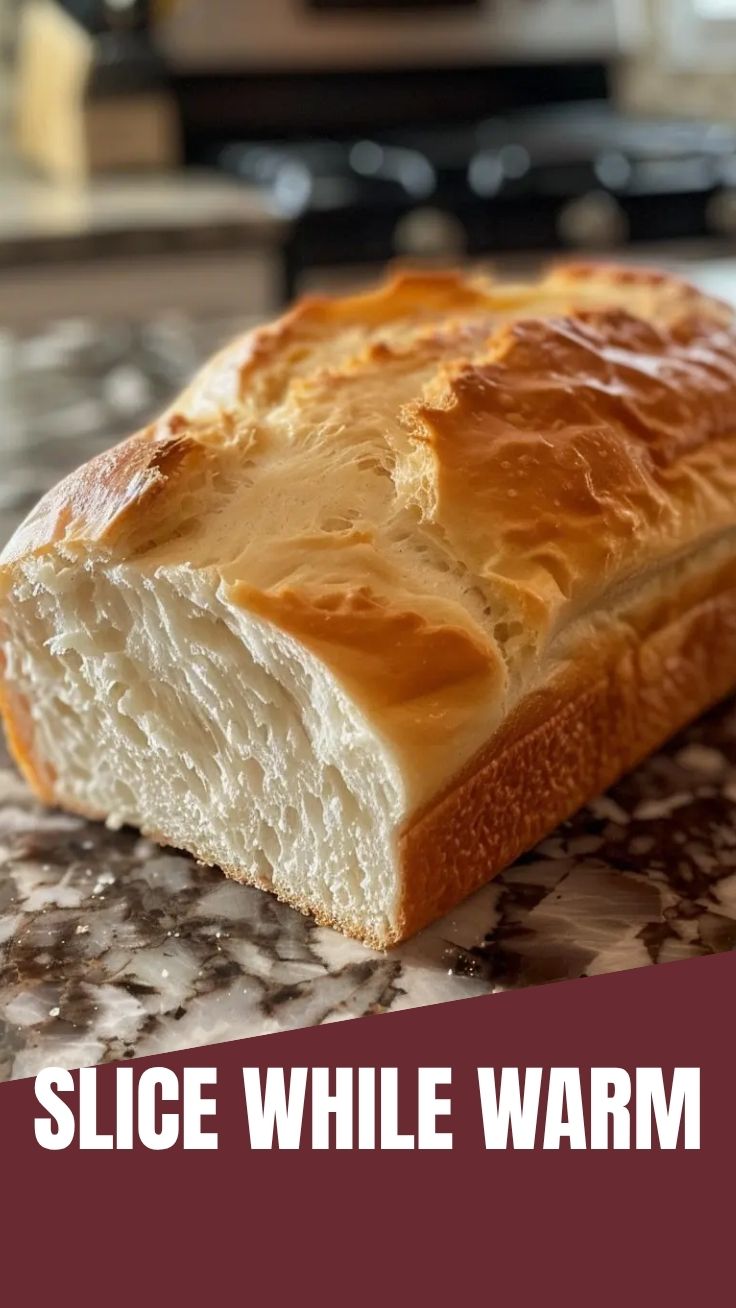
8. Cool: Remove the bread from the oven and immediately turn it out onto a wire rack to cool completely. Resist the urge to slice warm bread; cooling allows the internal structure to set.
Nutritional Benefits & Advantages
While often seen as a comfort food, homemade white bread, especially when made with quality ingredients, can offer several advantages. Opting for whole wheat flour in a variation can increase fiber content. The basic ingredients provide carbohydrates for energy. Making it at home avoids high-fructose corn syrup, trans fats, and artificial preservatives. You control the amount of salt and sugar, making it a healthier choice than many store-bought options.
Tips, Variations & Cooking Advice
- Flavor Variations: Add a tablespoon of dried herbs (rosemary, thyme, oregano) for an herbaceous loaf. A sprinkle of garlic powder or onion powder can also add a savory twist.
- Ingredient Swaps: Use milk instead of water for a richer, softer crumb. Substitute a portion of all-purpose flour with whole wheat flour for added fiber, though this may require a bit more liquid.
- Alternative Cooking Methods: While designed for an oven, a Dutch oven can be used for a crispier crust.
- Dietary Adaptations: For gluten-free, substitute with a high-quality gluten-free bread flour blend and follow package instructions for yeast and liquid. For dairy-free, use olive oil instead of butter.
Common Mistakes to Avoid
- Under-kneading: Leads to a dense, crumbly loaf. Knead until the dough is smooth and elastic.
- Too Hot or Cold Water: Water that’s too hot kills the yeast; too cold won’t activate it. Stick to the specified temperature range.
- Not Letting it Rise Enough: Results in a small, dense loaf. Ensure the dough doubles in size in both rises.
- Slicing Before Cooling: The bread continues to cook and set as it cools. Slicing too early can lead to a gummy texture.
- Adding Too Much Flour: Leads to dry, tough bread. Add flour sparingly during kneading, just enough to prevent sticking.
Storage & Meal Prep Tips
Your freshly baked Homemade White Bread is best enjoyed within 2-3 days.
- Room Temperature: Store cooled bread in an airtight container or bread bag at room temperature for up to 3 days.
- Refrigeration: Not recommended, as it can dry out the bread quickly.
- Freezing: For longer storage, slice the cooled loaf and freeze slices in an airtight freezer bag for up to 3 months. Thaw individual slices as needed, or pop them in a toaster.
- Reheating: To revive a slightly stale loaf, wrap it in foil and warm in a 300°F (150°C) oven for 10-15 minutes.
Conclusion
Baking your own Homemade White Bread is a rewarding journey, transforming simple ingredients into a warm, fragrant masterpiece. This Easy White Bread Recipe provides a foundational skill that will serve you well in countless culinary adventures. From the initial mix to the glorious golden crust, each step brings you closer to a wholesome, delicious loaf. Don’t hesitate to try your hand at this essential recipe and savor the unparalleled taste of bread made with love right in your own kitchen! Share your baking triumphs, tag us, and inspire others to experience the joy of homemade goodness.
FAQs
- My dough isn’t rising; what went wrong?
* Likely culprits are inactive yeast (check water temperature or yeast freshness) or a cold environment. Ensure your water is within the suggested temperature range and your rising spot is warm and draft-free.
- Can I use a stand mixer for kneading?
* Absolutely! Use the dough hook attachment and knead on medium-low speed for about 6-8 minutes, or until the dough clears the sides of the bowl.
- How do I get a softer crust?
* To achieve a softer crust, brush the top of the bread with milk or melted butter before baking. You can also lightly brush with butter immediately after removing from the oven.
- What if my bread is too dense?
* This often indicates insufficient kneading or not enough rising time. Ensure both steps are thoroughly completed. Over-proofing can also lead to a dense, collapsed texture.
- Can I add seeds or grains to this recipe?
* Yes, you can add 1/4 to 1/2 cup of seeds (like sesame, poppy, or sunflower) or rolled oats during the kneading stage for added texture and nutrients.
How to grow 3 Homemade White Bread loavesHomemade White Bread
Ingredients
Equipment
Method
- In a large bowl, dissolve yeast and a pinch of sugar in warm water; let it sit until foamy.
- Add remaining sugar, salt, oil, and 3 cups of flour to the yeast mixture, then gradually add the rest of the flour, kneading until a soft dough forms.
- Place the dough in a greased bowl, turn once, and let it rise in a warm place for 1-2 hours until doubled in size.
- Punch down the dough, divide into three portions, and shape each into a loaf, placing them in greased loaf pans.
- Let the loaves rise again for 30-45 minutes or until doubled.
- Bake in a preheated oven at 375°F (190°C) for 30-35 minutes, or until golden brown, and cool on wire racks.