The Ultimate Guide to Perfect Homemade Cinnamon Rolls
Have you ever bitten into a store-bought cinnamon roll and felt a twinge of disappointment, wishing it were fresher, softer, and more generously swirled with cinnamon sugar? If so, you’re not alone. The good news is that creating bakery-quality Cinnamon Rolls at home is not only achievable but also deeply rewarding. When you bake from scratch, you control the quality of every ingredient—from the butter to the cinnamon—and you get that irresistible aroma filling your kitchen. This guide will walk you through a foolproof Cinnamon Roll Recipe that delivers soft, pillowy rolls with a creamy glaze every single time. Whether you’re a beginner or a seasoned baker, preparing these at home saves money, avoids artificial preservatives, and lets you customize the sweetness and spice to your taste.
—
2. Ingredients & Kitchen Tools
Ingredients
– All-purpose flour (3½ cups, plus more for dusting) – Provides structure; you can substitute bread flour for extra chewiness.
– Active dry yeast (1 packet, about 2¼ tsp) – The leavening agent; instant yeast works too but reduce rising time.
– Warm milk (1 cup, 110°F–115°F) – Activates the yeast; use whole milk for richness, or almond milk for a dairy-free option.
– Granulated sugar (¼ cup in dough, ½ cup in filling) – Feeds the yeast and adds sweetness.
– Unsalted butter (6 tbsp melted for dough, 4 tbsp softened for filling) – Adds tenderness and flavor.
– Eggs (2 large, room temperature) – Help bind the dough and create a soft crumb.
– Salt (1 tsp) – Balances sweetness and strengthens gluten.
– Ground cinnamon (2 tbsp) – The star spice; use Ceylon cinnamon for a milder taste or cassia for a bolder kick.
– Brown sugar (½ cup, packed) – Combined with cinnamon for the filling; dark brown sugar gives deeper molasses notes.
– Cream cheese (4 oz, softened) – For the classic cream cheese glaze.
– Powdered sugar (1 cup) – Sweetens the glaze; adjust for desired consistency.
– Vanilla extract (1 tsp) – Enhances the glaze flavor.
Kitchen Tools
– Large mixing bowl (or stand mixer with dough hook)
– Measuring cups and spoons
– Rolling pin
– 9×13-inch baking pan (or round cake pan)
– Sharp knife or dough scraper
– Whisk and rubber spatula
– Clean kitchen towel or plastic wrap
Optional Substitutions
– Gluten-free: Use a 1:1 gluten-free flour blend with xanthan gum.
– Vegan: Replace butter with vegan butter, milk with plant-based milk, and eggs with flax eggs (1 tbsp ground flax + 3 tbsp water per egg).
—
3. Prep Time & Cooking Schedule
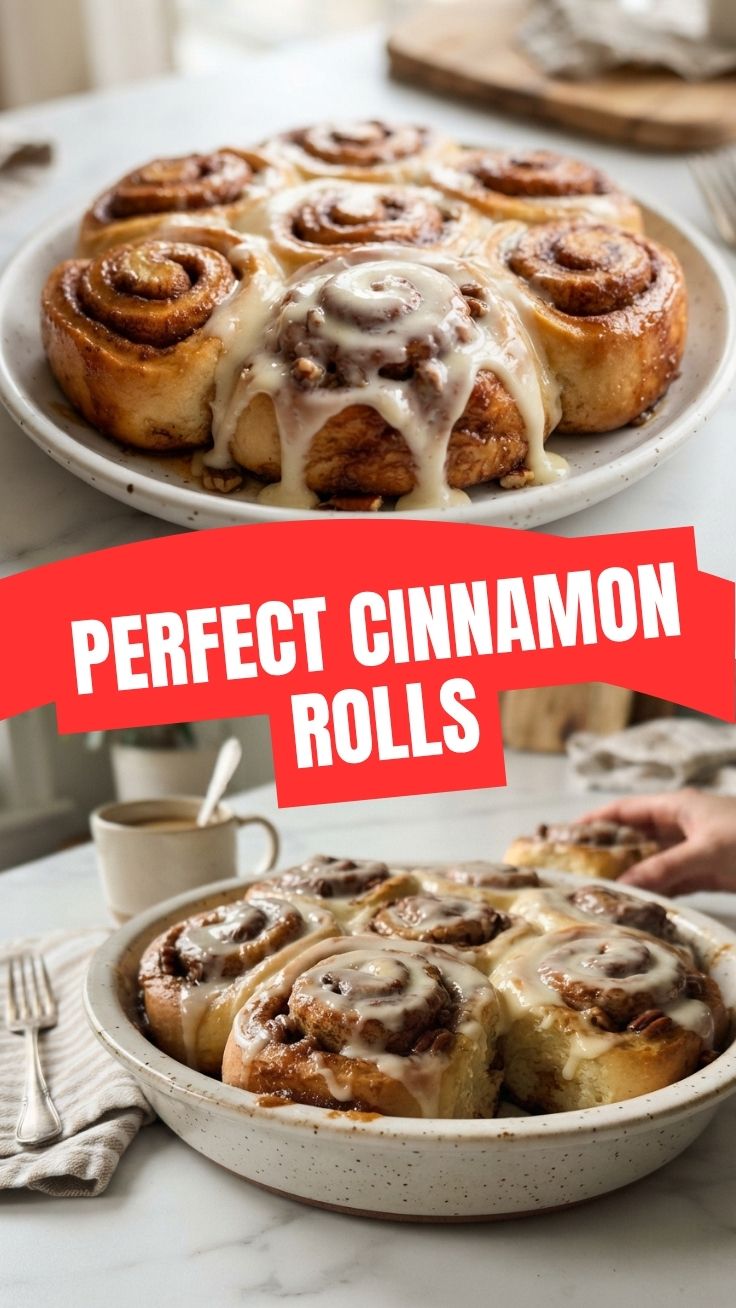
– Prep time: 20 minutes (mixing dough, making filling)
– First rise: 1–1½ hours (until doubled in size)
– Shaping & second rise: 30–45 minutes
– Baking time: 20–25 minutes at 350°F (175°C)
– Cooling & glazing: 10 minutes
Total time: approximately 2½–3 hours. Plan ahead: you can also refrigerate the shaped rolls overnight and bake them fresh in the morning. The slow rise actually develops better flavor.
—
4. Step-by-Step Instructions
1. Activate the yeast: In the warm milk, stir in 1 tablespoon of sugar and the yeast. Let it sit for 5–10 minutes until frothy. If it doesn’t foam, your yeast may be dead—start over.
2. Make the dough: In a large bowl, combine flour, remaining sugar, and salt. Add the yeast mixture, melted butter, and eggs. Mix until a shaggy dough forms. Knead by hand or with a stand mixer for 8 minutes until smooth and elastic.
3. First rise: Place the dough in a greased bowl, cover, and let rise in a warm spot (75°F–80°F) until doubled.
4. Prepare the filling: Mix softened butter, brown sugar, and cinnamon into a paste.
5. Shape the rolls: Punch down the dough, roll it into a 12×18-inch rectangle. Spread the filling evenly, leaving a 1-inch border. Roll tightly from the long side, then cut into 12 slices using a serrated knife or dental floss.
6. Second rise: Place rolls in a greased 9×13-inch pan, cover, and let rise until puffy (30–45 minutes).
7. Bake: Preheat oven to 350°F. Bake for 20–25 minutes until golden brown. Check for doneness: internal temperature should reach 190°F, or the center should feel set.
8. Make the glaze: Whisk cream cheese, powdered sugar, and vanilla until smooth. Add milk a tablespoon at a time to reach a pourable consistency.
9. Glaze and serve: Let rolls cool for 5 minutes, then drizzle the glaze. Enjoy warm!
Temperature control tip: If your oven runs hot, tent the rolls with foil after 15 minutes to prevent over-browning. For extra softness, brush the baked rolls with melted butter before glazing.
Now, here’s the moment to mention that mastering this Cinnamon Roll Recipe requires patience—especially during the rising stages. The secret to those perfect, fluffy layers lies in not rushing the process. And the same attention to detail applies when you’re working with any Cinnamon Rolls dough: always let the gluten relax fully before rolling to avoid tearing.
—
5. Nutritional Benefits & Advantages
While cinnamon rolls are an indulgence, they offer surprising nutritional perks when made from scratch. Cinnamon is a powerful antioxidant that can help reduce inflammation and regulate blood sugar levels. Using whole milk and butter provides fat-soluble vitamins A, D, and E, and the cream cheese glaze adds a dose of calcium. By making them at home, you can reduce sugar by 30–40% without sacrificing taste, and you avoid trans fats and high-fructose corn syrup common in store-bought versions. Plus, the act of baking itself can be a therapeutic mindfulness practice.
—
6. Tips, Variations & Cooking Advice
– Flavor variations: Add a pinch of cardamom or nutmeg to the filling. Try a chocolate-cinnamon swirl by mixing ¼ cup cocoa powder with the sugar. For a savory twist, reduce sugar and add chopped pecans and bacon bits.
– Dietary adaptations: To make gluten-free, use a 1:1 blend and add ½ tsp xanthan gum if not included. For dairy-free, substitute coconut cream in the glaze and use vegan butter.
– Alternative cooking methods: Bake in a muffin tin for individual rolls or use an air fryer at 325°F for 12–15 minutes (check often).
– Portion changes: Halve the recipe for a smaller batch, or double it for a crowd—just use a larger pan and adjust baking time by 5 minutes.
—
7. Common Mistakes to Avoid
– Over-flouring the dough: This yields dry, tough rolls. Add flour only until the dough pulls away from the bowl.
– Not letting the dough rise enough: A cold or drafty kitchen can slow yeast. Create a warm proofing box by placing the bowl in an oven with the light on.
– Slicing unevenly: Use dental floss to cut clean, even rolls without squishing them.
– Overbaking: The rolls should be just golden; they continue cooking from residual heat. A toothpick inserted in the center should come out with a few moist crumbs.
– Skipping the second rise: This step is crucial for fluffiness. Don’t rush it—even 20 minutes can make a difference.
—
8. Storage & Meal Prep Tips
– Room temperature: Store in an airtight container for up to 2 days. Reheat in the microwave for 10–15 seconds or in a 300°F oven for 5 minutes.
– Refrigeration: Keeps for 4–5 days, but the rolls will dry out faster. Wrap tightly in plastic wrap.
– Freezing: Unbaked rolls freeze beautifully. After shaping, place them in a pan, cover with plastic wrap, then foil. Freeze for up to 3 months. To bake, thaw overnight in the fridge, then let rise and bake as directed. Baked rolls can also be frozen without glaze for up to 2 months.
– Reheating to maintain texture: For best results, warm in a toaster oven or air fryer to restore the crisp exterior and soft interior.
—
9. Conclusion
There’s something magical about pulling a pan of golden, fragrant cinnamon rolls from the oven. By following this guide, you’ve learned how to create a Cinnamon Roll Recipe that rivals any bakery, and you now understand the science behind a perfect rise, a tender crumb, and a luscious glaze. Whether you’re making them for a lazy Sunday breakfast or a holiday brunch, these Cinnamon Rolls will become a family favorite. I encourage you to try this recipe, snap a photo, and share your results—your kitchen is about to smell incredible. And if you’re craving more baked delights, explore our other yeast-based recipes for even more homemade goodness.
—
10. FAQs (Frequently Asked Questions)
Q1: Can I use instant yeast instead of active dry yeast?
Yes, instant yeast can be mixed directly with the dry ingredients. Reduce the rise time by about 15–20 minutes because it works faster.
Q2: Why are my cinnamon rolls dry?
Dry rolls often result from over-baking, too much flour, or not enough fat. Ensure you measure flour correctly (spoon and level) and don’t exceed the baking time.
Q3: How do I make the filling less messy?
Soften the butter to a spreadable consistency, and use a pastry brush to distribute it evenly. If the filling is too runny, add a tablespoon of flour to stabilize it.
Q4: Can I make these rolls ahead of time for a morning bake?
Absolutely! Shape the rolls, place them in the pan, cover, and refrigerate overnight. In the morning, let them sit at room temperature for 30 minutes before baking as directed.
Q5: What’s the best way to reheat leftover cinnamon rolls?
For soft, fresh-tasting rolls, microwave them for 10–15 seconds. For a crispier exterior, reheat in a 350°F oven for 5 minutes, then add a fresh drizzle of glaze.
Proven way to grow 3 Cinnamon RollsCinnamon Rolls
Ingredients
Equipment
Method
- Prepare your chosen growing medium, ensuring it is moist and well-drained.
- Carefully plant each cinnamon roll, spacing them adequately to allow for growth.
- Provide consistent warmth and indirect light, monitoring for any signs of development.