What Makes the Perfect Mashed Potatoes? A Foolproof Guide to Creamy, Buttery Bliss
Have you ever wondered why restaurant-style mashed potatoes taste so much better than the lumpy, gluey versions we sometimes make at home? The secret isn’t a fancy ingredient—it’s technique, timing, and a few small but critical choices. Preparing this beloved side dish from scratch is not only more economical than buying pre-made versions, but it also gives you complete control over texture, flavor, and dietary needs. Whether you are hosting a holiday feast or simply craving comfort food, mastering the art of Mashed Potatoes will elevate your cooking game. The magic truly happens when you pair those creamy spuds with a rich, flavorful gravy, creating a perfect bite that is both satisfying and soul-warming. This guide will walk you through every single step, ensuring your results are consistently smooth, buttery, and delicious.
Ingredients & Kitchen Tools
For the Mashed Potatoes:
– 2 pounds Yukon Gold or Russet potatoes – Yukon Golds offer a naturally buttery flavor and creamy texture; Russets are fluffier but need more fat. Peel if desired.
– ½ cup (1 stick) unsalted butter – Cut into cubes for even melting. Salted butter works, but adjust seasoning later.
– 1 cup whole milk or heavy cream – Warm the liquid before adding to prevent cooling the potatoes. For extra richness, use half-and-half.
– 1 teaspoon salt – Plus more for the cooking water. Use kosher salt for better control.
– ¼ teaspoon white pepper – Black pepper is fine, but white pepper blends in visually.
– Optional: 2–3 cloves roasted garlic, ¼ cup sour cream, or 2 tablespoons cream cheese – These add depth and tang.
For the Gravy (Quick Version):
– 2 tablespoons butter
– 2 tablespoons all-purpose flour
– 1½ cups low-sodium chicken or turkey broth
– Salt and pepper to taste
– Optional: 1 teaspoon fresh thyme or rosemary
Kitchen Tools:
– Large pot (4–6 quart)
– Potato masher, ricer, or food mill (ricer = smoothest results)
– Colander
– Measuring cups and spoons
– Wooden spoon or silicone spatula
– Small saucepan (for gravy)
– Whisk
Prep Time & Cooking Schedule
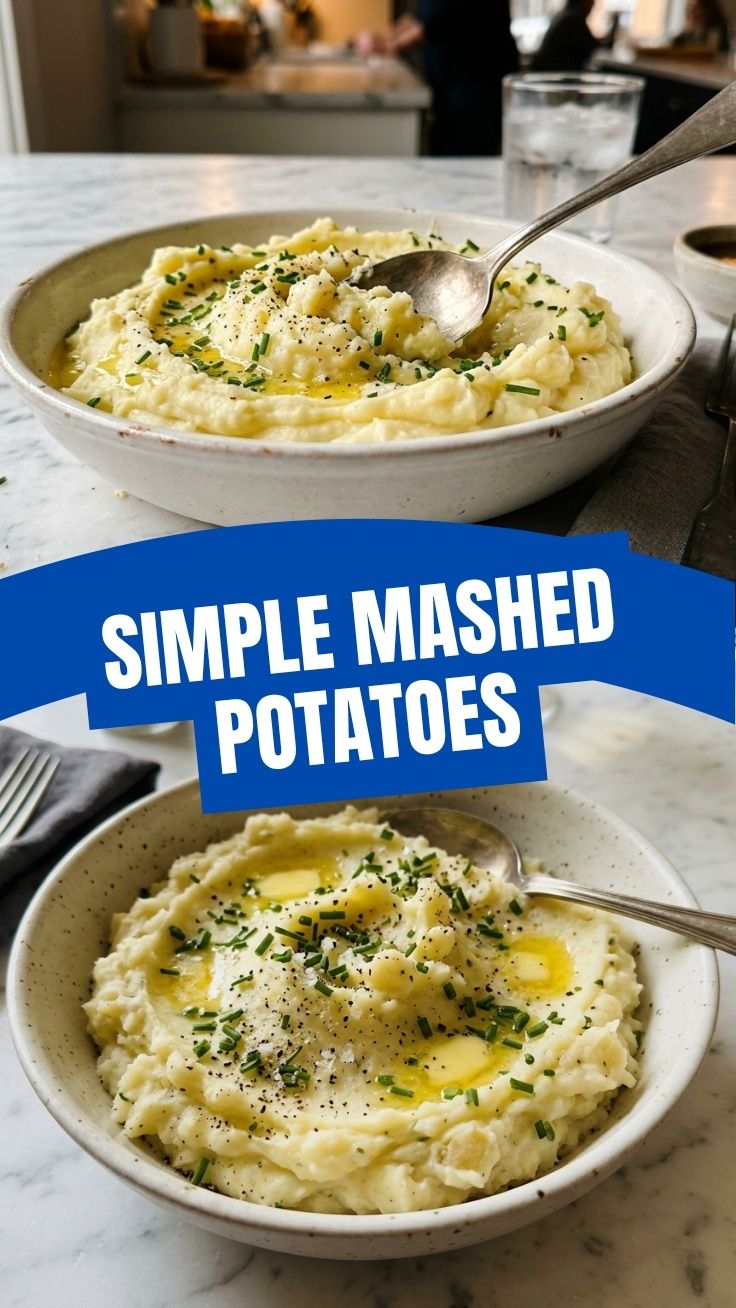
Total Time: 45 minutes
– Prep Time: 10 minutes (peeling, chopping, measuring)
– Cook Time: 25–30 minutes (boiling potatoes)
– Resting Time: 2–3 minutes (steaming dry after draining)
– Mashing & Finishing: 5–7 minutes
Plan your schedule: Start the potatoes first, then prepare the gravy while they boil. Warm the milk and butter in the microwave or on the stovetop during the last 5 minutes of boiling. This timing ensures everything is hot when you mash, which is crucial for a creamy, non-gummy texture.
Step-by-Step Instructions
1. Prepare the Potatoes – Peel the potatoes (or leave skins on for a rustic version) and cut them into uniform 1½-inch chunks. Place them in a large pot and cover with cold water by 1 inch. Add 1 tablespoon of salt. Why cold water? It allows the potatoes to cook evenly from the outside in, preventing a mushy exterior and raw center.
2. Boil Gently – Bring the water to a boil over medium-high heat, then reduce to a simmer. Cook for 15–20 minutes, until a knife slides through the largest chunk with no resistance. Do not overcook – waterlogged potatoes = watery mash.
3. Drain and Steam Dry – Drain the potatoes in a colander and return them to the hot pot (off the heat). Let them sit for 2–3 minutes, shaking occasionally. This evaporates excess moisture, which is the single most important step for fluffy, not gluey, Mashed Potatoes.
4. Mash or Rice – For silky smooth results, use a potato ricer or food mill. If using a masher, press gently and avoid overworking. Over-mashing releases too much starch, creating a paste-like texture.
5. Add Warm Fats – Pour the warmed milk or cream over the potatoes, then add the butter cubes. Fold gently with a spatula until just combined. Taste and adjust – add salt, white pepper, or a splash more cream if needed.
6. Make the Gravy – In a small saucepan, melt butter over medium heat. Whisk in flour and cook for 1 minute (this removes the raw flour taste). Slowly whisk in broth, stirring constantly until thickened, about 3–4 minutes. Season with salt, pepper, and herbs. Serve immediately over the mashed potatoes. The combination of creamy gravy and smooth potatoes is the ultimate comfort pairing.
Nutritional Benefits & Advantages
Mashed potatoes are more than just comfort food—they offer real nutritional value. One medium potato provides about 37 grams of carbohydrates, 4 grams of protein, and 3 grams of fiber (with skin). They are also an excellent source of vitamin C (27% DV), potassium (15% DV), and vitamin B6. When you prepare them at home, you control the fat and sodium content. Using low-fat milk or unsalted butter reduces calories, while adding roasted garlic or fresh herbs boosts antioxidants without extra salt. The potatoes themselves are naturally gluten-free and, when made with plant-based milk and vegan butter, can easily fit into a dairy-free or vegan diet.
Tips, Variations & Cooking Advice
– Flavor Variations: Stir in ¼ cup of sour cream or crème fraîche for tanginess, 2 tablespoons of cream cheese for extra richness, or ½ cup of grated Parmesan for a savory twist. Add roasted garlic, chives, or truffle oil for gourmet flair.
– Dietary Adaptations: Use unsweetened almond milk or oat milk plus vegan butter for a dairy-free version. For a lower-carb option, swap half the potatoes with cauliflower (steam and mash separately).
– Alternative Cooking Methods: Bake whole potatoes at 400°F for 1 hour, then scoop out the flesh and mash. This yields a drier, fluffier texture. Instant Pot method: steam potatoes on high for 8 minutes with a cup of water, then mash.
– Portion Changes: This recipe serves 4–6. Double it for a holiday crowd—just use a larger pot and increase boiling time by 5–7 minutes.
Common Mistakes to Avoid
– Mistake #1: Overworking the potatoes. Solution: Use a ricer or masher gently. Stop as soon as the mixture is smooth. Over-mashing = gummy, gluey texture.
– Mistake #2: Adding cold liquid. Solution: Always warm the milk and butter before incorporating. Cold ingredients shock the starch, causing lumps.
– Mistake #3: Salting the water too little. Solution: Season the boiling water generously. Potatoes absorb salt during cooking, building flavor from the inside out.
– Mistake #4: Letting the potatoes sit too long after draining. Solution: Mash and serve immediately. If you need to hold them, keep warm in a double boiler or slow cooker on low, stirring occasionally.
– Mistake #5: Using waxy potatoes. Solution: Stick to starchy (Russet) or all-purpose (Yukon Gold) varieties. Red or new potatoes are waxy and yield a dense, sticky mash.
Storage & Meal Prep Tips
Refrigeration: Store leftover mashed potatoes in an airtight container for up to 4 days. Press plastic wrap directly onto the surface to prevent a skin from forming.
Freezing: Spoon cooled potatoes into a freezer-safe bag or container. Freeze for up to 3 months. Thaw overnight in the refrigerator before reheating.
Reheating: For best results, reheat in a saucepan over low heat, adding a splash of milk or cream and stirring frequently. You can also reheat in the microwave in 30-second bursts, stirring between each. For a crispy twist, spread leftover mash in a baking dish, top with cheese, and bake at 375°F until golden.
Meal Prep Tip: Boil and mash the potatoes a day ahead. Store in the fridge, then reheat gently with extra butter and cream when ready to serve. This saves time on busy days.
Conclusion
There is a reason this dish has remained a staple for generations: it is simple, versatile, and deeply satisfying. By following these steps—starting with the right potatoes, boiling them gently, steaming them dry, and adding warm fats—you will consistently achieve a velvety, buttery result that rivals any restaurant. The key is patience and attention to detail, not complicated techniques. Remember, the perfect pairing of creamy Mashed Potatoes and a silky gravy is a culinary match made in heaven. Now it is your turn—grab your potatoes, warm your milk, and create a dish that will earn you rave reviews. Share your results in the comments below, and do not forget to explore our other comfort food recipes for more inspiration.
FAQs
1. Can I make mashed potatoes without a ricer or masher?
Yes. Use a fork to mash roughly, or pass the cooked potatoes through a fine-mesh sieve (a bit time-consuming but very smooth). A hand mixer on low speed works too, but be careful not to overmix.
2. Why are my mashed potatoes gluey?
This usually happens from over-mashing or using a food processor (which overworks the starch). Stick to a ricer or gentle hand-mashing. Also, avoid waxy potatoes like red or new potatoes.
3. Can I make this recipe ahead of time for a holiday dinner?
Absolutely. Prepare the potatoes up to 2 days ahead, store in the fridge, then reheat gently with extra butter and cream. You can also keep them warm in a slow cooker on low for up to 2 hours.
4. How do I fix thin or watery gravy?
Make a slurry by whisking 1 tablespoon of cornstarch with 2 tablespoons of cold water. Stir into the simmering gravy and cook for 1–2 minutes until thickened. Alternatively, let it simmer uncovered to reduce.
5. What is the best potato for mashed potatoes?
Yukon Golds are the top choice for their buttery flavor and creamy texture. Russets are second best for fluffiness. Avoid waxy potatoes—they will not break down properly and will yield a dense, sticky mash.
Quick way to grow 7 lbs of Mashed Potatoes
Ingredients
Equipment
Method
- Wash and peel the potatoes, then cut them into 1-inch cubes to ensure even and quick cooking.
- Place the potato cubes in a large pot and cover with cold water by about an inch; add a generous pinch of salt to the water.
- Bring the water to a boil, then reduce heat and simmer for 15-20 minutes, or until the potatoes are very tender when pierced with a fork.
- Drain the cooked potatoes thoroughly in a colander, shaking to remove excess water.
- Return the hot, drained potatoes to the empty pot or transfer them to a large mixing bowl.
- Add butter, milk/cream, salt, and pepper to the potatoes.
- Mash the potatoes with a potato masher or an electric mixer until smooth and creamy, adjusting seasonings as needed.