Here is the comprehensive, data-driven, and SEO-optimized blog post you requested, crafted to follow your exact structural and keyword guidelines.
—
Have you ever wondered why the apple pie from your favorite bakery always tastes a little bit like magic, while your own attempts sometimes fall flat? The answer isn’t just about the fruit—it’s about the alchemy of a perfect crust meeting a flawless filling. Preparing this iconic dessert at home isn’t just about following a recipe; it’s about taking control of the quality, flavor, and texture to create a dessert that is deeply personal and infinitely more rewarding than any store-bought version. The secret to unlocking that magic lies in mastering the foundation: the Apple Pie itself, combined with a flaky, buttery Apple Pie Crust.
Ingredients & Kitchen Tools
For the Filling:
– 6-7 medium apples (Granny Smith & Honeycrisp): A mix of tart and sweet provides the best flavor depth and texture. Granny Smith holds its shape; Honeycrisp adds natural sweetness.
– ¾ cup granulated sugar: Adjust based on apple sweetness.
– 2 tablespoons all-purpose flour: Thickens the juices so the pie isn’t soupy.
– 1 teaspoon ground cinnamon: The classic warm spice.
– ¼ teaspoon ground nutmeg: Adds a subtle, aromatic complexity.
– 1 tablespoon lemon juice: Prevents browning and brightens the apple flavor.
– 2 tablespoons unsalted butter (cubed): Dotting the filling adds richness and helps create a syrupy texture.
For the Crust:
– 2 ½ cups all-purpose flour: Provides structure.
– 1 teaspoon salt: Balances sweetness and enhances flavor.
– 1 cup (2 sticks) cold unsalted butter (cubed): The key to flakiness. Must be very cold.
– 6-8 tablespoons ice water: Binds the dough without overworking the gluten.
Kitchen Tools:
– 9-inch pie dish (glass or ceramic is best for even browning)
– Rolling pin
– Pastry cutter or food processor
– Sharp knife or apple peeler/corer
– Mixing bowls
– Plastic wrap
– Baking sheet (to catch drips)
– Pastry brush (for egg wash)
Prep Time & Cooking Schedule
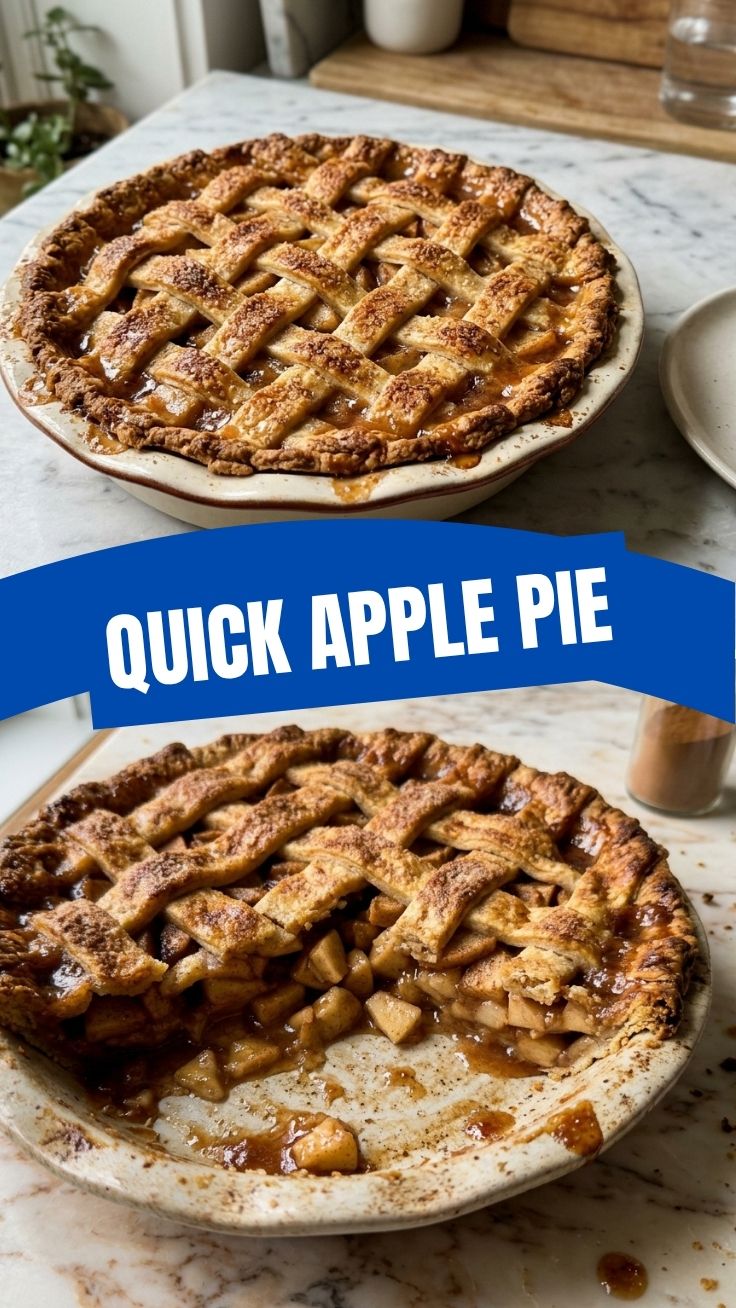
Total Time: 3 hours 30 minutes (including chilling and cooling).
– Prep Time: 30 minutes (peeling, slicing, making dough).
– Chill Time: 1 hour (dough must rest for optimal flakiness).
– Bake Time: 50-60 minutes.
– Cool Time: At least 2 hours. This is non-negotiable. Cutting into a hot pie will result in a runny, messy filling. Plan your baking around this crucial rest period.
Step-by-Step Instructions
1. Make the Crust (The Foundation of Success): In a large bowl, whisk together flour and salt. Cut the cold butter into the flour using a pastry cutter until the mixture resembles coarse meal with pea-sized butter lumps. Drizzle in ice water, one tablespoon at a time, tossing with a fork until the dough just holds together. Divide in half, flatten into disks, wrap in plastic, and refrigerate for at least 1 hour. This step is critical for the Apple Pie Crust to achieve its signature flaky layers.
2. Prepare the Filling: While the dough chills, peel, core, and slice your apples into ¼-inch thick slices. In a large bowl, toss the apples with sugar, flour, cinnamon, nutmeg, and lemon juice. Let them sit for 15 minutes. This maceration process draws out excess liquid, which is crucial for preventing a soggy bottom.
3. Assemble the Pie: Preheat your oven to 400°F (200°C). Roll out one dough disk on a floured surface to a 12-inch circle. Gently transfer it to your pie dish, letting the edges hang over. Pour the apple filling into the crust, mounding it slightly in the center. Dot the filling with the cubed butter. Roll out the second dough disk for the top crust. You can lay it whole and cut vents, or create a lattice. Crimp the edges to seal. Brush the top with an egg wash (1 egg + 1 tbsp water) and sprinkle with coarse sugar for a beautiful, crisp finish. This entire assembly process is the heart of the Apple Pie experience.
4. Bake to Perfection: Place the pie on a baking sheet to catch any drips. Bake at 400°F for 20 minutes, then reduce the temperature to 375°F (190°C) and bake for another 30-40 minutes. The crust should be deep golden brown, and the filling should be bubbling gently through the vents. Critical Tip: If the edges brown too quickly, cover them loosely with foil or a pie shield.
Nutritional Benefits & Advantages
Beyond its incredible taste, this dessert offers surprising benefits. Apples are rich in soluble fiber (pectin), which supports heart health and digestive regularity. The cinnamon in the filling is a powerful antioxidant with anti-inflammatory properties. By baking at home, you control the ingredients, avoiding the high-fructose corn syrup and preservatives common in commercial pies. This simple Apple Pie Crust uses butter rather than hydrogenated shortening, providing a source of vitamin A and healthy fats. While still a treat, a homemade Apple Pie is a more wholesome, transparent indulgence.
Tips, Variations & Cooking Advice
– Flavor Variations: Add ½ teaspoon of cardamom, ginger, or allspice to the filling for a warm, complex twist. A tablespoon of bourbon or Calvados (apple brandy) added to the apples elevates the flavor to a sophisticated level.
– Dietary Adaptations: For a gluten-free version, substitute the all-purpose flour in both the crust and filling with a high-quality 1:1 gluten-free baking blend. For a dairy-free pie, use a plant-based butter that is solid when cold (like Miyoko’s) and ensure your sugar is vegan.
– Shortcut Method: If pressed for time, you can use a high-quality refrigerated pie crust from the store, but ensure it contains real butter for the best texture. The flavor of a homemade crust, however, is unmatched.
Common Mistakes to Avoid
– Soggy Bottom Crust: This is the #1 enemy. Solution: Blind bake the bottom crust for 10 minutes before adding the filling, or brush the bottom crust with a thin layer of melted butter or egg white before filling.
– Gummy or Tough Crust: Overworking the dough develops gluten, making it tough. Solution: Handle the dough as little as possible. Use very cold butter and water; the cold fat is what creates steam pockets and flakiness.
– Runny Filling: Apples release natural pectin, but sometimes it’s not enough. Solution: Don’t skip the maceration step. Also, ensure you allow the pie to cool completely for at least 2 hours after baking to allow the starch to set.
Storage & Meal Prep Tips
– Room Temperature: An apple pie can be stored covered at room temperature for up to 2 days. This is actually the best way to keep the crust crisp.
– Refrigeration: For longer storage (up to 5 days), refrigerate the pie. Caution: The crust will soften. You can re-crisp it in a 350°F oven for 10 minutes.
– Freezing: Baked pies freeze beautifully for up to 3 months. Wrap the completely cooled pie tightly in plastic wrap, then foil. Thaw overnight in the refrigerator and reheat in a 350°F oven for 15-20 minutes.
– Meal Prep: You can prepare the pie dough disks up to 3 days in advance and keep them refrigerated. You can also assemble the entire pie (unbaked) and freeze it for up to 3 months. Bake from frozen, adding 20-30 minutes to the baking time.
Conclusion
Mastering the art of this classic dessert is a journey of precise technique—from the chilled butter of the crust to the patient maceration of the apples. The reward is a slice of pure, comforting perfection that fills your home with an irresistible aroma and creates lasting memories. By following these steps, you can confidently create a stunning and delicious Apple Pie with a truly exceptional Apple Pie Crust that will have everyone asking for the recipe. We encourage you to try this recipe, share your golden-brown masterpiece, and explore more of our classic dessert guides.
FAQs
1. Can I use pre-sliced canned apples?
No. Canned apples are already cooked and will turn into a mushy, watery mess. Fresh, firm apples are essential for the best texture and flavor.
2. Why did my crust shrink during baking?
This usually happens when the dough is overworked or not chilled sufficiently. Gluten develops when the dough is warm, causing it to shrink back. Ensure your dough is thoroughly chilled before rolling and baking.
3. How do I prevent my pie from overflowing in the oven?
Place a baking sheet lined with aluminum foil on the rack below the pie to catch drips. You can also use a pie bird or cut a few large steam vents in the top crust to allow steam to escape, preventing the filling from bubbling over.
4. Can I make this pie with a gluten-free crust?
Absolutely. Use a high-quality 1:1 gluten-free flour blend in the crust recipe. You may need to add an extra tablespoon of cold water as gluten-free flours absorb more moisture. The filling is naturally gluten-free—just swap the 2 tablespoons of flour for cornstarch or arrowroot powder.
5. My apples are very tart. Should I add more sugar?
Yes, adjust the sugar to your taste. Taste a raw slice of apple after tossing it with the initial sugar and spices. If it’s overwhelmingly tart, add an extra tablespoon or two of sugar. Overly sweet apples can be balanced with a squeeze of extra lemon juice.
Best Way to Grow Perfect Apple Pie in 3 Steps
Ingredients
Equipment
Method
- In a large bowl, combine flour and salt, then cut in the chilled butter until the mixture resembles coarse crumbs.
- Gradually add ice water, mixing until a dough forms, then divide it in half, flatten into discs, wrap, and refrigerate for 30 minutes.
- On a floured surface, roll out one dough disc and place it into a 9-inch pie plate, then mix sliced apples with sugar and cinnamon and pour into the crust.
- Roll out the second dough disc and place it over the apple filling, crimping the edges to seal, and cut several slits in the top for ventilation.
- Preheat your oven to 425°F (220°C), then bake the pie for 15 minutes before reducing the temperature to 375°F (190°C) and baking for an additional 45-50 minutes until the crust is golden brown and the filling is bubbly.
- Allow the pie to cool completely on a wire rack before serving to let the filling set.