The Ultimate Guide to Perfect New York Cheesecake: A Creamy, Dreamy Dessert
Have you ever wondered what makes a cheesecake truly unforgettable? Is it the velvety texture, the rich flavor, or the perfect crust? If you’ve ever craved a slice of dense, creamy, and tangy cheesecake that melts in your mouth, you’re not alone. Preparing a New York Cheesecake at home is not only rewarding but also allows you to control every ingredient, ensuring a healthier and more personalized dessert. This classic dessert, known for its luxurious consistency, is a staple in American baking. In this guide, we’ll explore the nuances of crafting the perfect New York Cheesecake, from ingredients to storage, while also comparing it to the equally beloved Philadelphia Cheesecake. Whether you’re a novice or a seasoned baker, this data-driven post will help you achieve bakery-quality results every time.
Ingredients & Kitchen Tools
To create a flawless New York Cheesecake, you’ll need the following ingredients and tools. Each item plays a critical role in texture and flavor.
Ingredients
– Cream Cheese (32 oz): Use full-fat, block-style cream cheese for the creamiest texture. Avoid whipped or low-fat versions.
– Granulated Sugar (1 cup): Adds sweetness and helps stabilize the batter.
– Sour Cream (1 cup): Provides tanginess and moisture, a hallmark of New York-style cheesecake.
– Vanilla Extract (2 tsp): Enhances flavor depth.
– Eggs (5 large): Room temperature eggs ensure a smooth, lump-free batter.
– Graham Cracker Crumbs (1.5 cups): For the crust. Substitute with crushed digestive biscuits or shortbread.
– Unsalted Butter (5 tbsp): Melted, to bind the crust.
– Salt (1/4 tsp): Balances sweetness.
Kitchen Tools
– 9-inch Springform Pan: Essential for easy removal.
– Electric Mixer (stand or hand): For beating cream cheese without overworking.
– Rubber Spatula: For scraping down the bowl.
– Large Mixing Bowls: For crust and batter.
– Parchment Paper: To line the pan.
– Water Bath (roasting pan): Prevents cracking by providing gentle, even heat.
Optional Substitutions
– Gluten-Free Crust: Use gluten-free graham crackers or almond flour.
– Dairy-Free Version: Substitute cream cheese with vegan cream cheese and sour cream with coconut cream.
Prep Time & Cooking Schedule
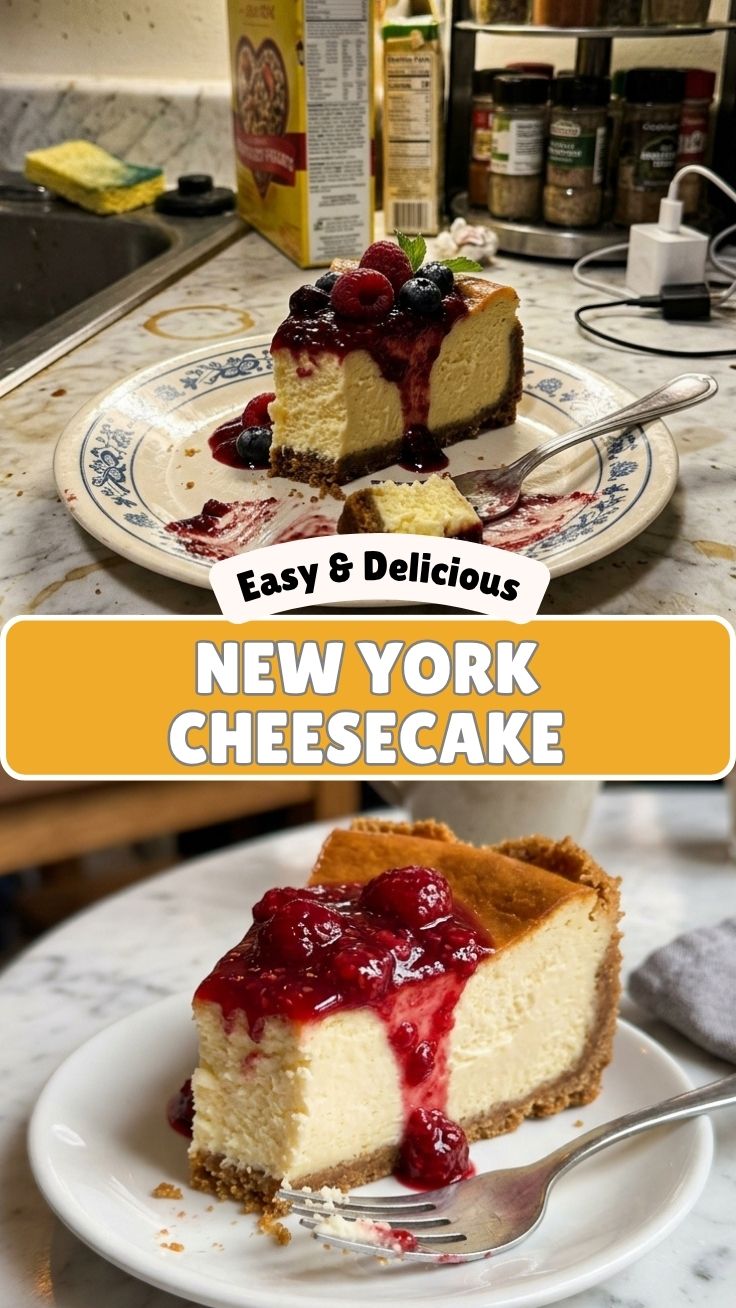
Planning is key to a stress-free baking experience. Here’s a typical schedule:
– Prep Time: 20 minutes (crust preparation + mixing batter)
– Bake Time: 55–65 minutes at 325°F (163°C)
– Cooling Time: 1 hour at room temperature (in the oven with door ajar)
– Chilling Time: Minimum 4 hours, ideally overnight (8–12 hours)
Context: The long chilling time is non-negotiable for a New York Cheesecake. It allows the custard to set fully, resulting in clean slices and a dense, velvety texture. Plan to make it a day ahead for best results.
Step-by-Step Instructions
Follow these precise steps to avoid common pitfalls and achieve a crack-free, creamy cheesecake.
1. Prepare the Crust: Preheat oven to 325°F. Mix graham cracker crumbs, melted butter, and 2 tbsp sugar. Press firmly into the bottom of a parchment-lined springform pan. Bake for 10 minutes, then cool.
2. Beat Cream Cheese: In a large bowl, beat room-temperature cream cheese on medium speed until smooth (about 2 minutes). Scrape down the bowl.
3. Add Sugar and Sour Cream: Gradually add sugar, then sour cream and vanilla. Mix on low until just combined. Overmixing incorporates air, leading to cracks.
4. Add Eggs One at a Time: On low speed, add eggs one by one, mixing until just incorporated. Stop scraping the bowl after each addition.
5. Prepare Water Bath: Wrap the springform pan in heavy-duty foil to prevent leaks. Place it in a roasting pan and pour hot water halfway up the sides.
6. Bake: Pour batter over the crust. Bake for 55–65 minutes. The center should jiggle slightly when shaken. Turn off the oven, crack the door, and let it cool for 1 hour.
7. Chill: Remove from water bath, cool to room temperature, then refrigerate for at least 4 hours. For a true New York Cheesecake, overnight chilling is ideal. This step also enhances the flavor of a Philadelphia Cheesecake, which relies on a similar cooling process for its signature creaminess.
Nutritional Benefits & Advantages
While cheesecake is an indulgence, it offers surprising nutritional perks when made from scratch. A standard slice (1/12 of a 9-inch cake) contains approximately:
– Calories: 450–500
– Protein: 8–10g (from eggs and cream cheese)
– Calcium: 15% of the daily value (from dairy)
– Vitamin A: 10% of the daily value
Health Advantages:
– High-Quality Protein: Supports muscle repair and satiety.
– Probiotics: Sour cream contains live cultures that aid digestion.
– Customizable: You can reduce sugar by 25% without affecting texture, making it a smarter dessert choice.
Tips Variations & Cooking Advice
Elevate your cheesecake game with these expert tips and creative twists.
Flavor Variations
– Lemon Zest: Add 1 tbsp lemon zest to the batter for a citrusy kick.
– Chocolate Swirl: Melt 4 oz dark chocolate and swirl into the batter before baking.
– Berry Topping: Top with fresh strawberries or a blueberry compote.
Ingredient Swaps
– Crust: Use Oreo crumbs for a chocolate base or crushed pretzels for a salty-sweet contrast.
– Dairy-Free: Replace cream cheese with cashew cream and sour cream with coconut yogurt.
Cooking Methods
– No-Water Bath: Bake at 300°F for 70–80 minutes with a pan of water on the lower rack. This reduces cracking risk.
– Mini Cheesecakes: Use a muffin tin with liners; bake for 18–22 minutes.
Dietary Adaptations
– Gluten-Free: Use almond flour crust.
– Keto-Friendly: Substitute sugar with erythritol and use a nut-based crust.
Common Mistakes to Avoid
Avoid these pitfalls to ensure a perfect cheesecake every time.
1. Overmixing the Batter: This incorporates too much air, causing cracks. Mix on low speed and stop as soon as ingredients are combined.
2. Skipping the Water Bath: Dry oven heat leads to a cracked, dry top. Always use a water bath for a New York Cheesecake.
3. Using Cold Ingredients: Cold cream cheese and eggs create a lumpy batter. Let them sit at room temperature for 30 minutes.
4. Overbaking: The center should jiggle like Jell-O when done. Overbaking dries out the custard.
5. Cutting Too Soon: Slicing a warm cheesecake results in messy pieces. Always chill thoroughly.
Storage & Meal Prep Tips
Proper storage preserves texture and flavor for days.
– Refrigeration: Store in an airtight container for up to 5 days. Place parchment paper on the cut surface to prevent drying.
– Freezing: Wrap the whole cheesecake (or individual slices) in plastic wrap, then foil. Freeze for up to 3 months. Thaw overnight in the fridge.
– Reheating: For a warm slice, microwave for 10–15 seconds or bake at 300°F for 5 minutes. Avoid overheating, which can cause curdling.
Meal Prep Hack: Bake the cheesecake on a Sunday, chill overnight, and enjoy slices throughout the week. It’s a time-saving dessert for busy schedules.
Conclusion
Mastering a New York Cheesecake at home is a journey of precision and patience, but the reward is a dessert that rivals any bakery. From the buttery graham cracker crust to the silky, tangy filling, every bite is a testament to your effort. Remember, the key to success lies in room-temperature ingredients, a water bath, and ample chilling time. Whether you prefer the classic version or a Philadelphia Cheesecake with its slightly lighter texture, this recipe is your foundation. We encourage you to try this recipe, share your results on social media, or explore our other dessert guides. Happy baking!
FAQs
1. Can I use low-fat cream cheese for a New York Cheesecake?
No, low-fat cream cheese contains more water and less fat, resulting in a runny, less creamy texture. Stick with full-fat for best results.
2. Why did my cheesecake crack on top?
Cracks are usually caused by overmixing, overbaking, or rapid temperature changes. Use a water bath and cool slowly in the oven with the door ajar.
3. How do I know when my cheesecake is done?
The edges should be set, but the center should jiggle slightly when shaken. An internal temperature of 150°F (65°C) is ideal.
4. Can I make this cheesecake gluten-free?
Absolutely! Use gluten-free graham crackers or almond flour for the crust. The filling is naturally gluten-free.
5. How long can I leave cheesecake at room temperature?
No more than 2 hours. After that, refrigerate to prevent bacterial growth. For events, keep it chilled until serving.
Proven way to grow 7-layer New York Cheesecake
Ingredients
Equipment
Method
- Preheat your oven to 350°F (175°C) and grease a 9-inch springform pan thoroughly. Combine graham cracker crumbs, sugar, and melted butter in a bowl, then press the mixture firmly into the bottom of the prepared springform pan.
- Bake the crust for 10 minutes, then remove it from the oven and set it aside to cool slightly while you prepare the filling.
- Reduce oven temperature to 325°F (160°C). In a large bowl, beat the softened cream cheese with an electric mixer until smooth, then gradually add sugar and flour, mixing until just combined and scraping down the sides of the bowl.
- In a separate bowl, whisk together the eggs and egg yolk, then slowly add them to the cream cheese mixture, mixing on low speed until fully incorporated.
- Stir in the heavy cream, sour cream, vanilla extract, and lemon zest, mixing until the batter is smooth and lump-free.
- Pour the cheesecake batter over the cooled crust in the springform pan, smoothing the top with a spatula.
- Prepare a water bath by wrapping the outside of the springform pan tightly with several layers of aluminum foil and placing it in a larger roasting pan; fill the roasting pan with hot water halfway up the sides of the springform pan.
- Bake for 1 hour and 15 minutes to 1 hour and 30 minutes, or until the edges are set but the center still slightly jiggles when gently shaken; turn off the oven and let the cheesecake cool in the oven with the door ajar for 1 hour.
- Remove the cheesecake from the water bath and aluminum foil, then let it cool completely on a wire rack at room temperature; once cooled, refrigerate for at least 6 hours, or preferably overnight, before serving.