The Ultimate Guide to Back-to-School Lunches: Nutritious, Easy & Kid-Approved Recipes
Are you tired of the daily lunchbox struggle? Packing a meal that your child will actually eat, while ensuring it’s full of nutritious ingredients, can feel like a monumental task. But preparing healthy Back-to-School Lunches at home is one of the most valuable gifts you can give your child. Not only does it save money over pre-packaged options, but it also guarantees freshness, flavor, and complete control over every ingredient. By focusing on vibrant, Nutritious Lunches that are packed with color and taste, you can foster healthy eating habits that last a lifetime while making mornings less stressful.
In this comprehensive guide, we’ll walk you through a foolproof recipe for Healthy Veggie & Cheese Muffin-Tin Frittatas —a portable, protein-packed solution that works for everything from elementary lunchboxes to adult desk lunches. We’ll cover every step from ingredient selection through storage, ensuring your school-year meal prep is both efficient and delicious.
—
Ingredients & Kitchen Tools
For the Frittata Muffins
– 8 large eggs – The protein backbone; use pasture-raised for richer flavor and higher omega-3s.
– ⅓ cup whole milk (or unsweetened almond milk) – Adds moisture; dairy-free alternatives work well.
– ½ cup shredded cheddar or mozzarella cheese – For binding and savory depth; omit for dairy-free.
– ½ cup finely diced bell peppers (any color) – Provides vitamin C and natural sweetness.
– ½ cup chopped spinach (fresh or frozen, thawed) – Iron-rich; squeeze excess moisture if using frozen.
– ¼ cup finely chopped onion – Adds subtle savory notes; skip for picky eaters.
– ½ teaspoon salt – Enhances overall flavor without overpowering.
– ¼ teaspoon black pepper – Balances richness.
– Optional: ¼ cup cooked crumbled bacon or diced ham for extra protein, or 1 tablespoon nutritional yeast for a cheesy vegan option.
Kitchen Tools
– 12-cup muffin tin – Non-stick or well-greased silicone preferred.
– Large mixing bowl – For whisking eggs.
– Whisk or fork – For beating eggs until frothy.
– Measuring cups and spoons – For precise ratios.
– Chef’s knife and cutting board – For prepping vegetables.
– Small skillet – If sautéing onions or lightly wilting spinach.
– Cooling rack – To prevent soggy bottoms.
– Muffin liners (optional) – For easy removal; use parchment paper liners for best results.
—
Prep Time & Cooking Schedule
– Prep Time: 10 minutes (washing, chopping vegetables, whisking eggs)
– Cook Time: 18–20 minutes at 375°F (190°C)
– Cooling Time: 5 minutes in the pan, then 10 minutes on a rack
– Total Active Time: 30 minutes
Planning Tip: This recipe yields 12 frittata muffins—enough for 3–4 lunchboxes when paired with sides. Make a double batch on Sunday evening and you’ll have healthy lunches ready through Wednesday. The muffins can be stored in the refrigerator, so you can assemble lunchboxes in under 5 minutes each morning.
—
Step-by-Step Instructions
1. Preheat and Prep the Pan – Set your oven to 375°F (190°C). Generously grease each cup of the muffin tin with butter, cooking spray, or coconut oil. If using liners, place them in each cup.
2. Prepare the Vegetables – Finely dice the bell peppers and onion. If using fresh spinach, give it a rough chop. For frozen spinach, thaw it completely and squeeze dry with paper towels—this prevents watery muffins.
3. Whisk the Egg Base – In a large bowl, crack all 8 eggs. Add the milk, salt, and pepper. Whisk vigorously for 1–2 minutes until the mixture is uniformly yellow and slightly frothy. This aeration creates lighter, fluffier muffins.
4. Combine Ingredients – Fold the cheese, bell peppers, spinach, and onion into the egg mixture. Stir gently until everything is evenly distributed. If adding meat or nutritional yeast, fold it in now.
5. Fill the Muffin Cups – Using a ladle or measuring cup with a spout, divide the mixture evenly among the 12 muffin cups. Fill each cup about ¾ full—they will puff up during baking but settle when cooling. These Back-to-School Lunches are designed to be portion-controlled and easy to grab on busy mornings.
6. Bake to Perfection – Place the muffin tin on the center rack and bake for 18–20 minutes. Look for these visual cues: the tops will be lightly golden and slightly domed, and a toothpick inserted into the center should come out clean. The muffins should feel firm to the touch but spring back when pressed. This creates truly Nutritious Lunches that children enjoy eating.
7. Cool and Release – Let the muffins rest in the pan for 5 minutes. Run a thin spatula or butter knife around the edges of each muffin, then gently lift them out. Transfer to a cooling rack for at least 10 minutes before packing.
Pro Temperature Tip: If you notice browning too quickly, loosely tent the pan with foil for the final 5 minutes. Ovens vary, so start checking at 16 minutes the first time you make these.
—
Nutritional Benefits & Advantages
Each frittata muffin (based on this recipe) contains approximately:
– 90–110 calories
– 8 grams of protein – Essential for sustained energy through afternoon classes.
– 5 grams of healthy fats – From eggs and cheese, supporting brain development.
– 1.5 grams of fiber – From the vegetables, aiding digestion.
– 15% of the daily value for vitamin A – From spinach and bell peppers.
– 10% of the daily value for calcium – From cheese and milk.
Eggs are a complete protein source, meaning they contain all nine essential amino acids required for growth and repair. The bell peppers provide more vitamin C than oranges by weight, helping with iron absorption from the spinach. This combination of protein, healthy fats, and vegetables creates a satiating meal that stabilizes blood sugar levels—keeping kids focused until the afternoon bell rings.
These muffins are naturally low in carbohydrates (approximately 3–4g each), making them suitable for low-carb or keto dietary preferences. They contain no added sugars and are free from artificial preservatives common in store-bought lunch items.
—
Tips Variations & Cooking Advice
Flavor Variations
– Mediterranean Twist: Replace cheddar with feta cheese, add diced sun-dried tomatoes and olives.
– Southwest Style: Use pepper jack cheese, add black beans and a pinch of cumin.
– Italian Inspiration: Mix in chopped fresh basil, swap cheddar for Parmesan, and add diced mushrooms.
Ingredient Swaps
– Dairy-Free Version: Use unsweetened oat milk and dairy-free cheese shreds, or simply skip the cheese entirely (add nutritional yeast for savory depth).
– Gluten-Free: This recipe is naturally gluten-free—just double-check that any added meats or seasonings are certified gluten-free.
– Higher Protein: Add 2 tablespoons of cottage cheese or ¼ cup of crumbled turkey sausage to the mixture.
Cooking Adjustments
– Mini Muffin Version: Use a mini muffin tin and bake for 10–12 minutes. Perfect for toddler lunches or snack portions.
– Air Fryer Option: Cook at 325°F (163°C) for 12–14 minutes in silicone muffin cups. Check halfway through for even cooking.
– Add Greens: Lightly sauté kale or Swiss chard before adding to the egg mixture for a more robust flavor.
Portion Changes
For larger appetites or older children, serve two muffins alongside a whole-grain roll and fresh fruit. For preschoolers, one muffin plus cucumber circles and apple slices makes a balanced lunch.
—
Common Mistakes to Avoid
1. Overcooking leads to dry, rubbery muffins. Remove them from the oven when they are just set—a slight jiggle in the center is fine, as carryover cooking will finish the process.
2. Underseasoning creates bland lunches. Eggs need adequate salt to taste their best. Don’t skip it—just use a light hand for younger children.
3. Using overly wet vegetables causes soggy muffins. Always squeeze frozen spinach dry, and pat fresh mushrooms or tomatoes with a paper towel before chopping.
4. Skipping pan greasing results in stuck muffins. Even non-stick pans need coating; silicone pans benefit from a light spray as well.
5. Filling cups too full causes spillover. Stick to ¾ full; the eggs will puff up about 30% during baking.
6. Cooling in the pan too long creates condensation. Always transfer to a wire rack within 5 minutes to keep the bottoms crisp.
—
Storage & Meal Prep Tips
Refrigeration
– Duration: Frittata muffins stay fresh in an airtight container in the refrigerator for up to 4 days.
– Layering: Place parchment paper between layers to prevent sticking.
– Best Container: Glass containers with snap-lock lids maintain freshness better than plastic.
Freezing
– Duration: Properly stored muffins freeze well for up to 3 months.
– Method: Arrange cooled muffins in a single layer on a baking sheet and freeze for 1 hour. Then transfer to a freezer-safe zip-top bag, removing as much air as possible.
– Label: Write the date and contents on the bag with a permanent marker.
Reheating
– From Refrigerated: Microwave on 70% power for 20–30 seconds per muffin, or reheat in a 350°F oven for 5–7 minutes.
– From Frozen: Microwave for 45–60 seconds, flipping halfway through. For better texture, thaw overnight in the refrigerator first.
– Avoid Overheating: Reheat just until warm—excess time will dry them out.
Lunchbox Assembly
– Pack cooled muffins with an ice pack in an insulated lunch bag.
– Add sides that don’t require reheating: cherry tomatoes, snap peas, apple slices, or a small yogurt cup.
– For warm lunches, pack the muffin in a thermos with a small insulated container.
—
Conclusion
Preparing homemade Back-to-School Lunches doesn’t have to be complicated or time-consuming. With just one batch of these veggie-filled frittata muffins, you can cover multiple days of lunchboxes while gaining total control over nutrition, taste, and freshness. The key is to focus on building truly Nutritious Lunches that combine protein, vegetables, and healthy fats in a format that children actually enjoy eating. By mastering a few versatile recipes like this one, you’ll save money, reduce food waste, and develop a sustainable meal prep habit that serves your family throughout the entire school year.
We’d love to hear how these turned out for you! Share your flavor variations or lunchbox photos in the comments below, and explore our other lunchbox-friendly recipes for more inspiration.
—
FAQs
1. Can I use different vegetables than what’s listed?
Absolutely! Diced zucchini, shredded carrots, finely chopped broccoli, or even leftover roasted sweet potatoes work beautifully. Just keep the total vegetable volume around 1½ cups to maintain the proper egg-to-veggie ratio. For frozen vegetables, thaw and pat dry before adding.
2. How do I prevent my frittata muffins from sticking to the pan?
Two techniques work best: (1) Use a high-quality non-stick muffin tin and generously grease every crevice with butter or cooking spray; (2) Use silicone baking cups or parchment paper liners (standard paper liners tend to stick to eggs). Letting them cool for exactly 5 minutes before removing also helps.
3. Can I make these dairy-free and still have them taste good?
Yes. Substitute unsweetened almond, oat, or soy milk for cow’s milk, and either omit the cheese entirely or use a plant-based shred. Adding 1 tablespoon of nutritional yeast and ¼ teaspoon of garlic powder will restore savory depth. The texture will be slightly less fluffy but still delicious.
4. Why are my frittata muffins watery or weeping liquid?
This usually happens when vegetables release moisture during baking. Always squeeze thawed frozen spinach completely dry, and avoid watery vegetables like raw tomatoes or wet mushrooms. If using zucchini, salt it and let it sit for 10 minutes, then squeeze out the liquid before adding to the eggs.
5. Can I prepare the mixture the night before?
Yes, but with a caveat. You can whisk the eggs, milk, and seasonings together and store them in a covered bowl in the refrigerator. Combine the chopped vegetables and cheese in a separate bag. In the morning, mix them together, fill the muffin cups, and bake. Do not combine the eggs with vegetables overnight, as the salt will draw out moisture and make the mixture watery.
Best way to grow Back-to-School Lunches: 5 Fast Ideas
Ingredients
Equipment
Method
- Gather all ingredients for your chosen lunch idea. Wash and chop any fruits or vegetables as needed to save time during assembly.
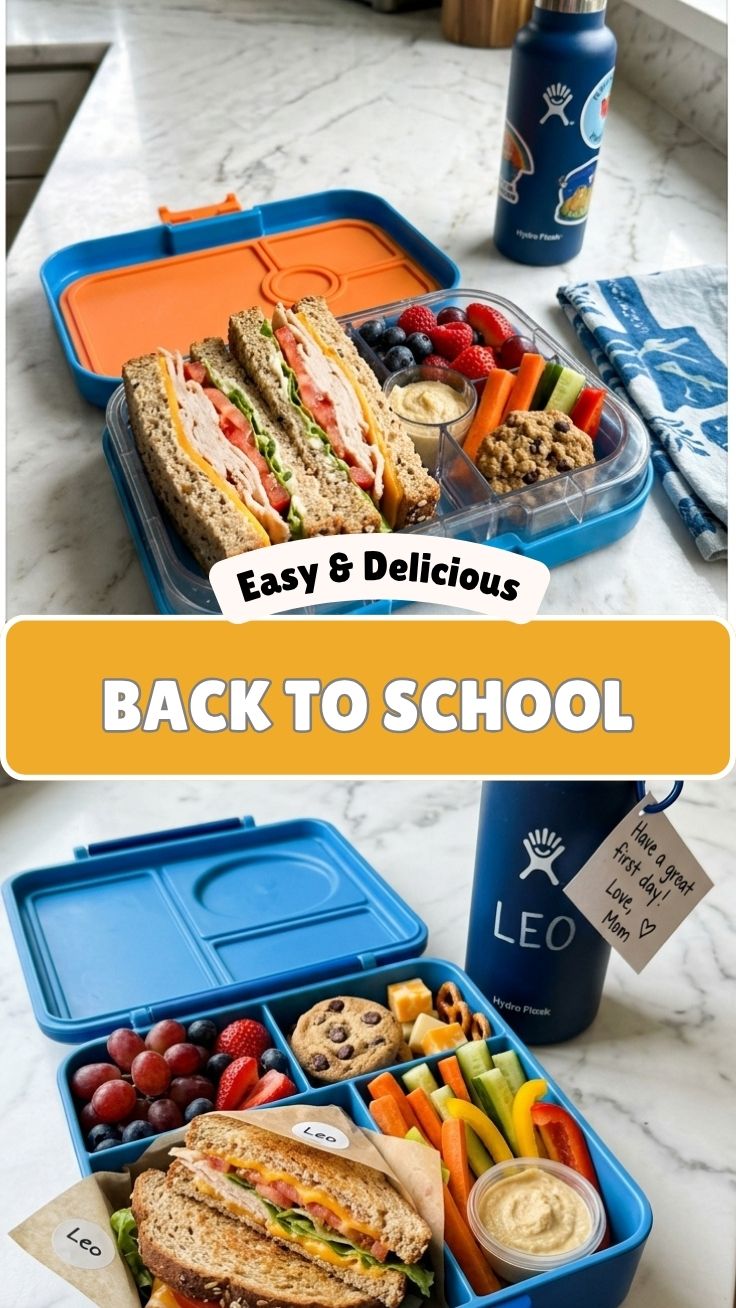
- Make a sandwich with your choice of bread and fillers; cut it into fun shapes if desired. Add a side of fruit and vegetable sticks for a balanced meal.
- Spread hummus or cream cheese on a tortilla, then fill with sliced deli meat, cheese, or veggies. Roll it up tightly and slice into pinwheels.
- Mix cooked and cooled pasta with chopped vegetables, a protein source like chicken or chickpeas, and a light dressing. Pack in a container with a fork.
- Provide crackers, sliced cheese, and deli meat in separate compartments of a bento box. Include fruit and a small treat for a fun, interactive lunch.
- Layer yogurt with granola and berries in a sealable container. Pack a spoon and an additional side like a cheese stick or vegetable for more substance.
- Ensure all containers are sealed tightly and pack a napkin and any necessary utensils. Include a small positive note to brighten their day.